You’ll bring calm, modern order to your rooms with 24 hands-on projects that feel intentional and look expensive. Each idea focuses on clean lines, tactile details, and simple joinery you can manage with basic tools. You’ll learn quick paint tricks, subtle trim upgrades, low-profile furniture builds, and lighting swaps that change mood without fuss. Start with one small project and you’ll want to try the next—here’s how to get there.
DIY Modern-Sleek Details: Quick Plan, Materials & Skills
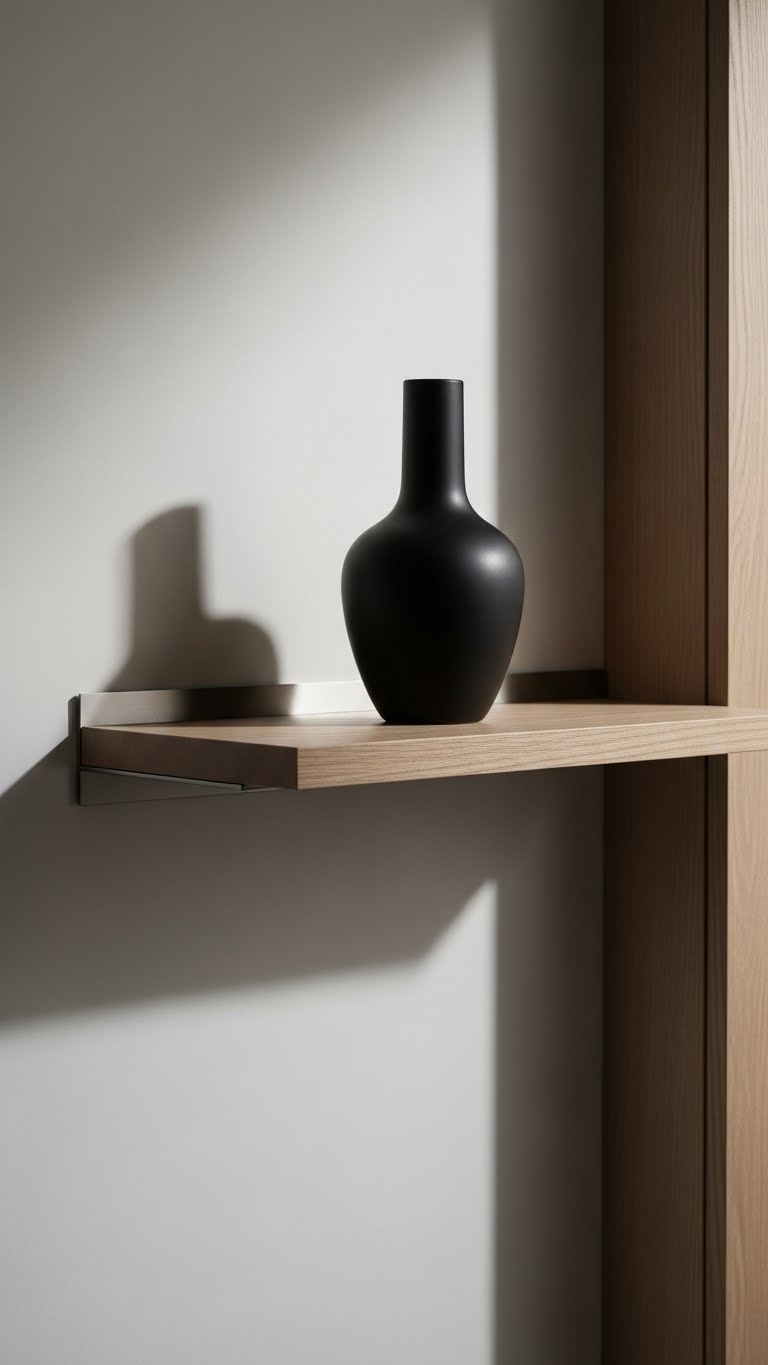
When you want a modern, sleek finish, start with a tight plan: sketch the detail, list measurable dimensions and pick a dominant material (metal, glass, or matte wood) so everything reads cohesive; gather simple tools—sander, drill, quality screws, finishing tape—and basic skills like straight cuts, smooth sanding, and precise alignment, and you’ll turn a small, deliberate upgrade into a high-impact design element.
Use hidden hardware for seamless shifts, keep surfaces minimal, and favor bold single accents so your space feels free, intentional, and effortless.
Simple Tools That Deliver Pro Results

Grab a few reliable tools and you’ll get pro-level finishes without a workshop full of gear. Choose a magnetic toolbelt for hands-free access, a compact cordless drill, and a quality level.
Use a snap-off utility knife, clamps, and a fine pencil for precision marking. These essentials keep projects clean, fast, and freeing—so you can shape sleek, modern spaces on your terms.
Paint Tricks to Get Ultra-Smooth, Matte Modern Walls
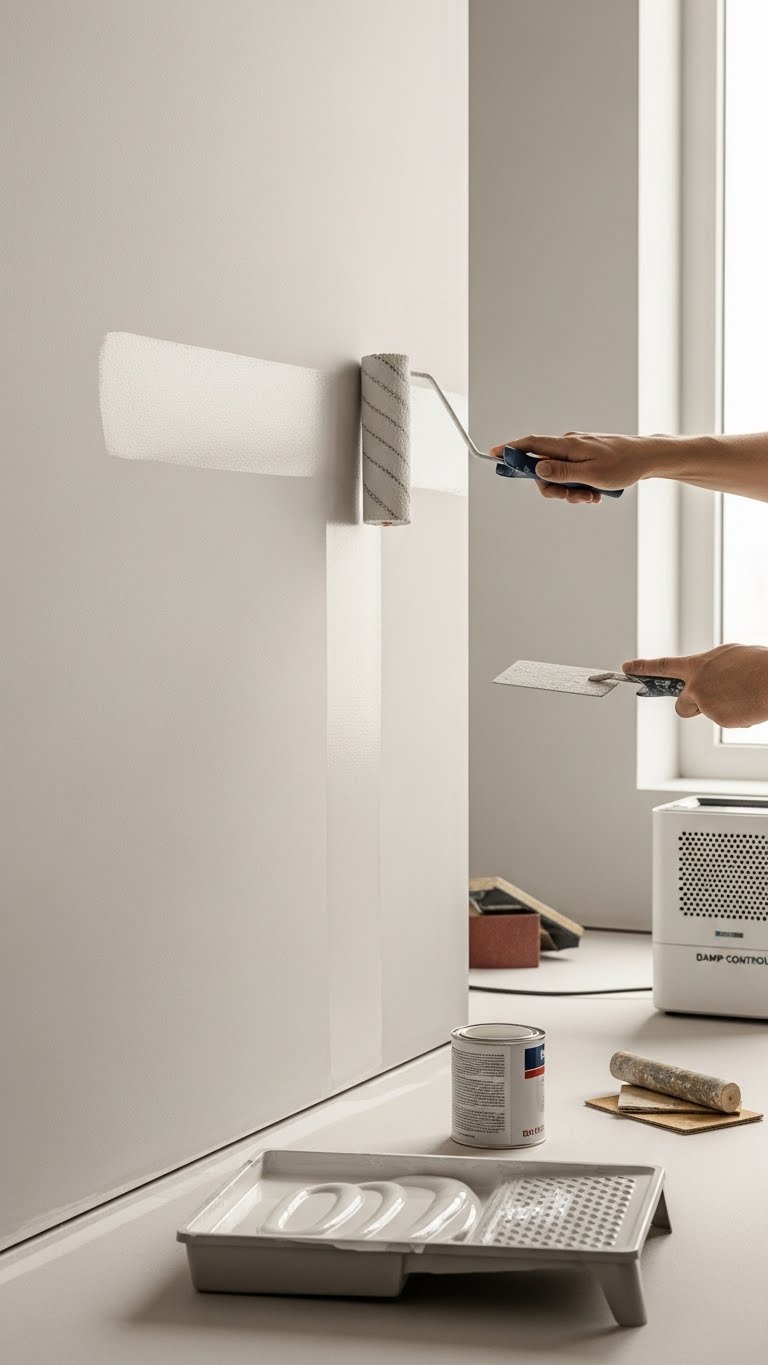
Once your tools are set, nail-perfect paintwork is what makes modern rooms feel finished.
You’ll prep surfaces, sand lightly, and prime for consistent adhesion.
Use a high-density roller technique, load evenly, and work in long, overlapping strokes.
Control humidity for even drying—dehumidify or wait for low-moisture days.
Finish with two thin coats of matte paint for that sleek, effortless look.
Create Curved Scalloped Trim on a Budget

If you want a budget-friendly way to soften a room, scalloped trim gives instant character without custom millwork—cut curves from cheap pine or MDF, trace a simple compass arc, and sand to a smooth profile before painting.
Use scallop templates or flexible moulding for tricky runs, glue foam trim with hot melt adhesive where weight’s light, and paint for a clean, modern finish you’ll love.
Upgrade Baseboards With Subtle Scallop Profiles
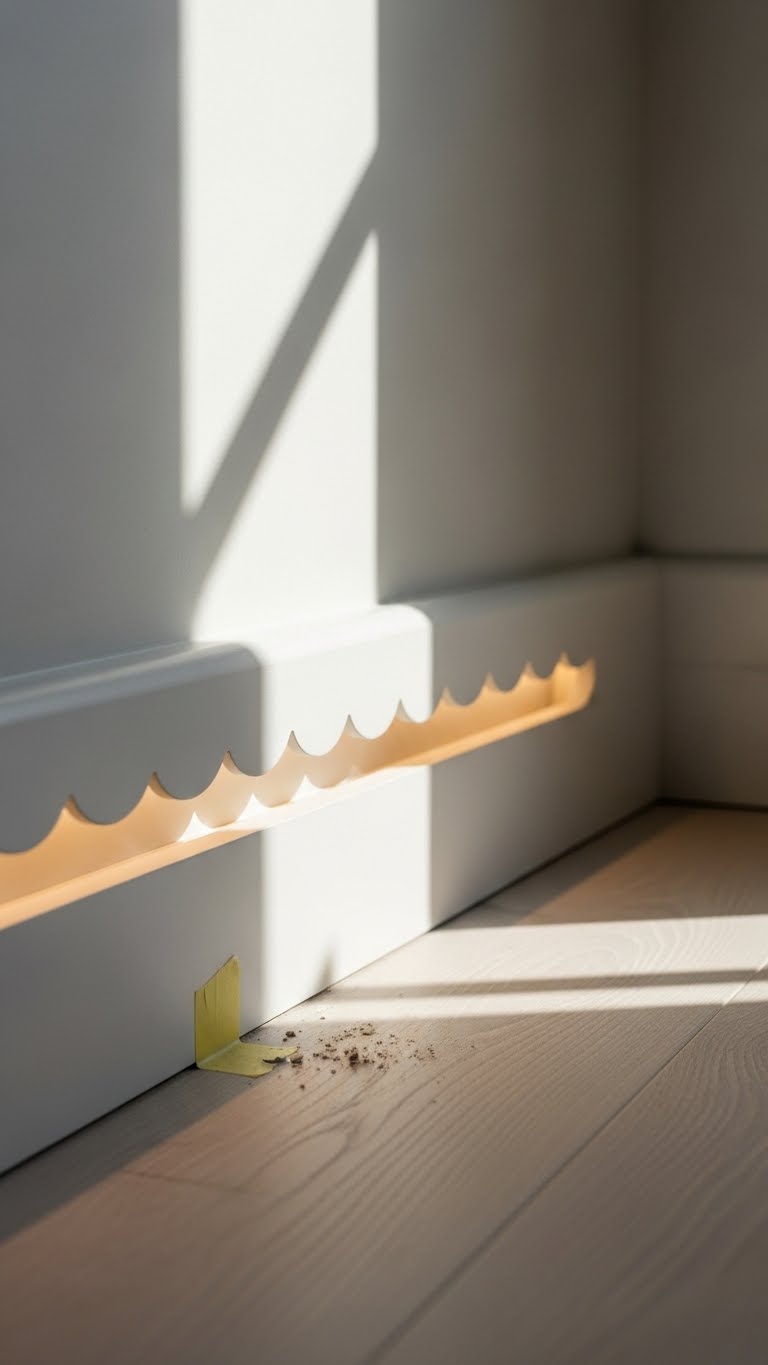
Give your baseboards a subtle, modern lift by adding a scallop profile that reads refined, not fussy.
You’ll cut and install a shallow curve that catches light without dominating the room.
Paint junctions stay crisp when you tape precisely and sand seams.
Route a slim channel behind the scallop if you want hidden lighting for mood.
It’s bold, simple, and freeing.
Add Reeded Panels to Update Flat Cabinets
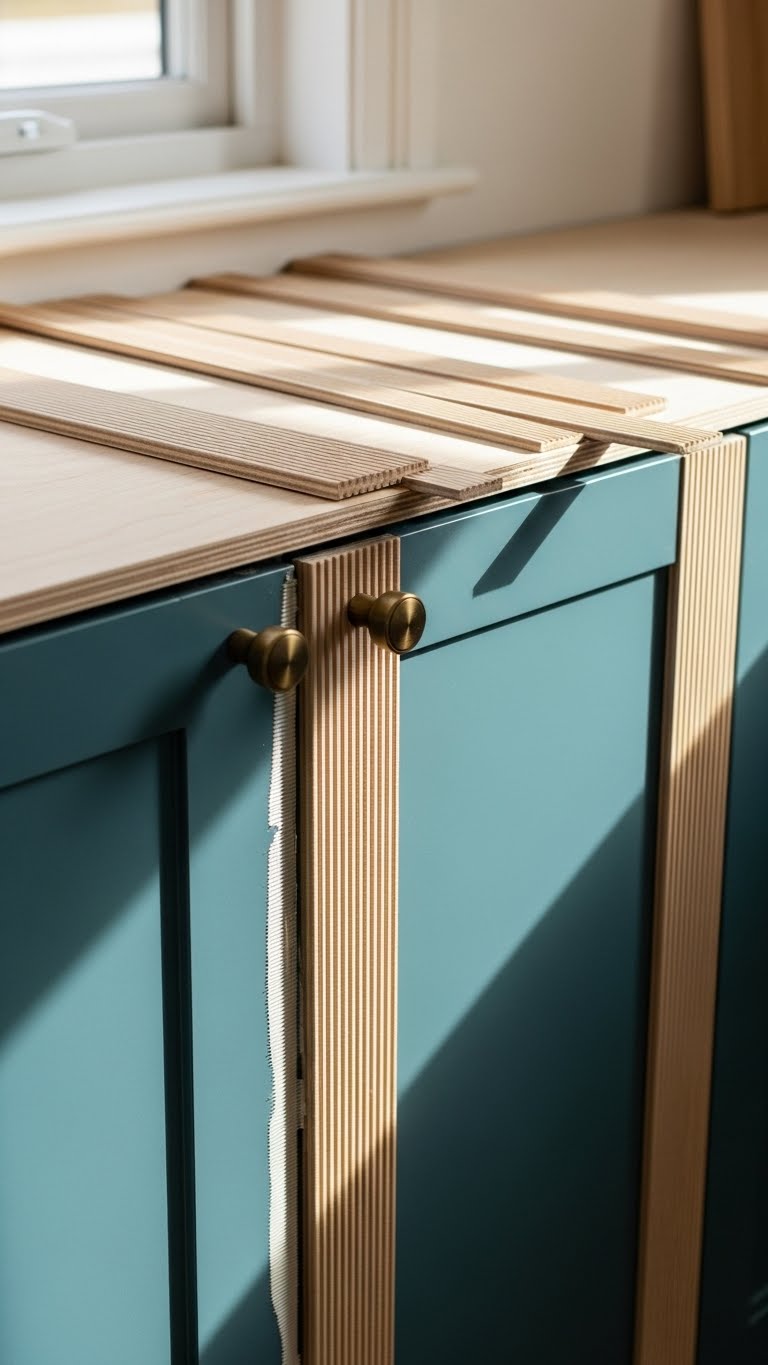
When you want to refresh flat cabinet doors without replacing them, add reeded panels for instant texture and depth that still reads modern.
You’ll cut thin strips or buy pre-reeded panels, glue or nail them onto doors, minding consistent groove spacing for a crisp look.
Pair with matte reeded hardware, paint a bold color, and enjoy a liberated, streamlined kitchen upgrade without demolition.
Build a Reeded Island Facade From MDF
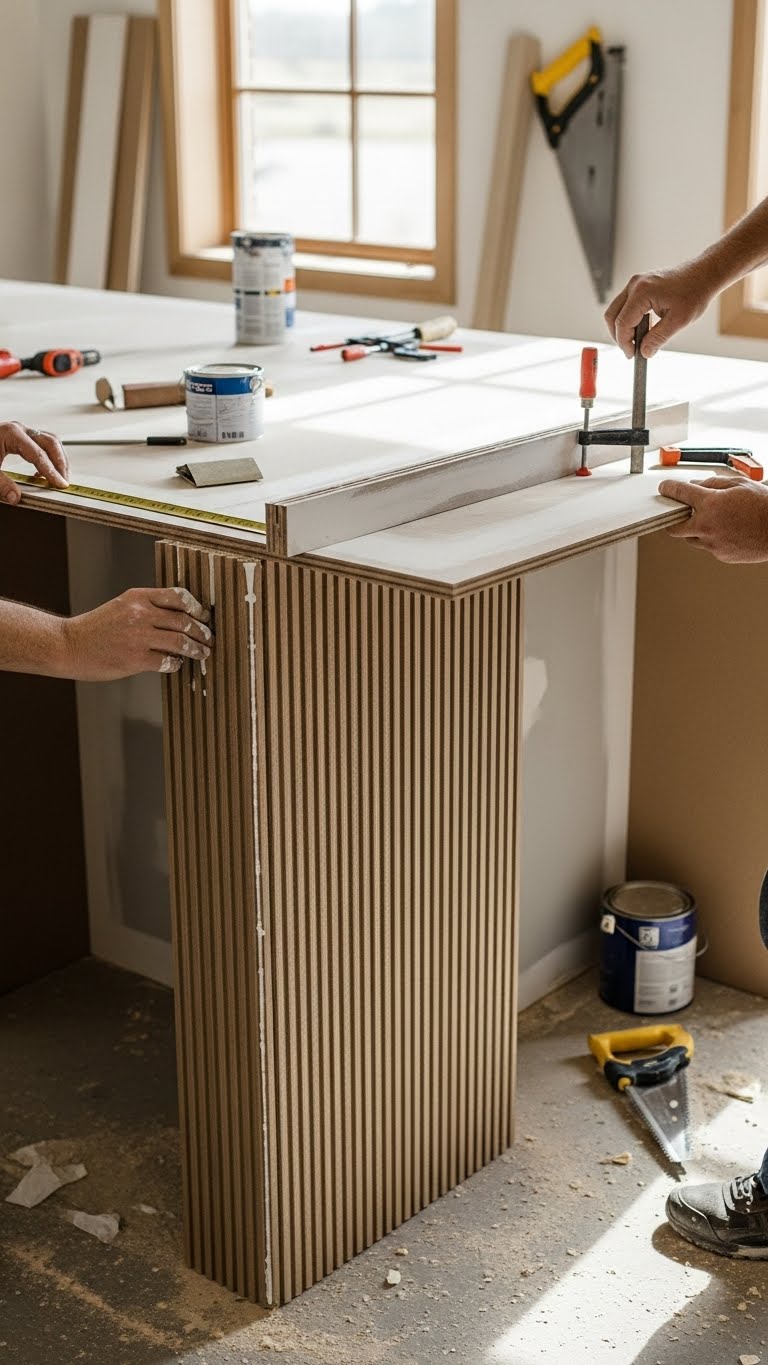
Start by measuring the island faces and cutting MDF sheets to size so you get continuous, clean panels with minimal seams; you’ll then rip or order pre-reeded MDF strips to glue and nail onto those panels, spacing the grooves evenly for a crisp, modern rhythm. Trim with mitered corners, add acoustic backing for dampened sound, sand, prime, and paint for a sleek, liberated finish.
Refinish Old Furniture With Reeded or Fluted Moulding
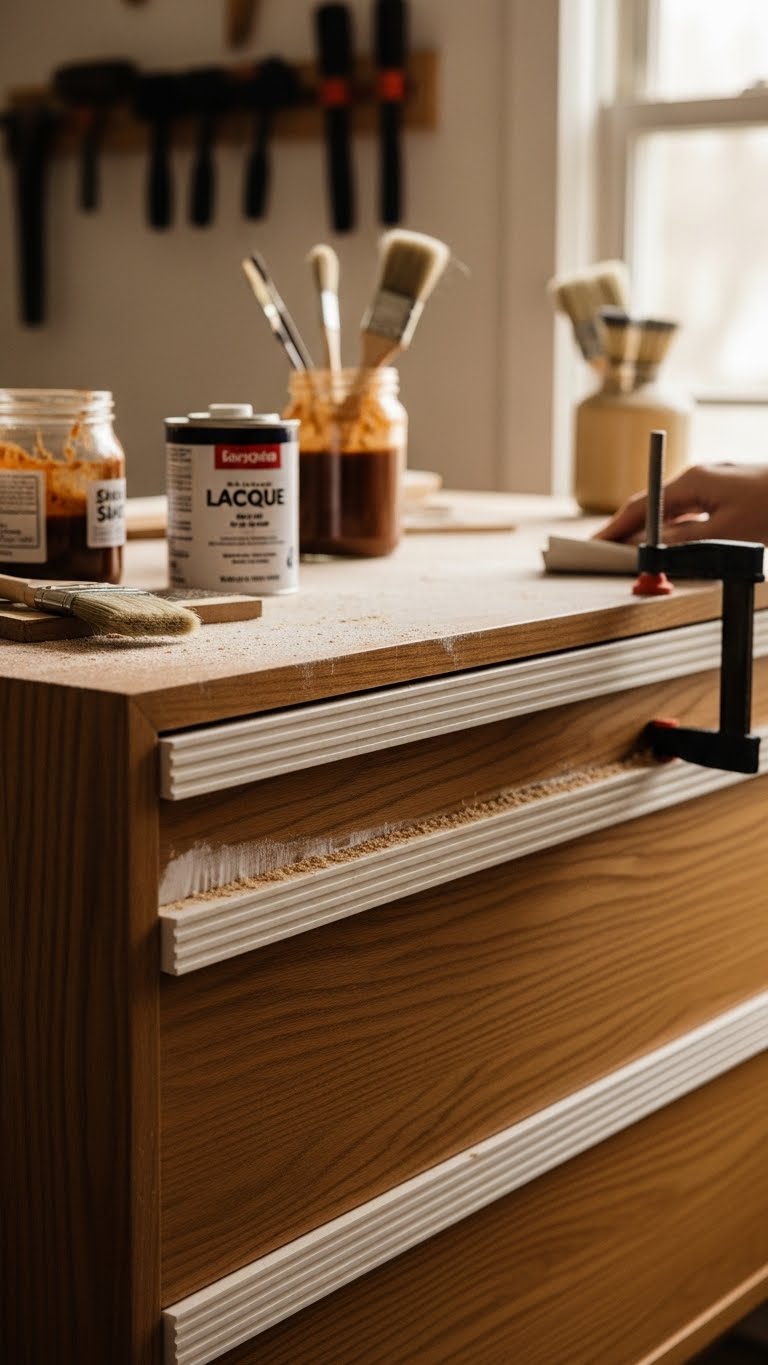
Refresh worn furniture by adding reeded or fluted moulding to its surfaces — it’s a fast way to modernize pieces while keeping their original bones. You cut thin strips or buy moulding, glue and clamp, then sand seams.
Paint with grooved lacquer for crisp shine or stain and seal. Tufted reeds add tactile rhythm; you’ll create liberated, gallery-ready furniture without heavy overhaul.
Make a Matte Wood Finish for Flat-Panel Cabinets
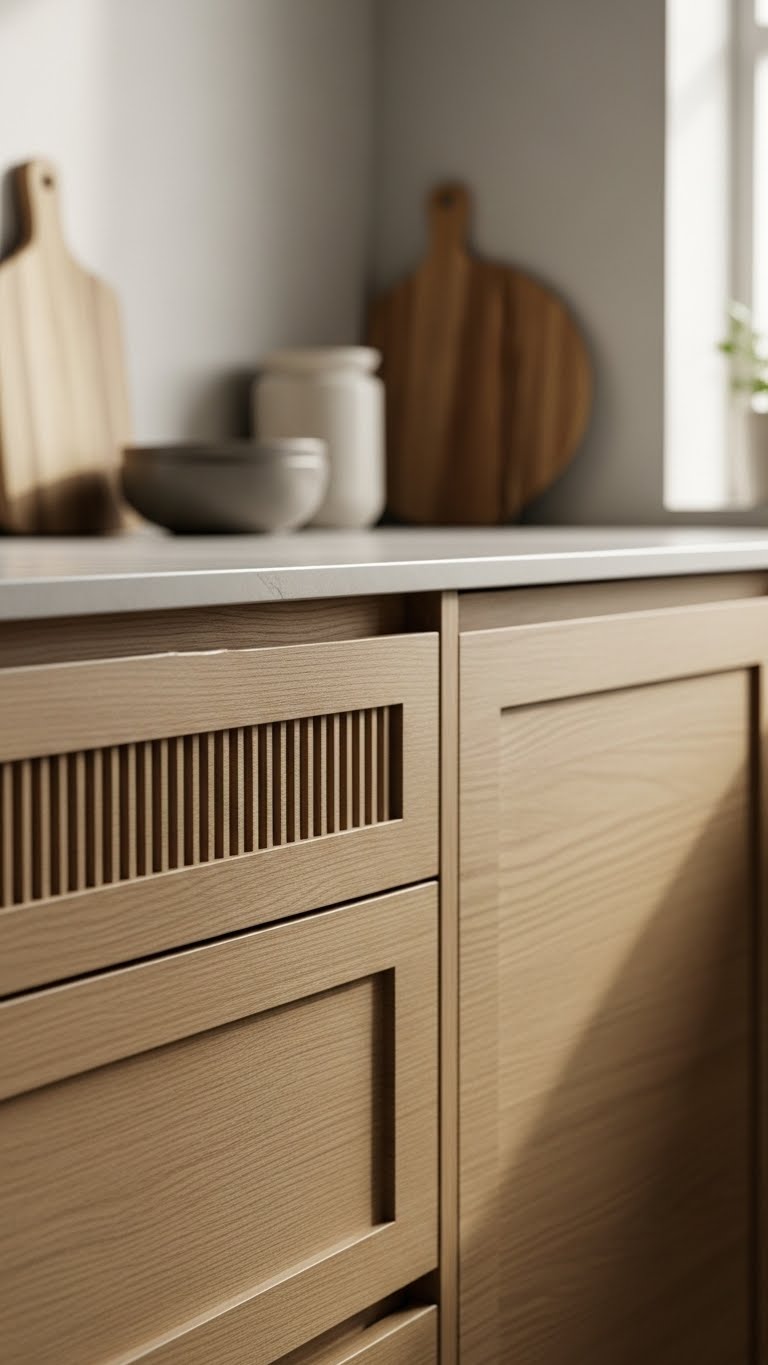
After you’ve added reeded moulding to one or two focal pieces, give your flat-panel cabinets a complementary matte wood finish to keep the room feeling modern and calm.
Sand, fill pores with grain filler, and sand smooth.
Stain for tone, then seal with matte lacquer in even coats.
You’ll achieve a restrained, tactile surface that feels lived-in yet liberated — clean, low-gloss, and confidently minimal.
DIY Piped Pillows for Tailored Sofas
[IMAGE PROMPT: A clean, modern interior scene focused on a tailored sofa adorned with several handmade piped pillows; close-up on one pillow showing neat panels, contrast piping sewn into the seams, and a hidden zipper along a crisp edge. Soft natural light from a nearby window highlights neutral fabrics—warm greys, off-whites, and a muted reeded texture on a wooden backdrop—with shallow depth of field and a minimalist composition that emphasizes sharp lines and refined craftsmanship. Photorealistic style with calm, deliberate mood, high-detail textile textures, and a balanced, airy color palette.]
Give your sofa a crisp, tailored look by sewing simple piped pillows that echo the room’s clean lines and reeded details. You’ll pick fabric, cut panels, and stitch contrast piping into seams for visual pop.
Finish with tailored edges and a hidden zipper for a seamless silhouette. These pillows feel modern, deliberate, and freeing—small projects that instantly sharpen your seating.
Sew Simple Fringe Throws for Chairs and Benches
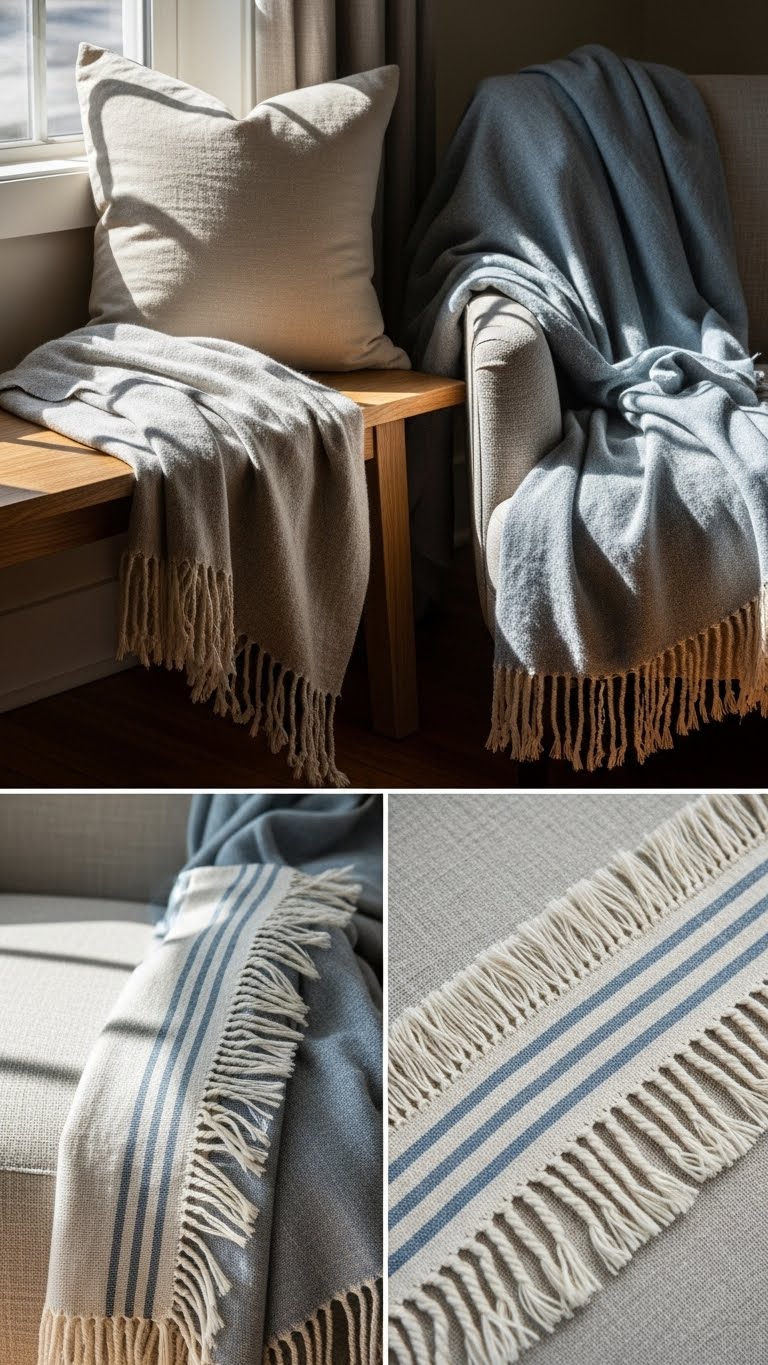
Often you’ll reach for a cozy throw to soften a chair or bench, and adding a sewn fringe makes that easy and intentional; start by choosing a fabric with enough weight to drape—linen, cotton-linen blends, or lightweight wool work well—then cut the body and a narrow strip for the fringe, hem the edges, stitch the strip to the main panel, and finish with neat, even cuts or twisted tassels for a tailored yet relaxed edge.
Trim evenly, experiment with fringe knotting for texture, and label pieces for neat fringe storage so your throws stay ready to grab and roam.
Construct a Low-Profile Modern Coffee Table
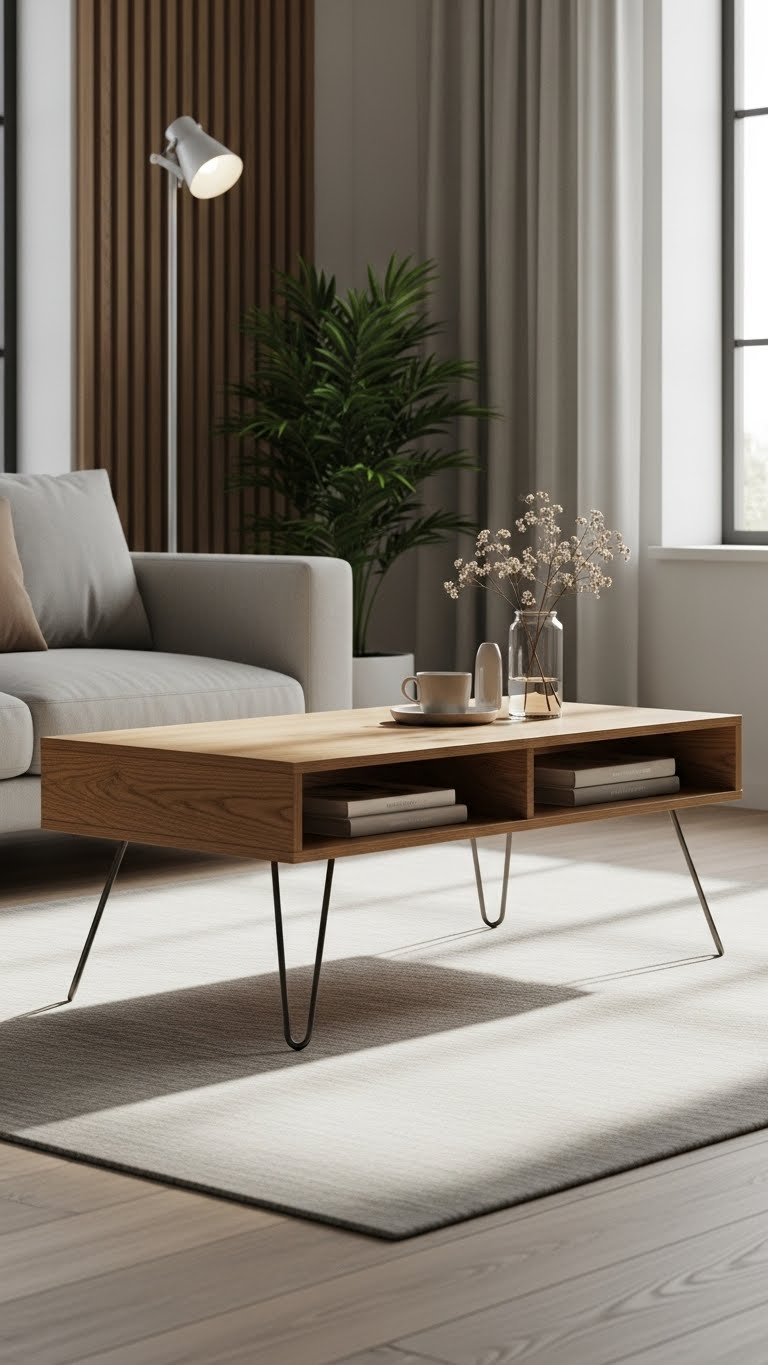
Start by picturing a low, clean-lined coffee table that anchors your seating without overpowering it: aim for a height between 12–16 inches, a simple rectangular or rounded silhouette, and materials that read modern — oak or walnut veneer, matte metal legs, or a concrete top with softened edges.
Build a low profile piece from a plywood slab, add integrated storage beneath, and finish with slim hairpin legs for airy freedom.
Make a Statement Round Mirror With a Wood Frame
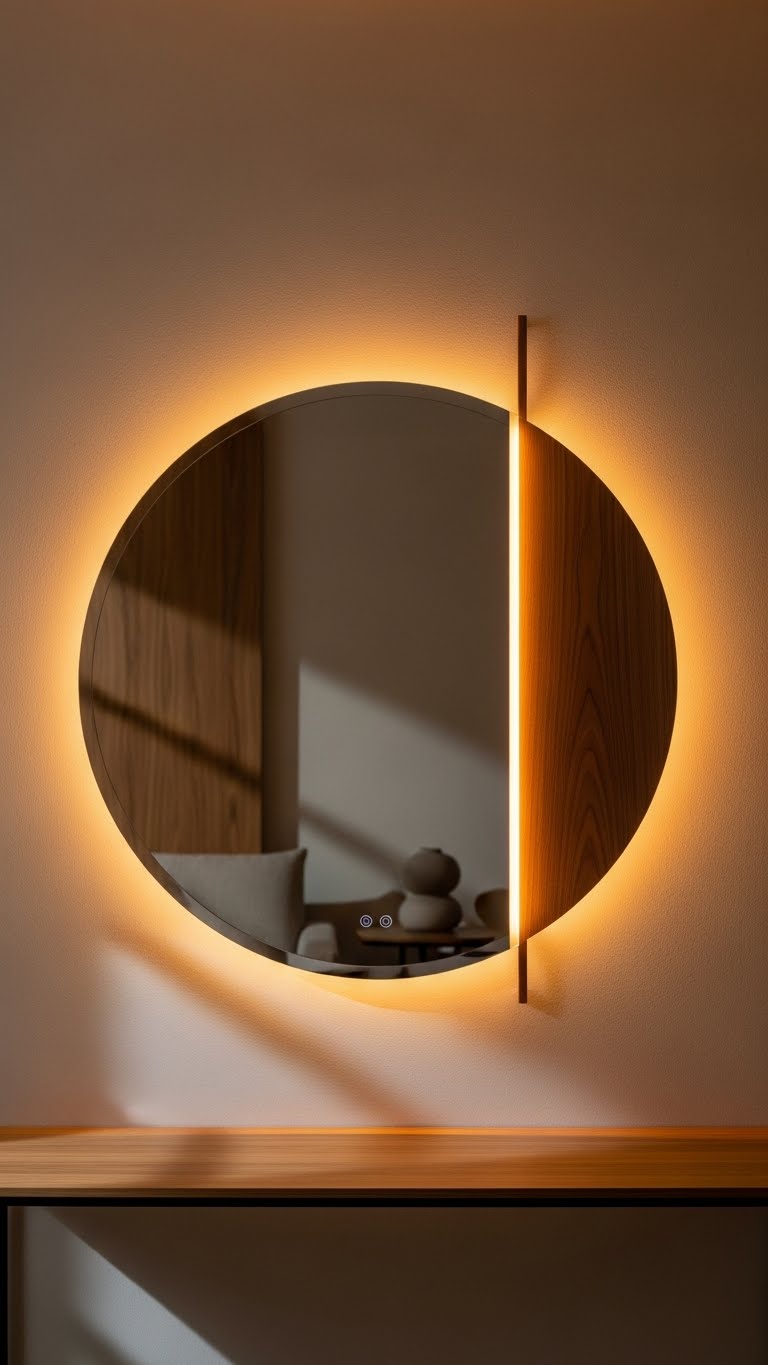
After your low-profile table sets the room’s horizontal line, add a bold vertical focal point with a large round mirror framed in warm wood to lift light and anchor the wall.
You’ll craft a warm toned, beveled edge mirror with a slim floating frame, add discreet backlit LEDs, and hang it confidently — a simple, freeing statement that brightens and defines your space.
Turn Vintage Carved Panels Into Headboards or Toe Kicks

When you spot a worn carved panel at a flea market or salvage yard, imagine it mounted as a headboard or fitted as a toe kick to give ordinary furniture instant character; the aged patina, hand-carved motifs, and irregular edges add depth and a tactile focal point that’s hard to replicate.
Sand, seal, and trim to fit—create upcycled headboards or ornate toe kicks that free your space.
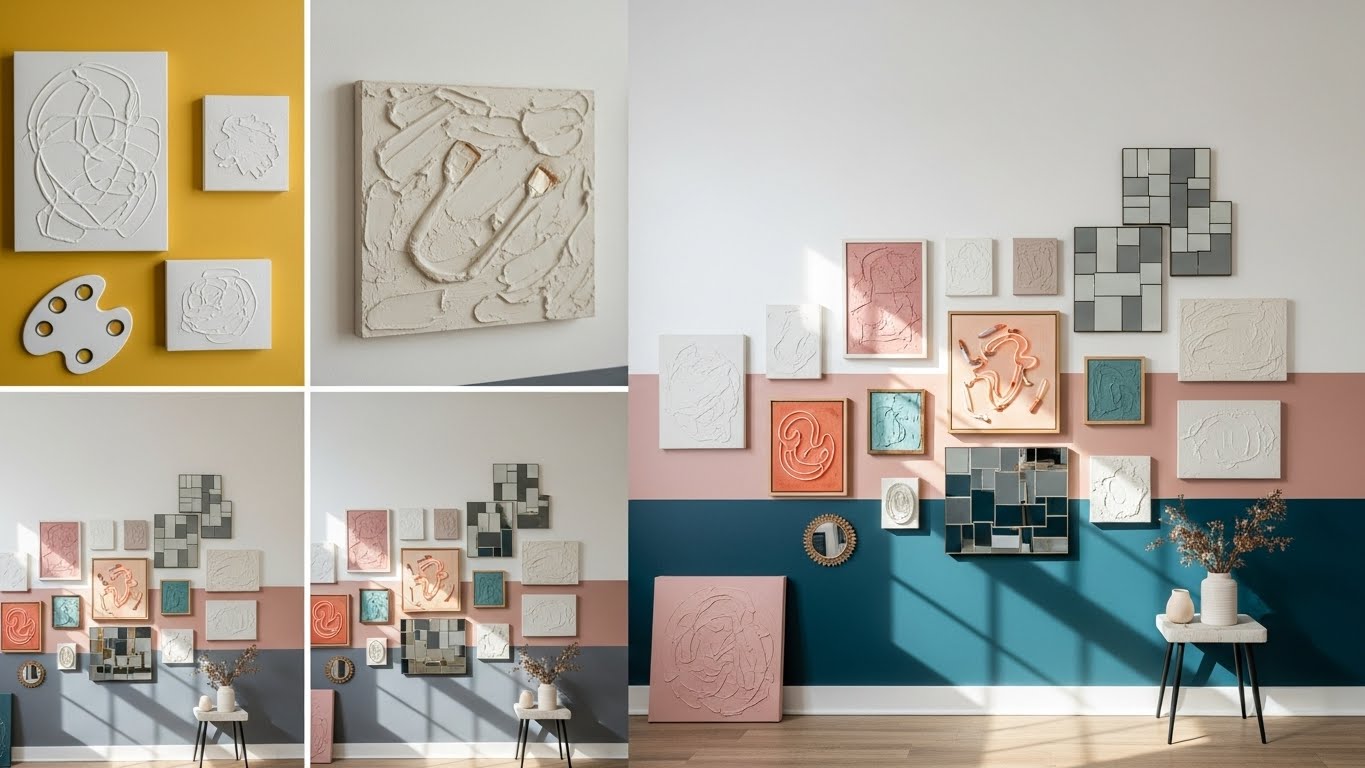
Create a Sculptural Plate Wall Display
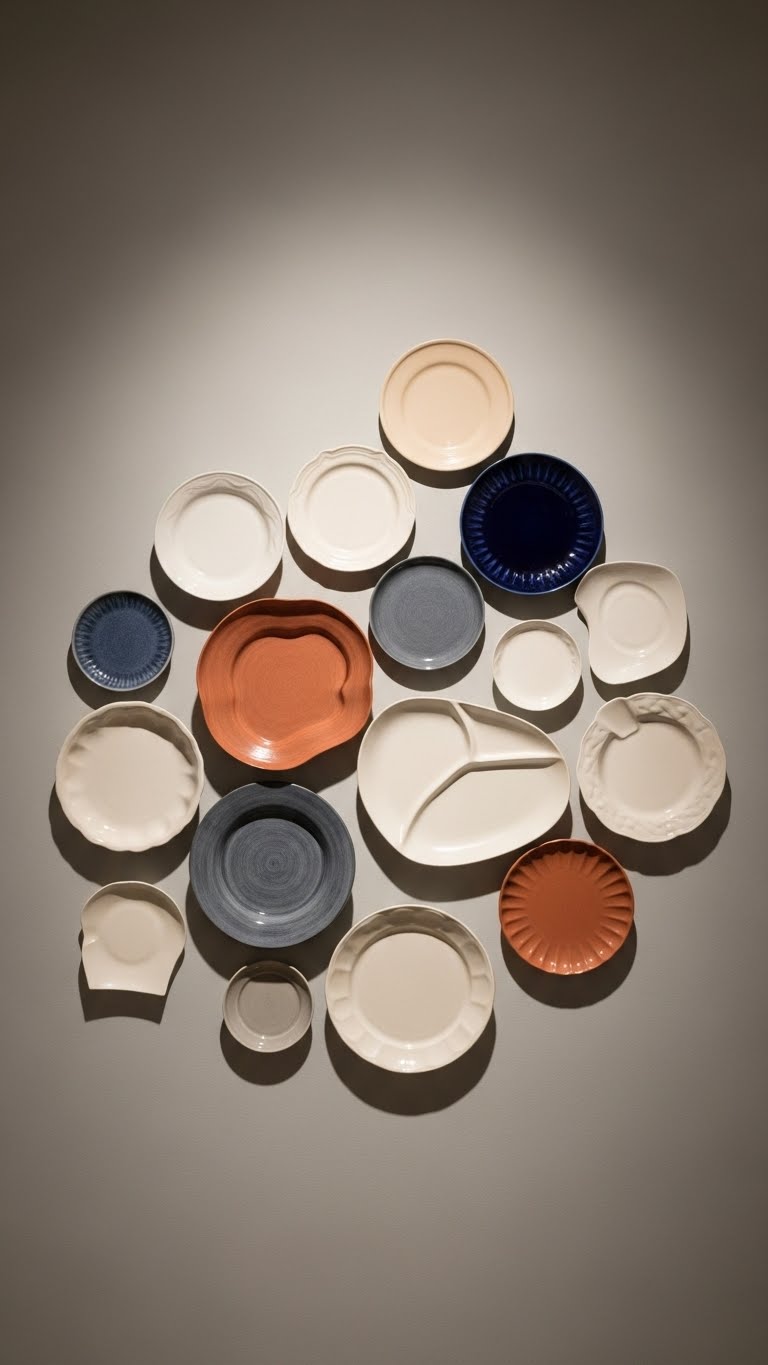
Curate a sculptural plate wall by mixing shapes, sizes, and textures so the arrangement reads like a three-dimensional collage rather than a row of dishes. You’ll anchor pieces with ceramic layering—overlap matte and glossy forms, vintage rims and modern curves. Use asymmetrical spacing to keep rhythm, vary heights, and secure lightweight plates with discreet mounts. Let the display feel liberated and intentional.
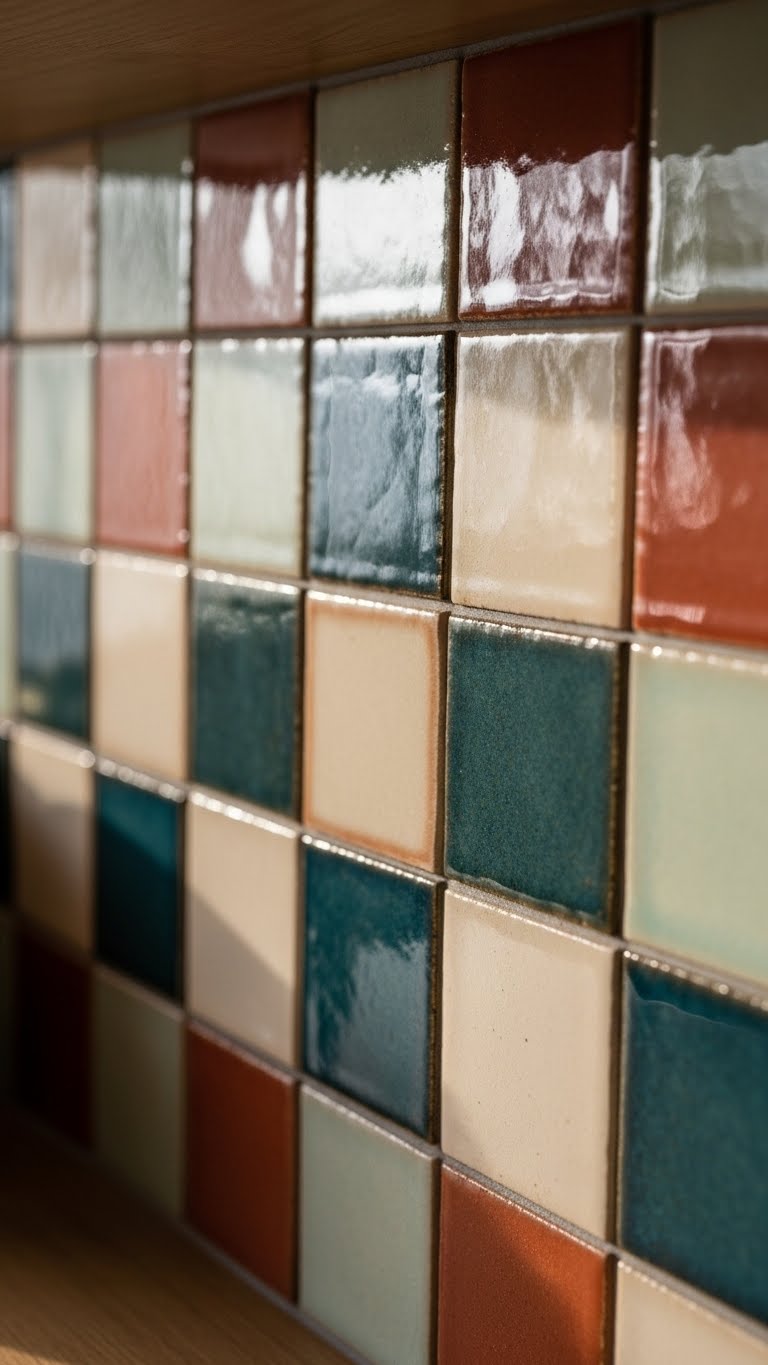
Install Terracotta Tile Patterns for Warmth
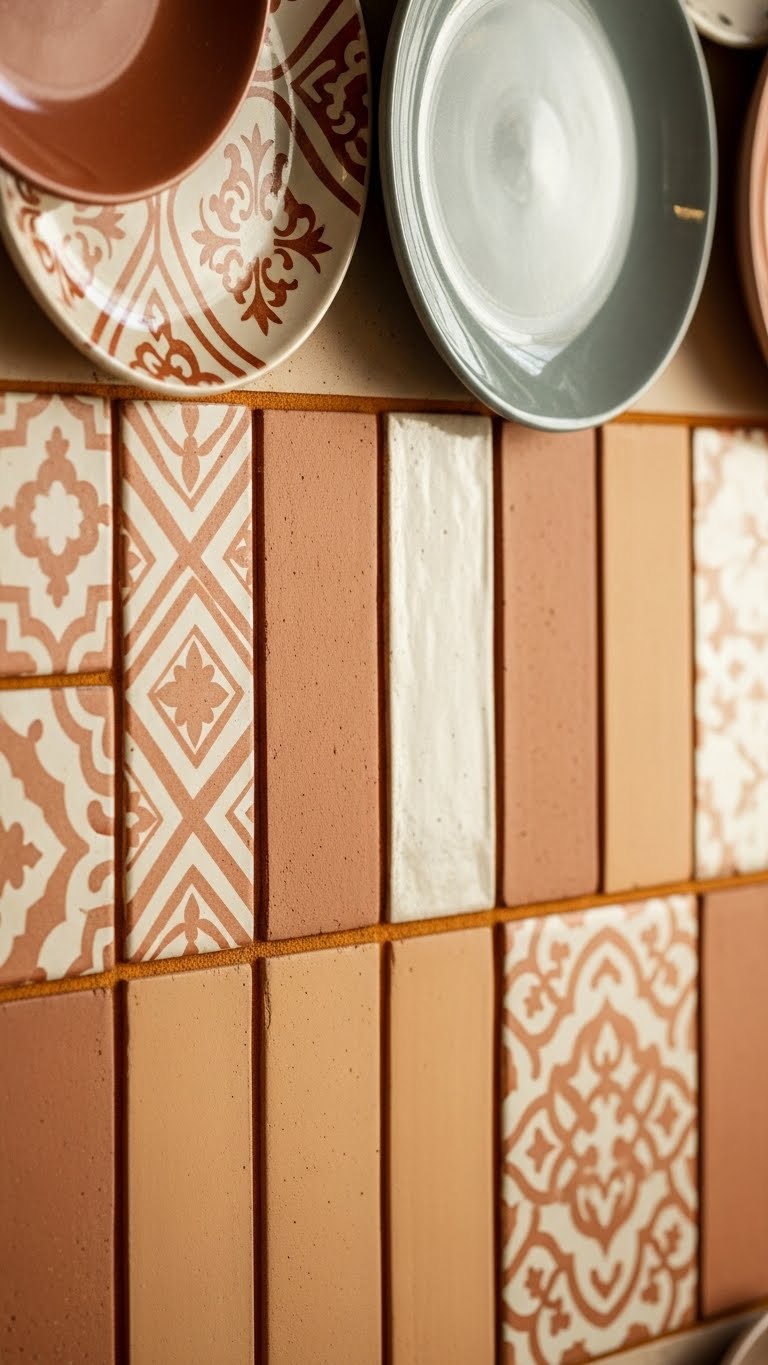
You can balance the sculptural plate cluster by introducing terracotta tile patterns that bring grounded warmth and tactile contrast to the wall. Lay patterned encaustics mixed with plain terracotta, staggered for rhythm. Use sunbaked grout to unify tones and age the installation. Cut tiles cleanly, seal edges, and keep grout lines narrow for a modern, liberated look that feels both handcrafted and intentional.
DIY Zellige-Inspired Backsplash With Pressed Tiles
Bring handcrafted Moroccan charm to your kitchen with a DIY zellige-inspired backsplash made from pressed tiles that mimic the irregular, glossy depth of traditional clay.
You’ll choose tile sizes, arrange a loose grid, and play with pressed glaze patterns for lively reflection. The zellige technique rewards imperfect joins and subtle color shifts—seal grout, mount confidently, and enjoy a liberated, tactile focal wall.
Lay Herringbone or Chevron Flooring Yourself
[IMAGE PROMPT: A PHOTOREALISTIC, TOP-DOWN VIEW OF A CRAFTSMAN LAYING HERRINGBONE/CHEVRON WOOD FLOORING IN A BRIGHT, AIRY ROOM. SUNLIGHT STREAMS THROUGH LARGE WINDOWS, CASTING WARM, SOFT SHADOWS ACROSS NATURAL OAK PLANKS AND A VISIBLE CHALK LINE; HANDS ARRANGE AND DRY-FIT SEVERAL PATTERNED PLANKS, WITH TOOLS (MEASURING TAPE, PENCIL, CARPENTER’S SQUARE, CLAMPS) AND A FEW CUT ANGLED PIECES NEARBY. THE COMPOSITION FOCUSES ON PRECISE ALIGNMENT, STAGGERED ROWS, AND THE TACTILE TEXTURE OF WOOD GRAIN, EVOKING CAREFUL METHODICAL WORK AND A CONFIDENT, TIDY FINISH.]
Lay out a clear chalk line and get a dry run of your pattern before you glue or nail anything down — herringbone and chevron depend on precise alignment, so measure, snap reference lines, and arrange a few tiles or planks on the floor to confirm spacing and visual flow.
Work methodically, mastering floor patterning, cutting angles, and adhesive techniques; clamp, press, and stagger rows for a clean, confident finish.
Mix Patterned Decorative Flooring for Artisanal Charm

Mix patterned tiles and wood planks to create an artisanal floor that reads like a curated mosaic rather than a single repeat—start by choosing two or three complementary motifs (geometric, floral, or rustic wood) and limit your palette to 2–3 colors so the overall look stays intentional. Lay tiles with patterned grout, stagger wood for movement, then anchor zones with handcrafted rugs to define seating, play, or entry.
Hand-Paint a Minimalist Accent Wall in Sage or Terracotta
[IMAGE PROMPT: An intimate interior scene of a minimalist room featuring an accent wall being hand-painted in either soft sage or rich terracotta. Foreground shows artisanal patterned flooring with warm natural light casting gentle shadows; midground focuses on a partially painted wall with tape-lined clean edges, a hand-held roller and brush, subtle layered strokes forming a sage gradient or bold terracotta ombre, and a small pile of sanding dust and paint cans. Mood is calm, grounding, and slightly imperfect—textured brush marks visible, warm sunlit highlights, neutral furnishings kept minimal to emphasize color and craft. Photorealistic, editorial-style composition with soft directional lighting and a serene, tactile atmosphere.]
After your floor sets the scene with artisanal patterns, add a calm, painted anchor to balance the space—choose sage for a cool, grounding backdrop or terracotta for warm, sunlit depth.
Tape clean edges, sand lightly, and hand-roll or brush in layers to craft a subtle sage gradient or bold terracotta ombre.
Step back, adjust tones, and embrace imperfect, freeing strokes.
Build an Egg-Style Corner Chair Setup for Comfort
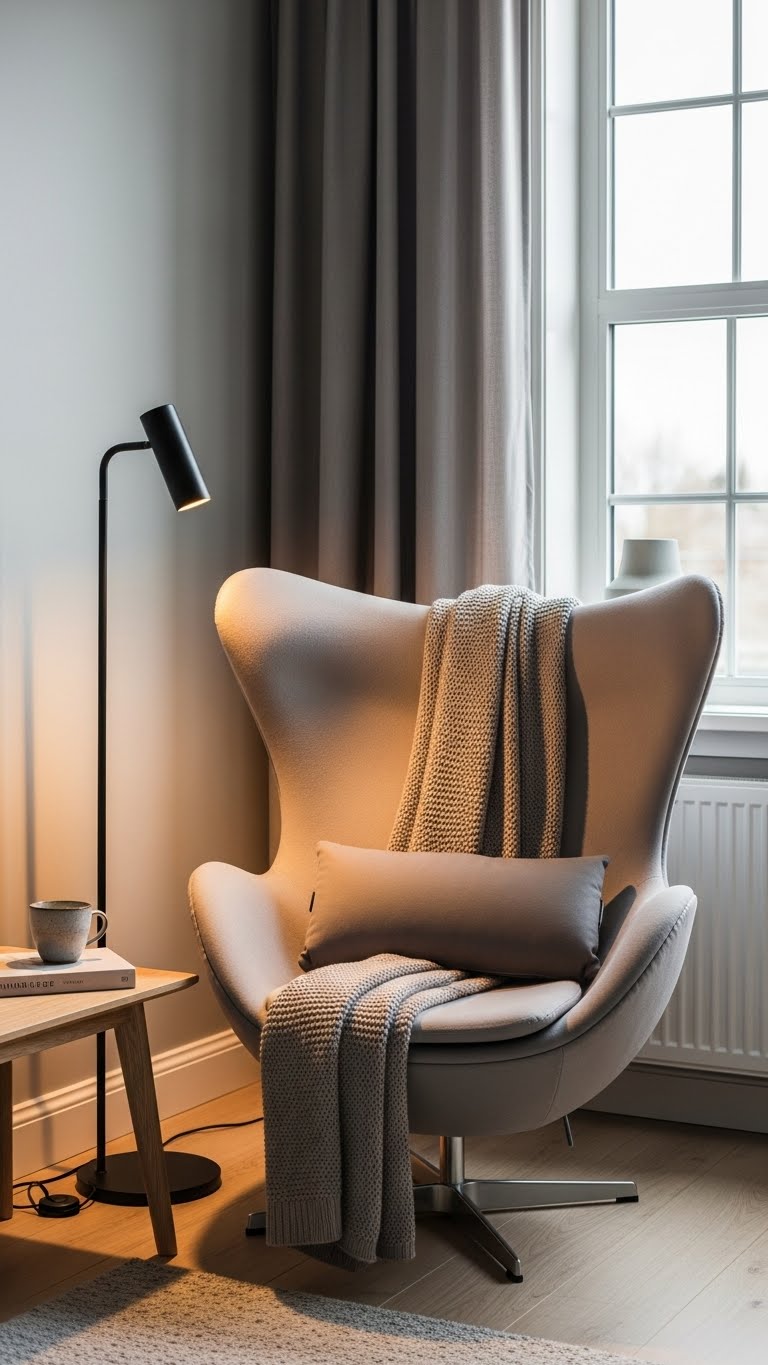
Tuck an egg-style chair into a quiet corner to create an intimate, cocooned reading nook that feels both modern and inviting. Position the egg chair angled toward natural light, add a slim floor lamp and a low side table. Layer a textured throw and a lumbar pillow for posture and warmth. Keep colors muted, lines clean, and leave space to breathe in your corner cocoon.
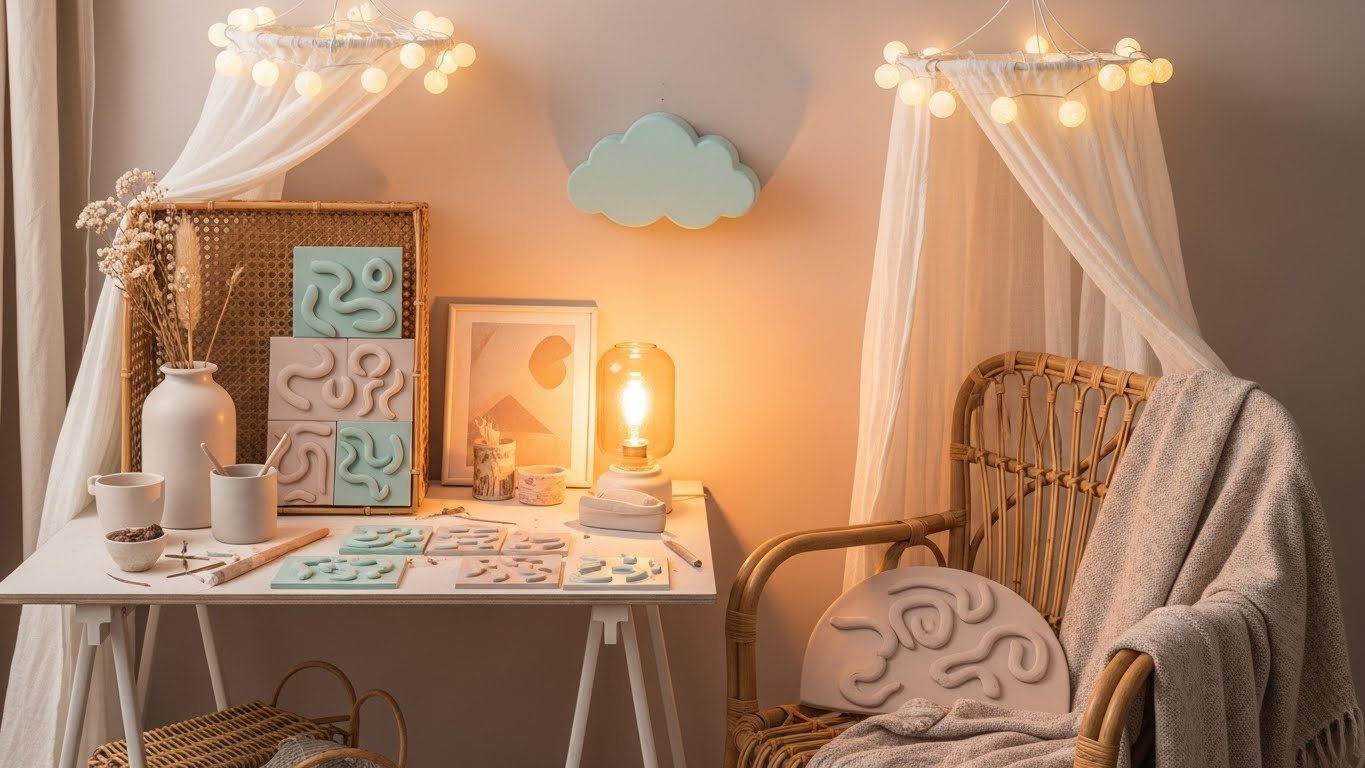
Craft a Cozy Reading Nook With Budget Finds

If you loved the egg-style corner, you can create a similar cozy reading nook without spending much: scout thrift stores for an affordable accent chair or repurpose a cushioned dining chair, then add a soft throw and lumbar pillow for comfort. Pair thrifted armchairs with a low side table, a stack of favorites, portable reading lamps for focused light, and a woven rug to define your free, calm corner.
Quick Lighting Swaps That Modernize Any Room
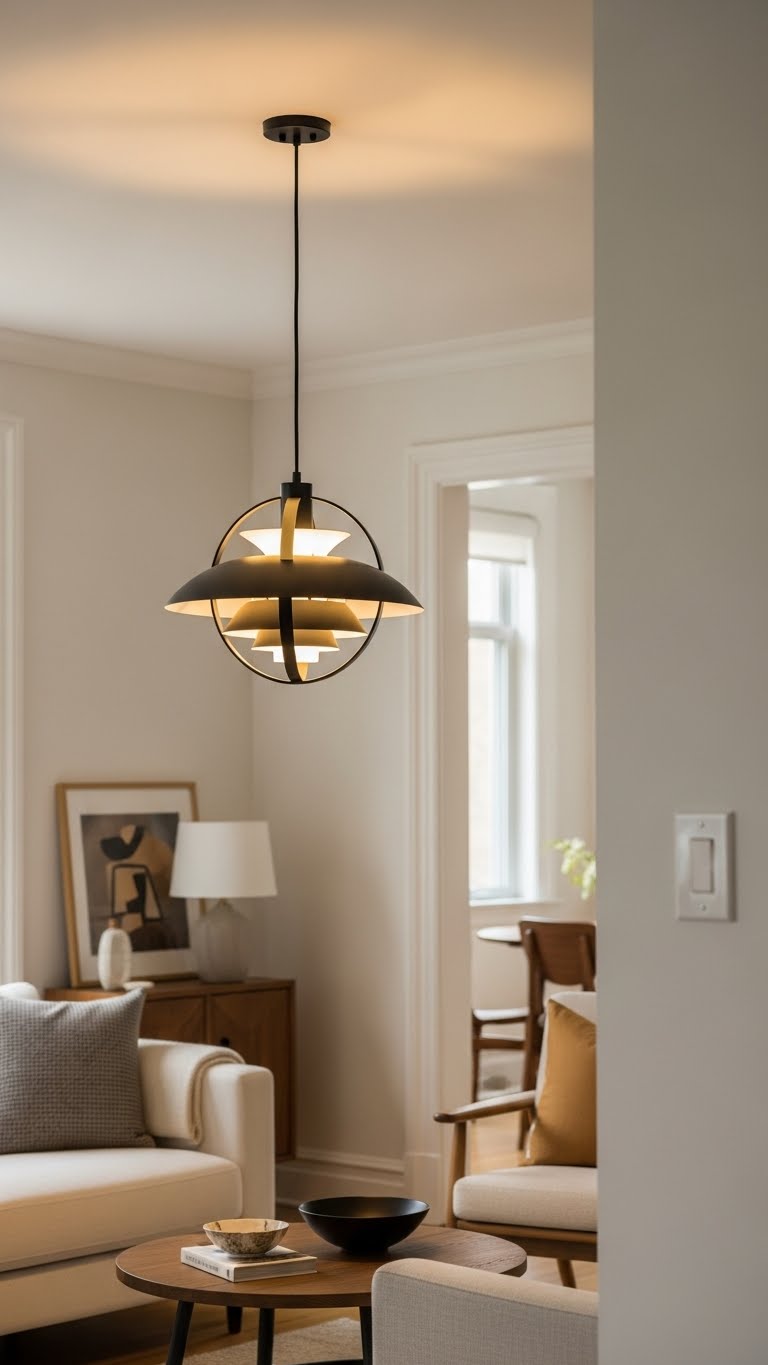
Swap out a dated fixture and you’ll immediately lift the whole room—lighting changes are one of the fastest ways to modernize a space without a full remodel.
Embrace pendant swaps for focal points, choose matte metals and sculptural shapes, and install Dimmer upgrades to control mood and energy.
You’ll get cleaner lines, flexible ambiance, and a freer, more intentional home vibe—all with minimal effort.
Scoring the Look: Examples & Before-After DIY Plans
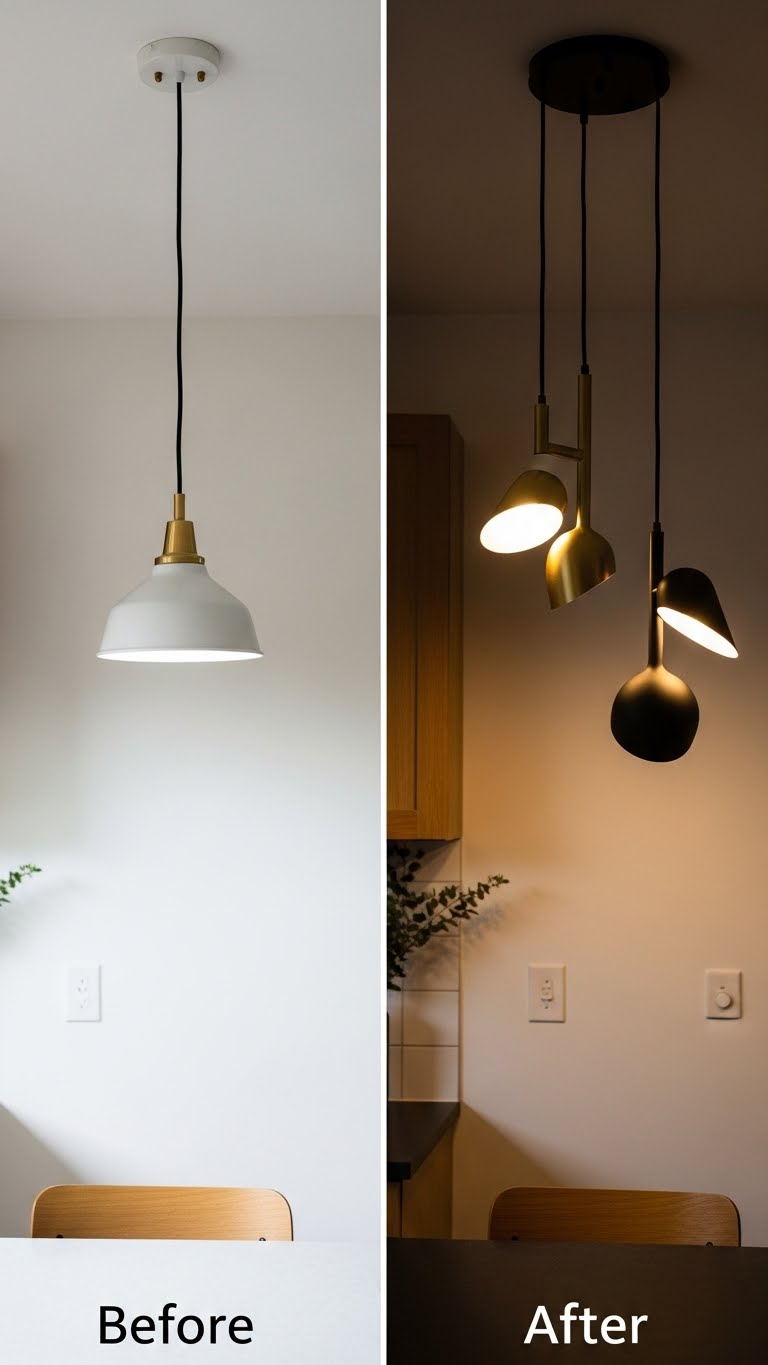
Lighting is one of the quickest changes you can make, and here you’ll see concrete before-and-after plans that make that impact repeatable: each example shows the original setup, the exact fixtures and finishes used (matte black, warm brass, sculptural pendants), a short tools-and-parts list, and step-by-step tweaks for mounting, wiring, and adding a dimmer. You get clear before after photos, makeover mapping, material swaps, and tight visual storytelling so you can copy setups, free yourself from hesitation, and finish fast.