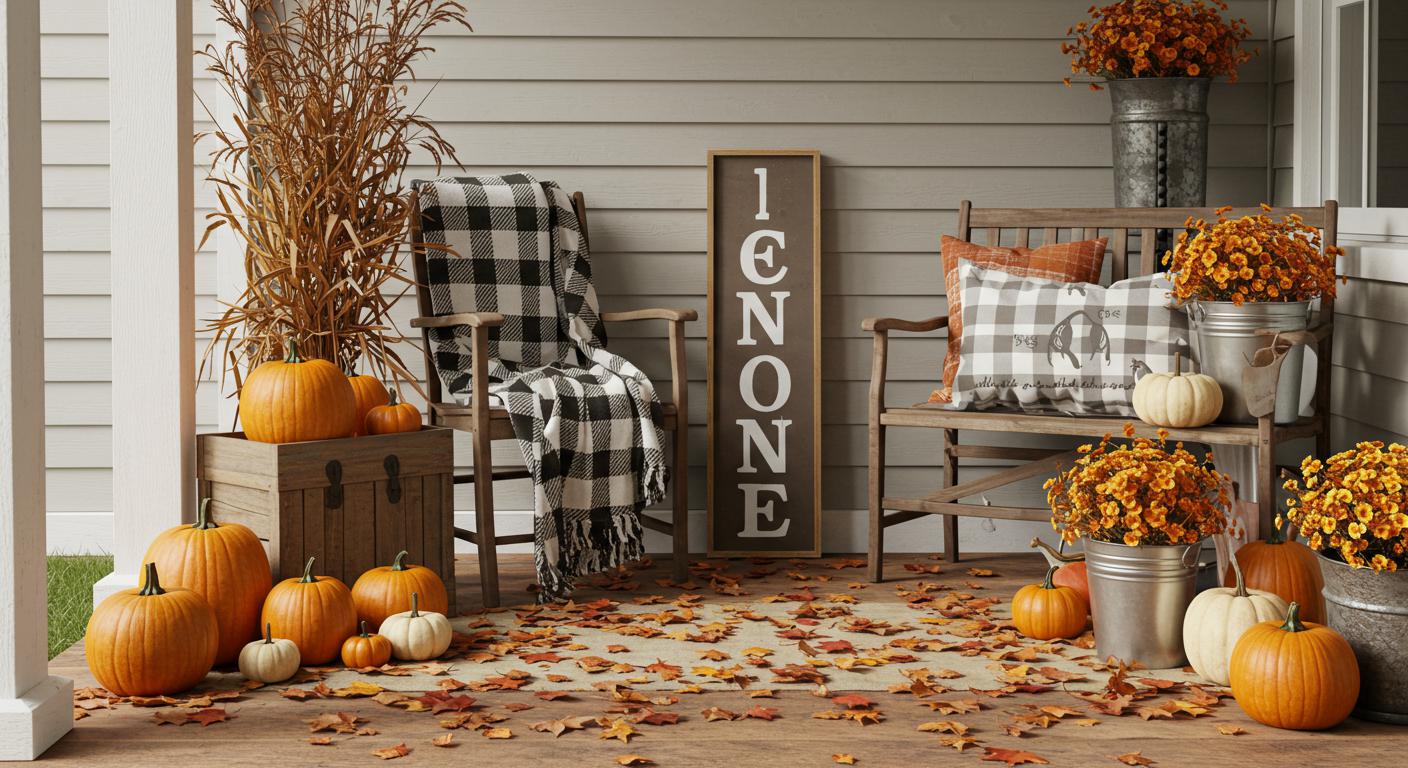
Imagine pulling open your front door on a crisp autumn morning, greeted by the warm glow of pumpkins, cozy blankets, and a charming rustic welcome sign that whispers, “You’re home.” There’s something so inviting about a handmade touch that sets the tone for the season – it’s not just decoration, it’s a hug for guests and family alike. Whether you’re a seasoned crafter or a DIY newbie, creating a rustic fall welcome sign is easier than you think—and today, I’m going to walk you through it in just three simple steps.
Step 1: Gather Your Materials and Prep Your Workspace
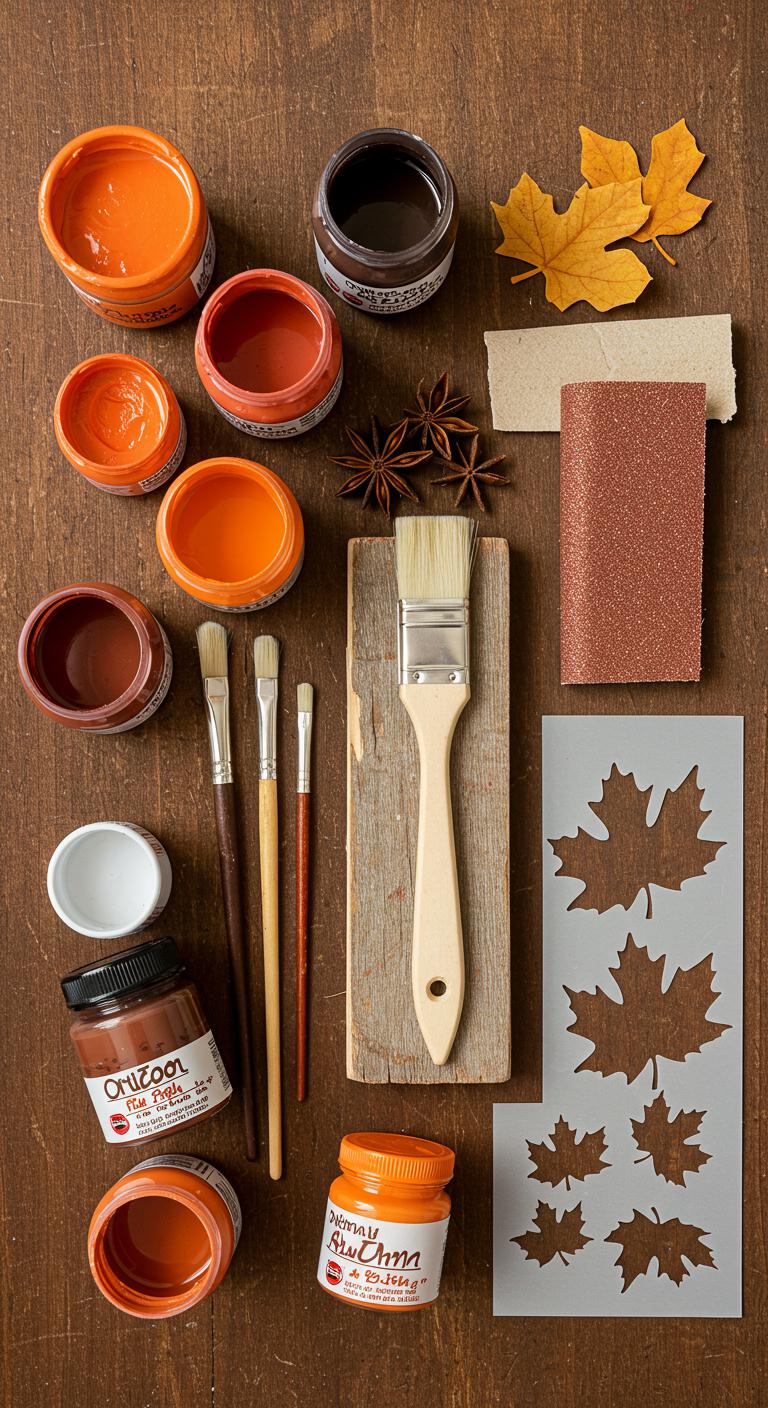
Before diving into your masterpiece, setting yourself up for success is key. Here’s a quick checklist of what you’ll need:
- Wood plank or pallet piece: Look for reclaimed wood or craft stores’ unfinished wood – about 12” x 24” works great.
- Paints: Warm fall colors like burnt orange, deep red, mustard yellow, and creamy white.
- Brushes: A variety, including a flat brush for widening strokes and a fine tip for details.
- Stencil or vinyl letters: If hand-lettering feels intimidating, these can be a huge help.
- Sandpaper: To smooth rough edges and create that distressed look.
- Twine or ribbon (optional): For hanging.
- Protective sealant: To keep your sign weather-resistant.
Set up in a well-lit area, ideally a craft table or a spot with newspaper laid out. Wearing an apron or old clothes is a good idea to avoid paint mishaps.
Pro Tips:
- Choose wood with natural imperfections like knots or grain variations to add to the rustic vibe.
- If you’re new to painting, practice your strokes on scrap wood before tackling the sign.
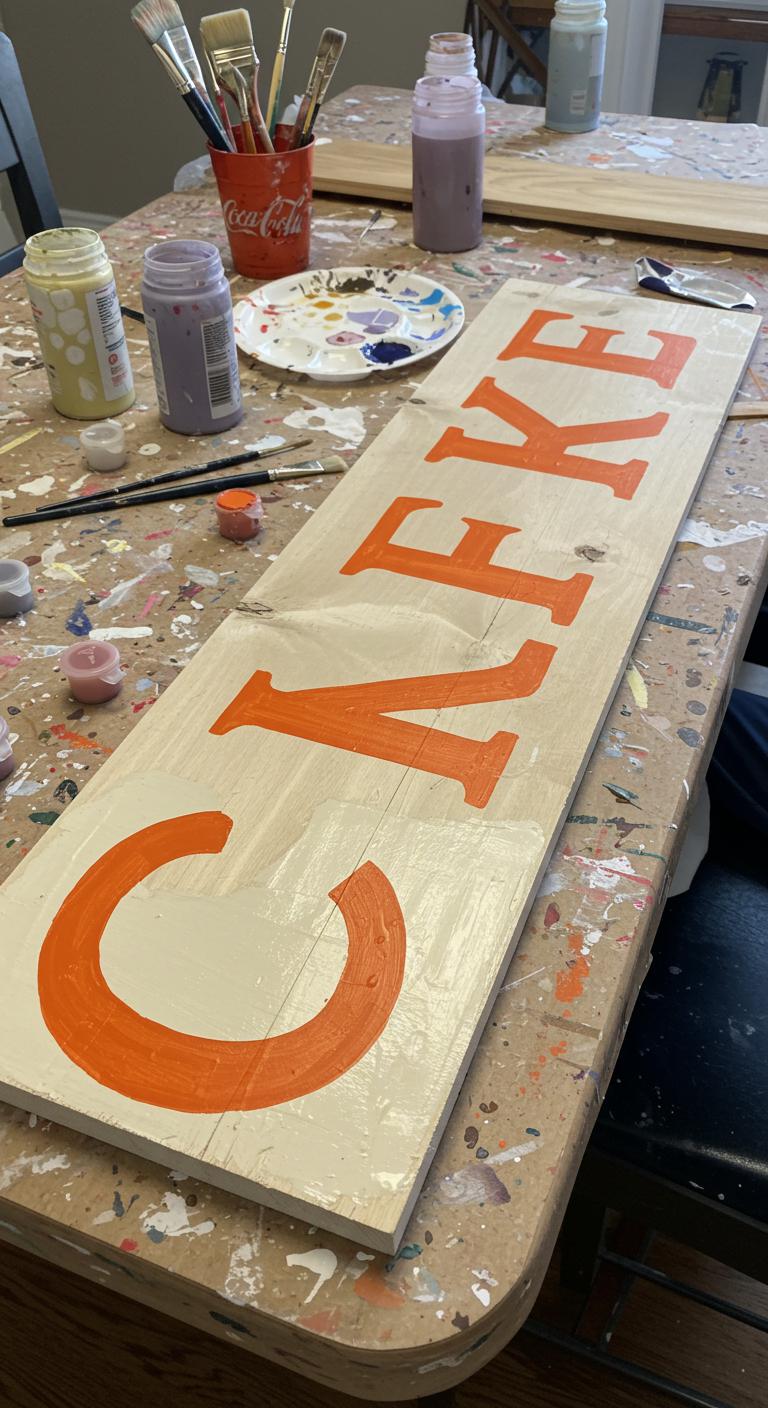
Step 2: Design and Paint Your Sign
Now comes the fun part: getting creative with your design!
Design Ideas:
- Letters spelling “Welcome,” “Hello Fall,” or “Gather”
- Fall motifs like pumpkins, leaves, acorns, or sunflowers
- A mix of script and block lettering for personality
- Prep Your Wood: Lightly sand your plank to smooth any splinters but keep some texture for character.
- Base Coat: Paint the entire surface with a warm neutral color like cream, off-white, or soft gray. This will make your design pop.
- Let it Dry: Patience is key here! A good dry base coat prevents smudges.
- Lettering and Decoration:
- Place your stencil to outline letters or pencil them lightly by hand.
- Use a small brush for detailed work and a larger brush for filling in.
- Paint leaves or pumpkins around the edges or in one corner to frame your message.
- Distressing: When your paint is completely dry, take sandpaper and gently rub over the edges and certain spots to reveal wood underneath—this adds a weathered, rustic charm.
Remember, each imperfection adds personality, so don’t fret over perfect lines!
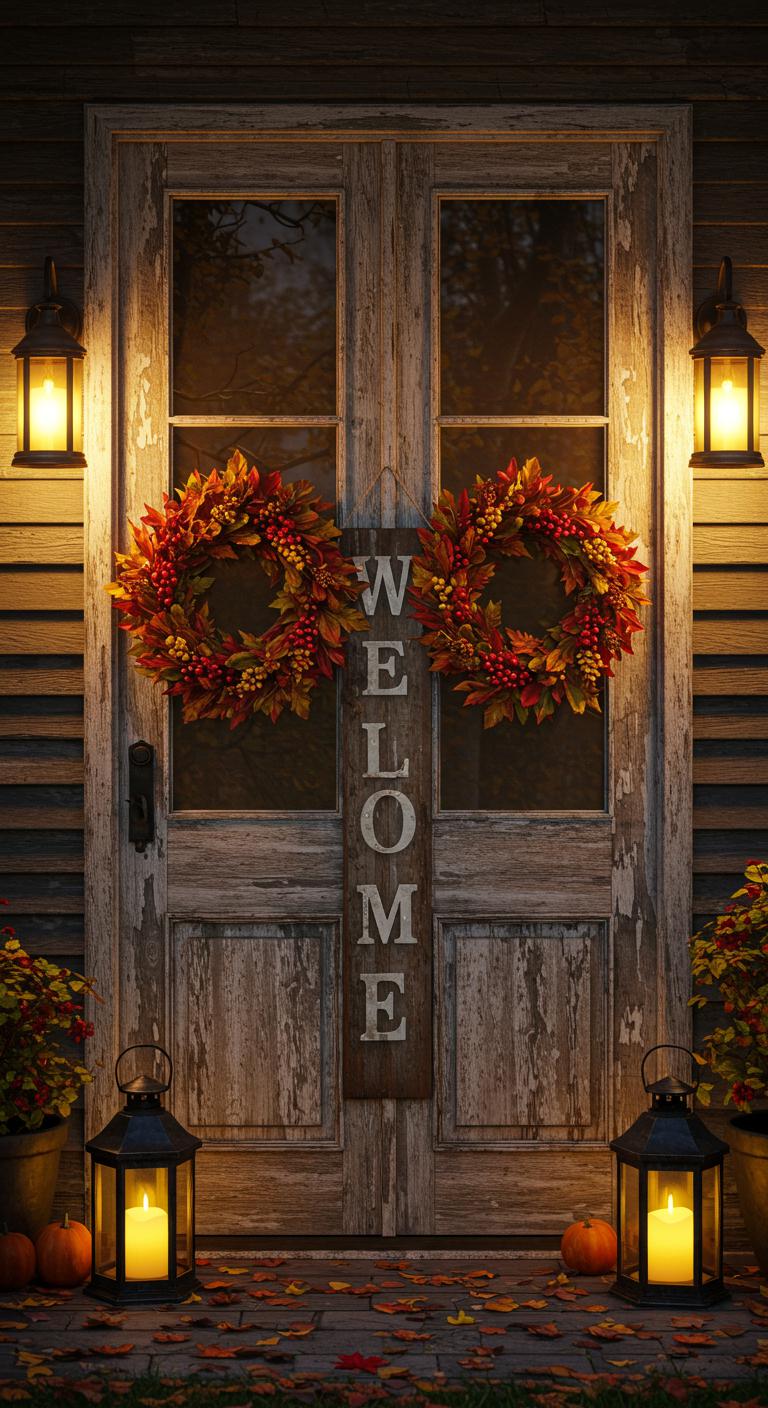
Step 3: Seal and Display Your Rustic Masterpiece
After all your hard work, it’s essential to give your sign some protection.
- Seal the Sign: Apply a clear matte or satin polyurethane sealant to keep it safe from moisture and fading. Use a soft brush and cover each side.
- Add Hanging Hardware: Attach small hooks or put a loop of twine or ribbon on the back if you want to hang it.
- Placement: Showcase your new welcome sign on your front porch, leaning it against a planter, or hang it on your door. Pair with a few fall favorites – like a pumpkin stack or a cozy doormat – for instant seasonal charm.
Bonus Touches:
- Add LED fairy lights around the frame for nighttime sparkle.
- Pair with a fall-scented candle nearby for a full sensory welcome.
Fall is all about embracing cozy textures, warm colors, and that inviting homemade feeling. With just a few simple steps, you can create a charming rustic fall welcome sign that greets everyone with seasonal cheer. No fancy tools required — just a bit of patience and love for handmade decor.
Save this guide for later and get ready to turn your front porch into the coziest, most inviting spot this fall! Happy crafting!