If you’re ready to give your tree a mischievous twist, these 15 DIY Grinch ideas will guide you step-by-step with photo-friendly tips. You’ll learn how to layer faux fur garlands, craft a Grinch hat topper, make ombre pine effects, and build tiny Who-ville scenes. Each project is practical and camera-ready, so your shots will pop — keep going for the projects that match your skill level and holiday vibe.
Classic Grinch Tree With Faux Fur Garlands
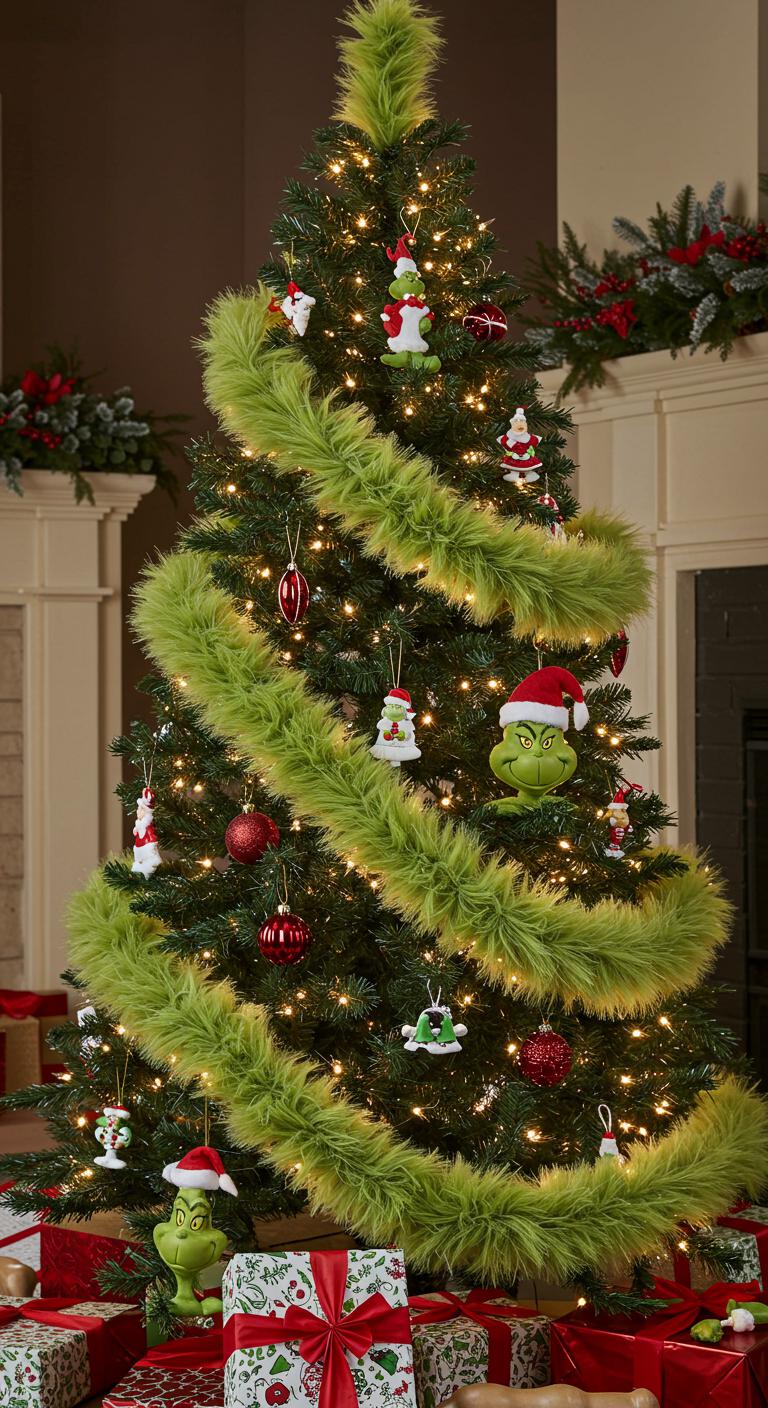
When you want a quick, show-stopping Grinch tree, start with faux fur garlands to get that plush, mischief-ready look; they’re easy to wrap, photograph beautifully, and instantly give your tree that iconic shaggy texture.
You’ll choose garland styles, drape boldly, add simple ornaments, and shoot tight detail shots. Move freely, tweak angles, and capture the playful vibe.
Who-ville Miniature Grinch Village Tree
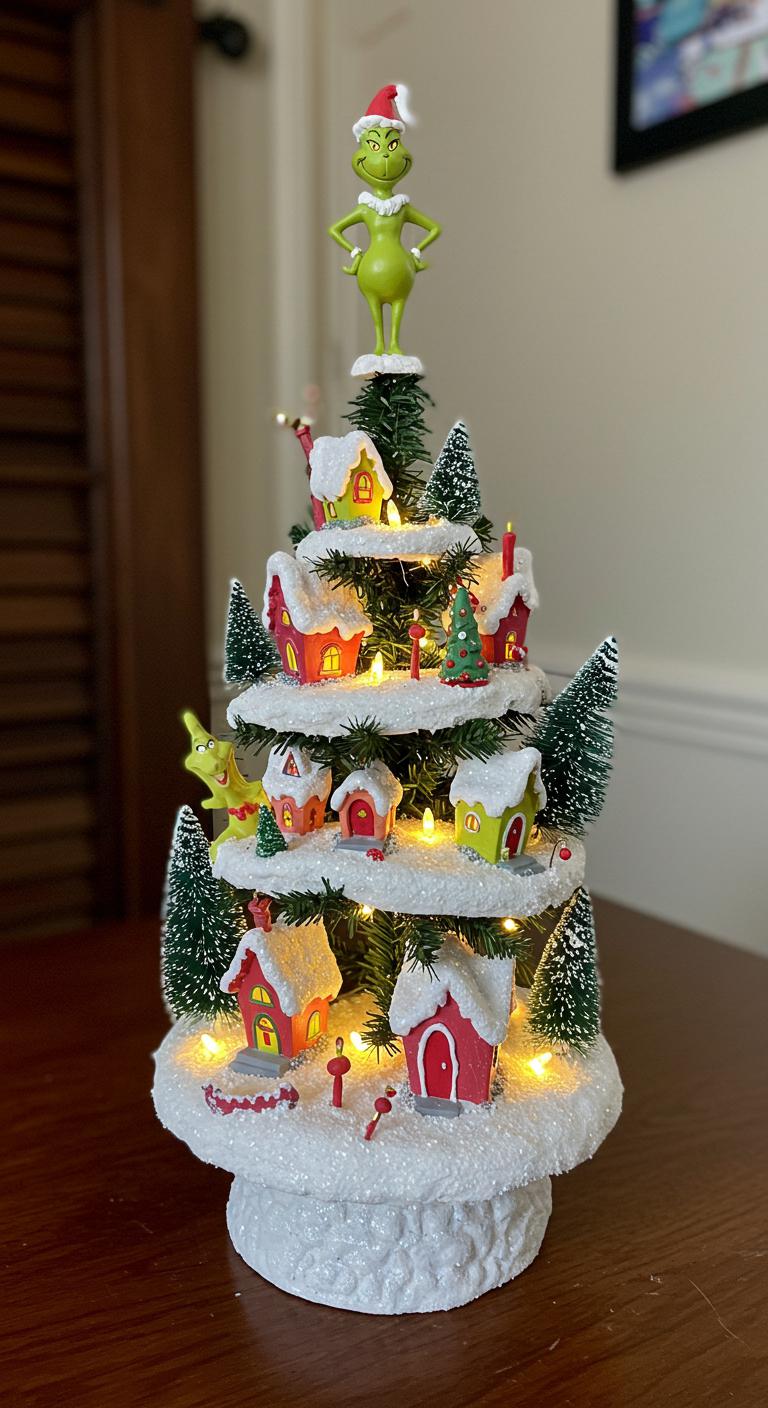
If you want a whimsical, photo-ready centerpiece, build a Who-ville Miniature Grinch Village Tree by layering tiny painted houses, miniature trees, and a Grinch topper around a compact tree base; it’s all about scale, lighting, and tight composition.
Start by arranging Who-ville decorations, glue Miniature figures to platforms, string micro LED lights, and photograph from low angles to capture charming depth.
Grinchy Green Ombre Pine
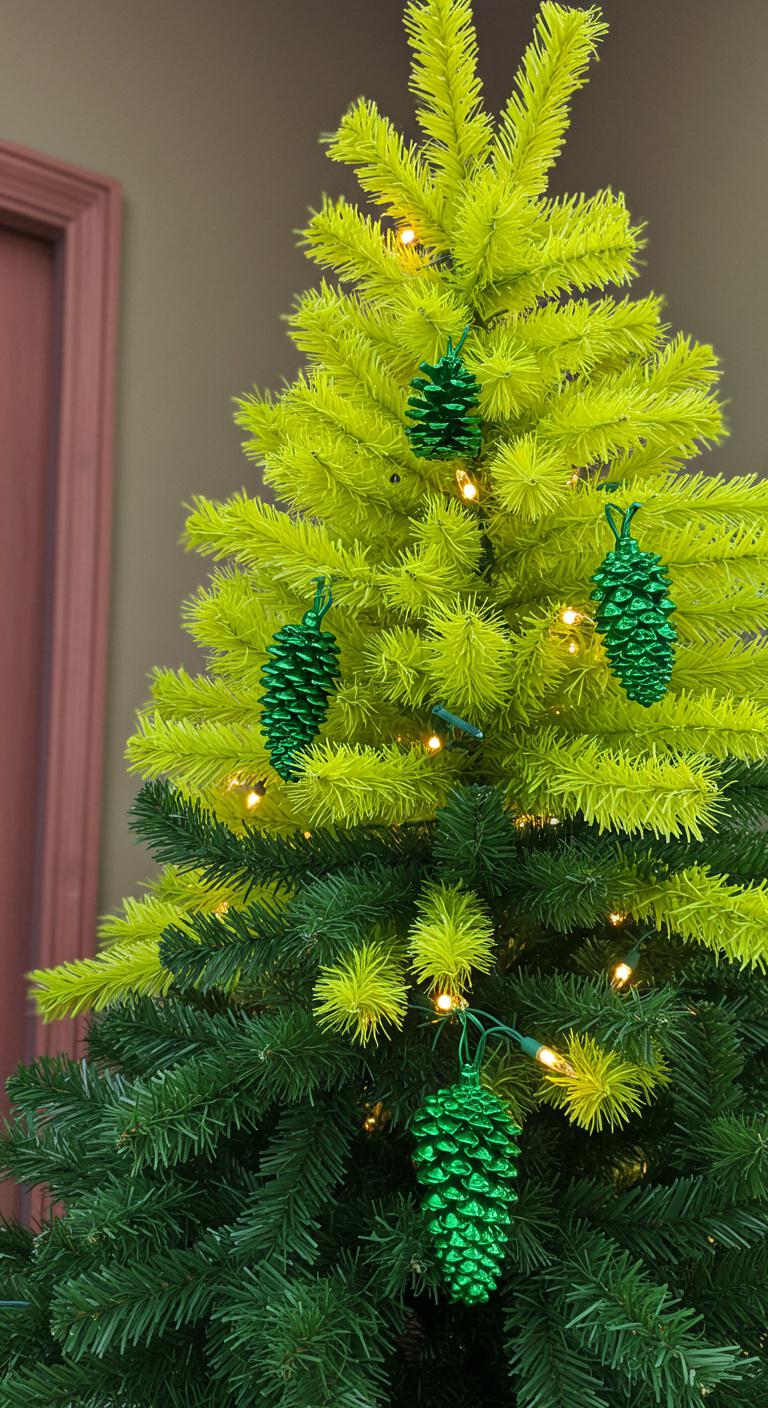
After you’ve captured your Who-ville scene, shift your focus to a single striking tree: the Grinchy Green Ombre Pine.
You’ll paint from deep forest to lime using ombre color techniques, photographing each gradient step.
Add pinecone embellishments dipped in metallic green, then string simple lights.
Shoot close-ups of texture, step back for full-tree shots, and let your creative freedom guide final styling.
Grinch Hat Topper Tree
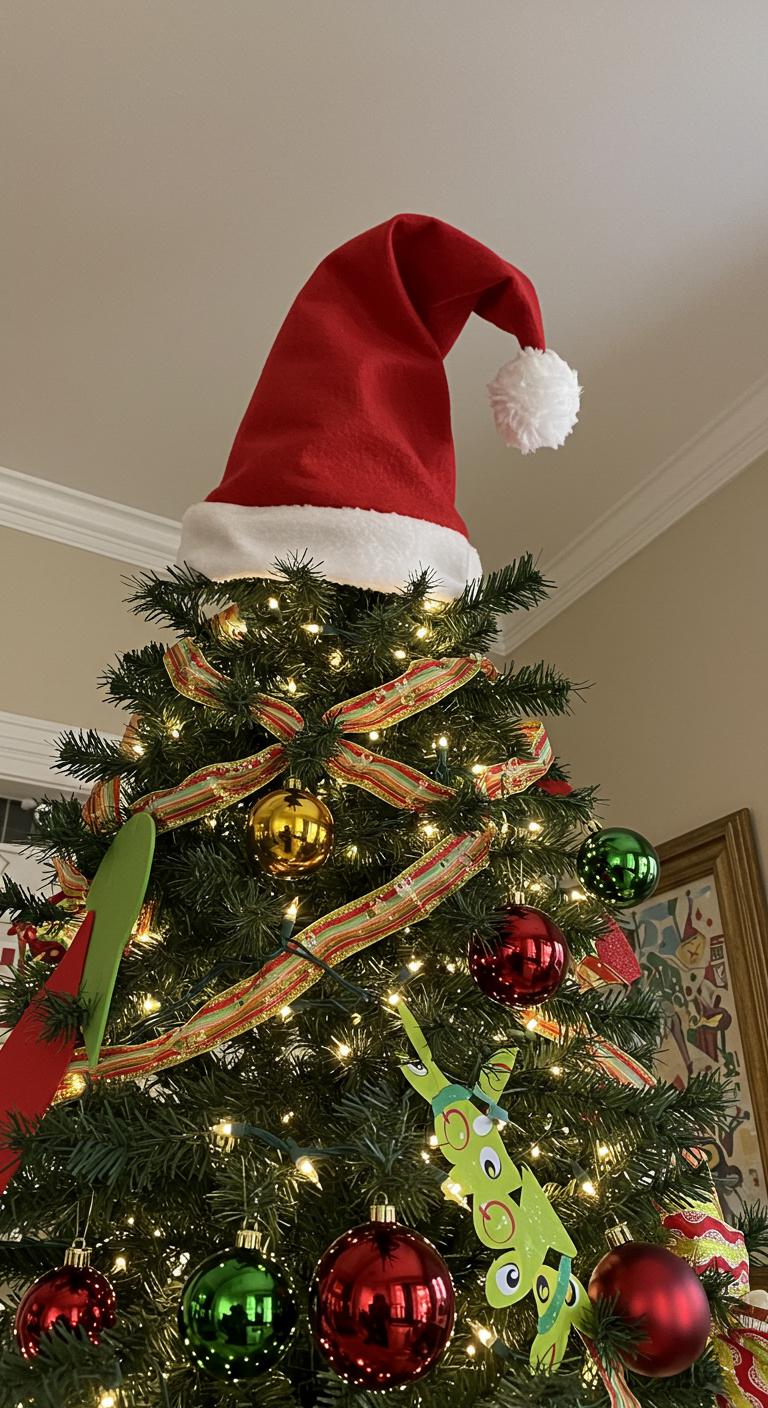
Paragraphs
Grinch Face Ornament Tree
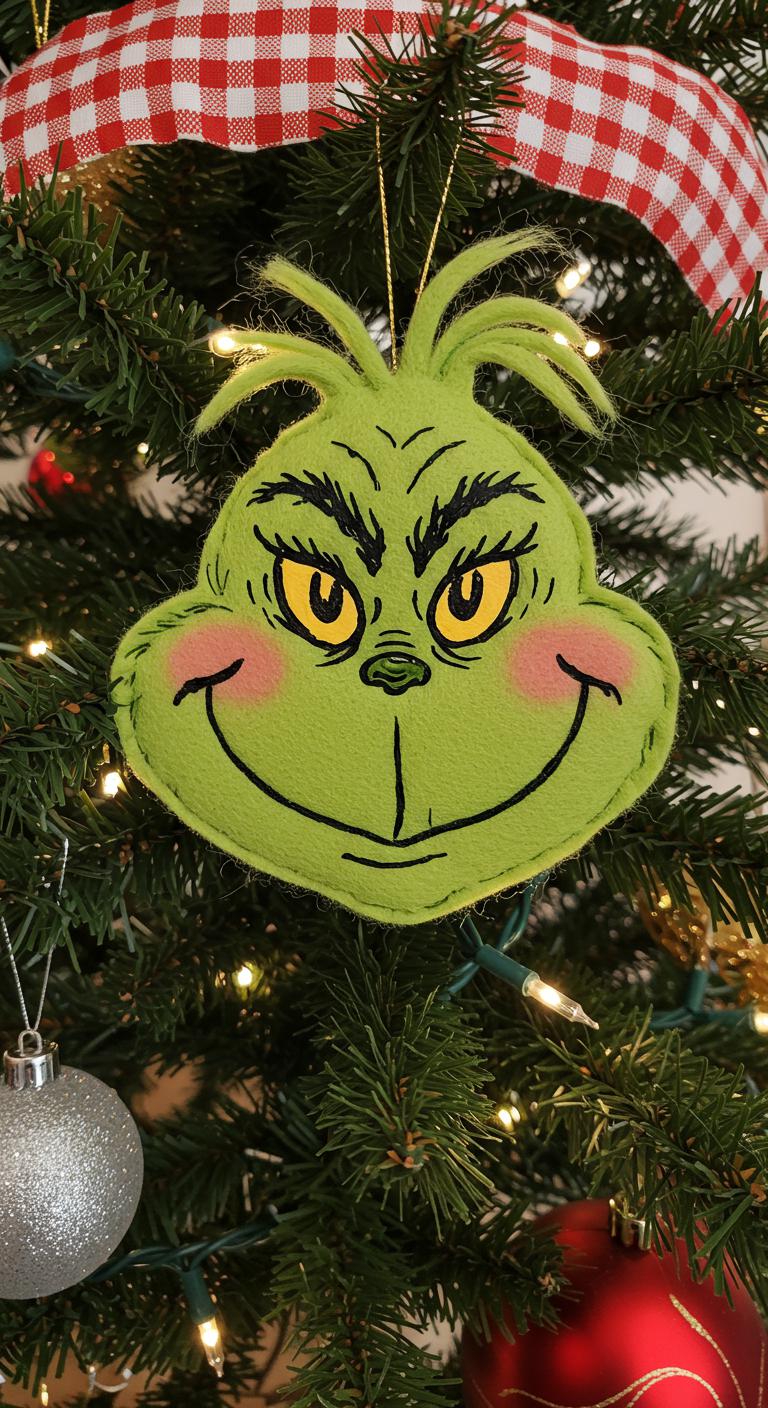
Paragraphs
Grinchy Teal and Red Ribbon Tree

If you loved making those cheeky Grinch face ornaments, you’ll enjoy wrapping a whole tree in playful teal and red ribbons next — this look pairs bold color blocking with textured loops and bows for maximum photo impact.
Start by spiraling teal ribbon, secure loops with zip ties, add red accents as bows and trail pieces, step back, tweak proportions, then shoot tight and wide photos.
Grinch Sock Stocking Tree
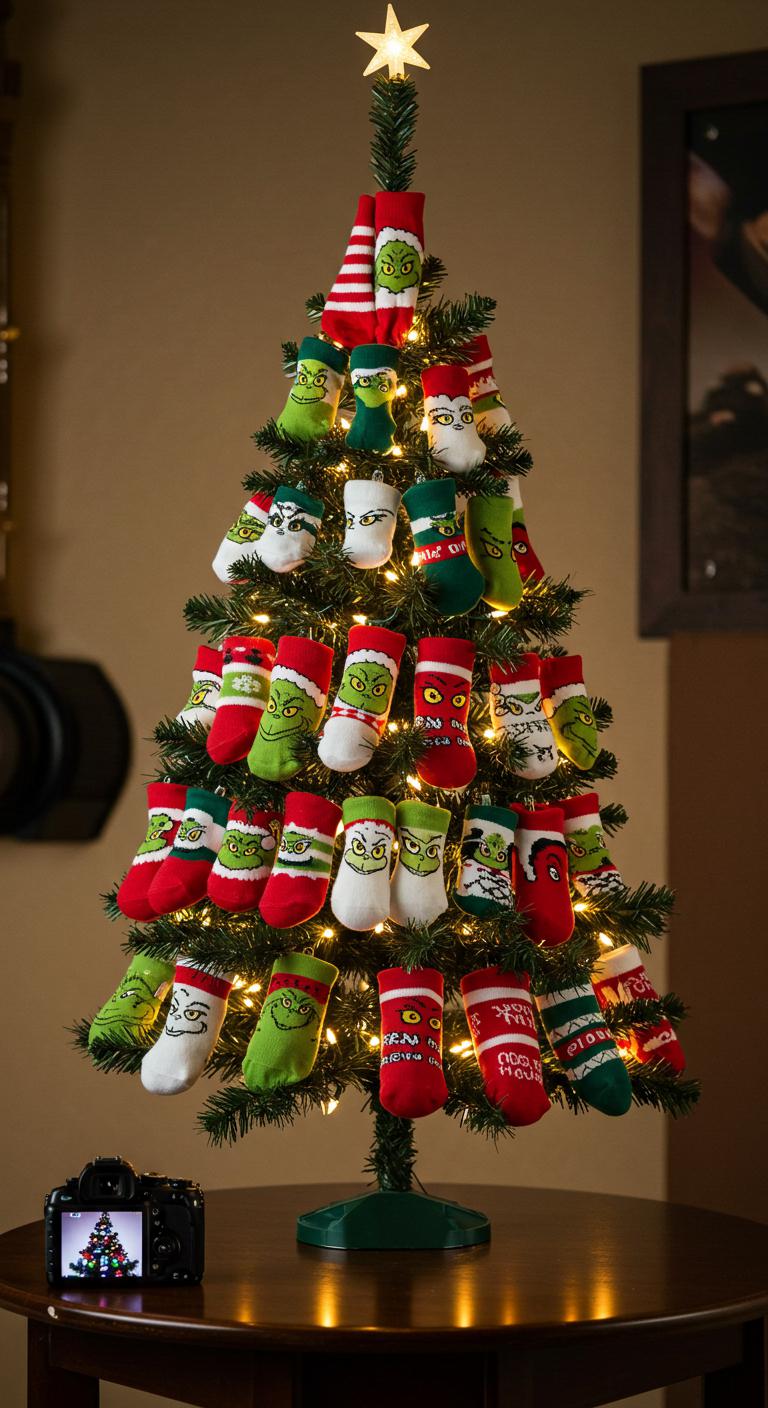
Because cozy socks are already half the charm, you’ll love transforming mismatched Grinch-themed socks into a mini stocking forest on a slim tabletop tree.
Start by clipping sock stocking loops, then hang alternately by size and color. Photograph each tier for a social gallery.
Add fairy lights, step back, and tweak spacing until your festive decor feels liberated and perfectly playful.
Dr. Seuss Quote Ribbon Tree
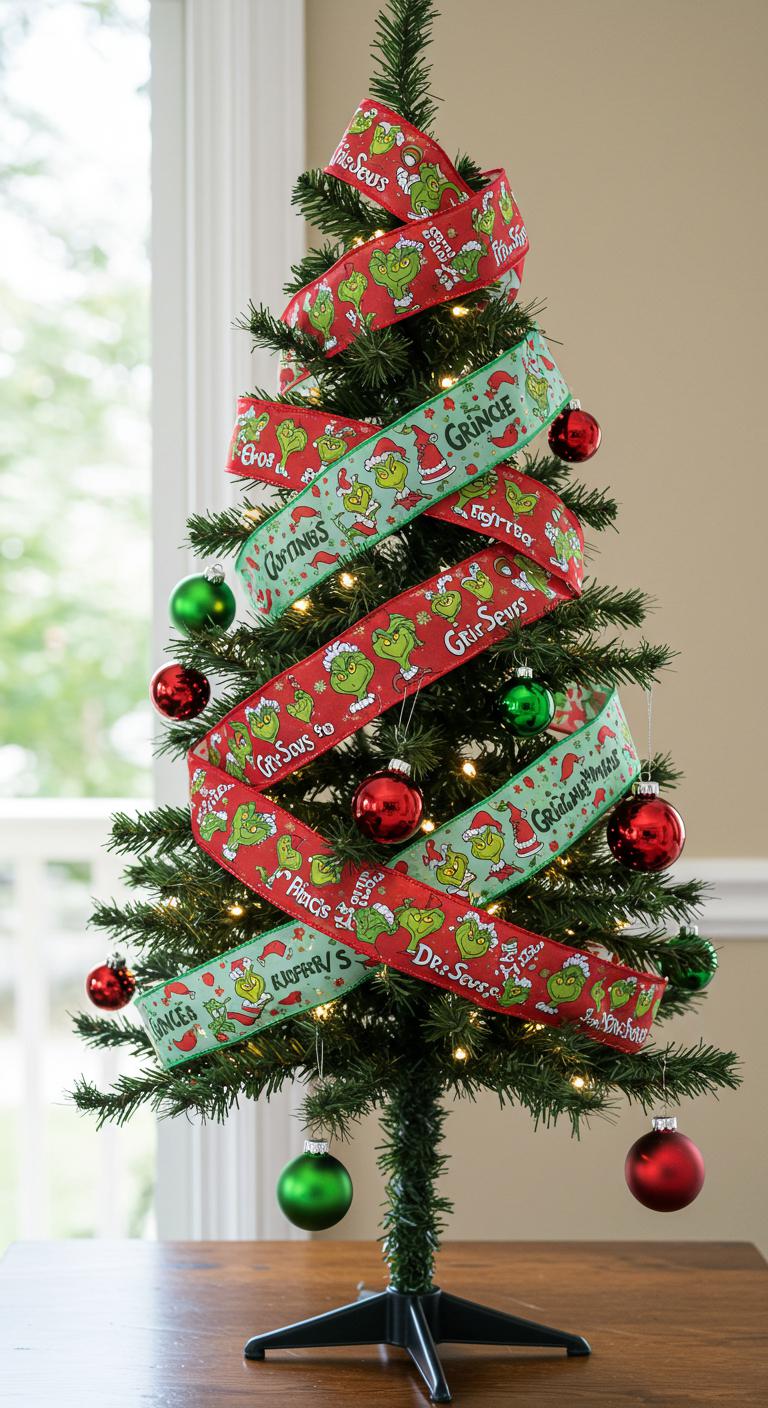
Start by wrapping a slim tabletop tree in wide ribbon printed with Dr. Seuss grinch quotes. Layer ribbon diagonally, secure with discreet pins, photograph each stage. Add small ornaments where ribbons cross for contrast. You’ll love the free-spirited look—keep shots close, natural light, and note ribbon crafting tips in captions so others can recreate your bold, whimsical tree.
Grinchy Pom-Pom Tassel Tree
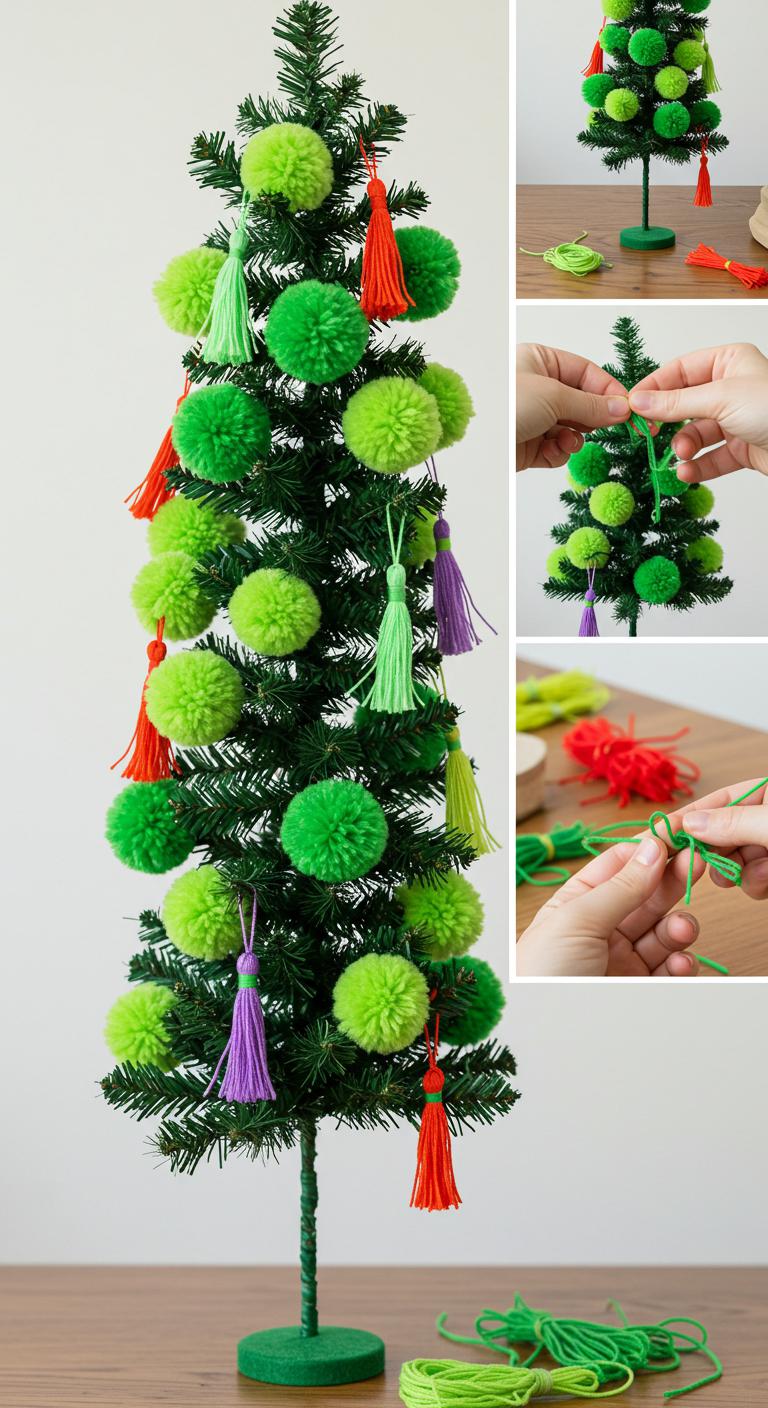
Give your slim tabletop tree a playful twist by layering bright Grinch-green pom-poms and coordinating tassels; you’ll work in small sections, photograph each step, and build texture and movement as you go. Pick pom pom colors, alternate sizes, and attach with simple knots. Use basic tassel techniques for sway, trim ends evenly, and shoot close-ups so your free-spirited process looks effortless and joyful.
Grinch Heart Lighted Tree
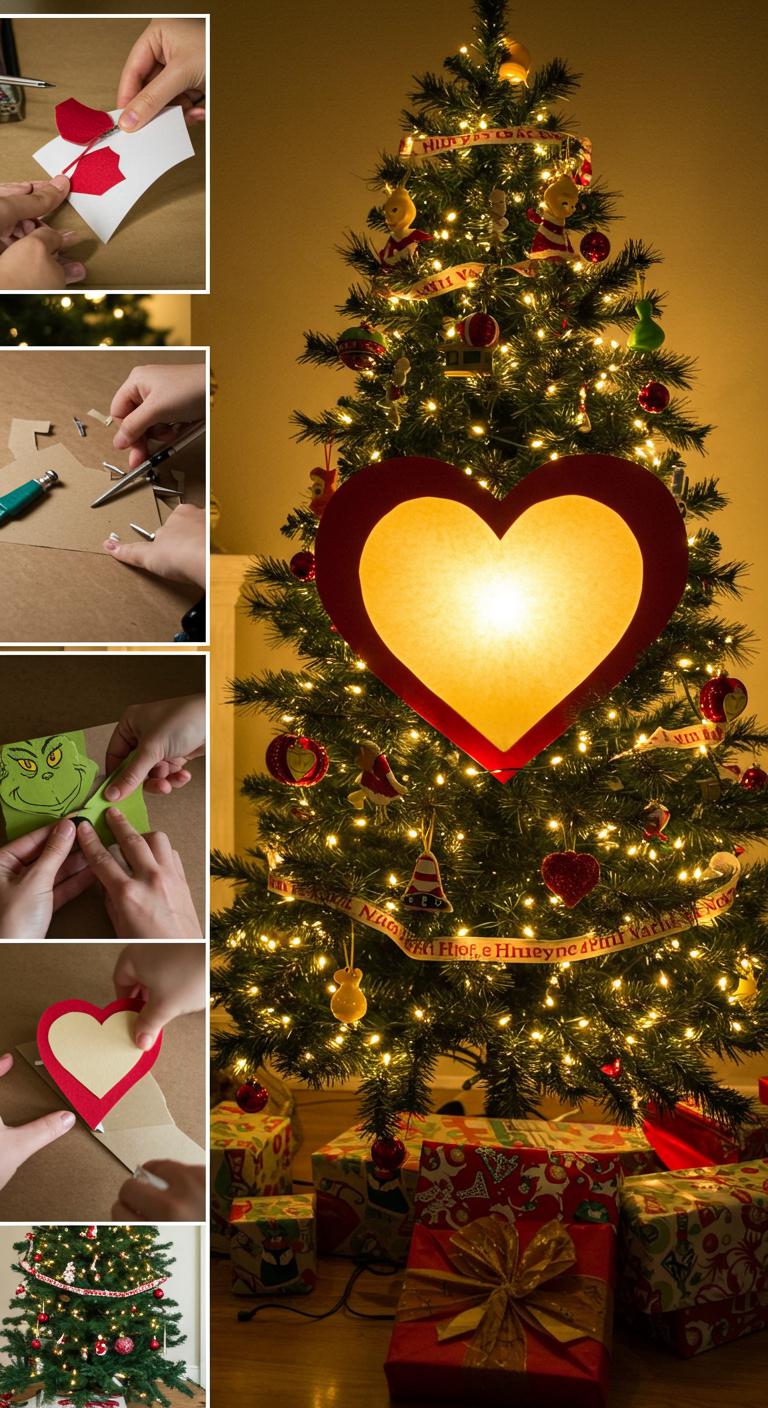
If you loved the playful pom-pom tree, you’ll enjoy creating a Grinch Heart Lighted Tree that focuses on a glowing focal point. Start by shaping a felt or cardboard heart, string warm LEDs through it, and mount centrally. Photograph each step for reference. Add simple Grinch heart decorations around the tree, experiment with lighted tree ideas, and tweak positioning until the glow frees your holiday vibe.
Grinch and Max Pet-Themed Tree

Think of your Grinch and Max Pet-Themed Tree as a playful duet where the Grinch’s mischief meets Max’s loyal charm — you’ll begin by selecting a small-to-medium tree and gathering pet-inspired ornaments, ribbon, and a few faux antlers for Max.
Step 1: drape green and red ribbon.
Step 2: add Grinch pet costumes miniatures and Max ornament ideas.
Photograph each layer, share freely.
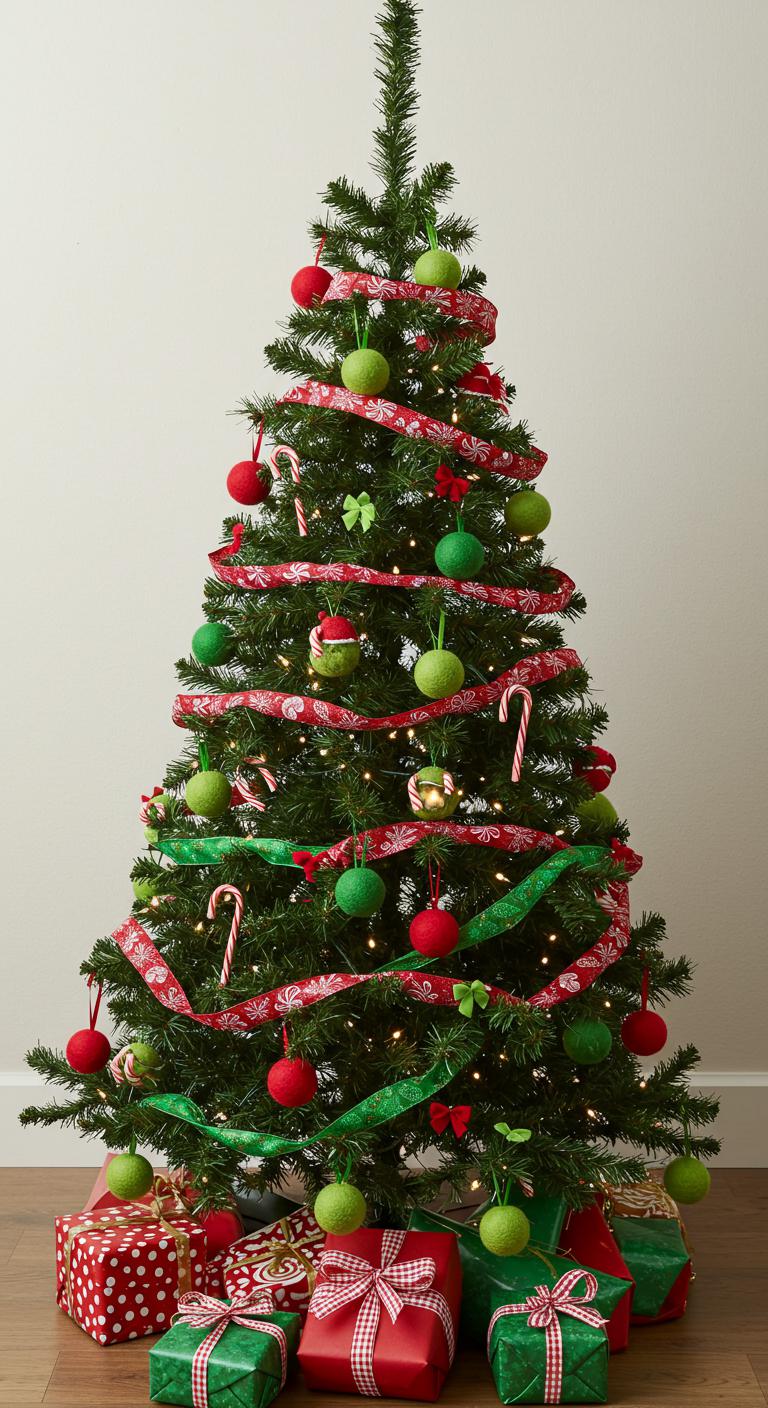
Grinchy Candy Cane Spiral Tree

Start by picking a slim, small-to-medium tree so you can wrap a bold candy-cane spiral without crowding the branches; you’ll work in layers, photographing each step to capture the candy-striped rhythm as you go. You’ll secure red and white ribbon, gently spiral outward, add green accents, and shoot progress shots. Follow this Candy Cane Crafts Spiral Tree Tutorial for a freeing, photo-friendly finish.
Grinch Felt Ball Tree
After wrapping your tree in candy-cane ribbon, swap gears and outfit a slim tree with felt balls for a softer, more whimsical Grinch look.
Choose grinch felt in greens and reds.
Step 1: string varying sizes.
Step 2: stagger heights for balance.
Photograph each stage for easy repeats.
Hang simple festive decorations like tiny bows.
Enjoy playful, free-form styling.
Grinchy DIY Photo Ornament Tree
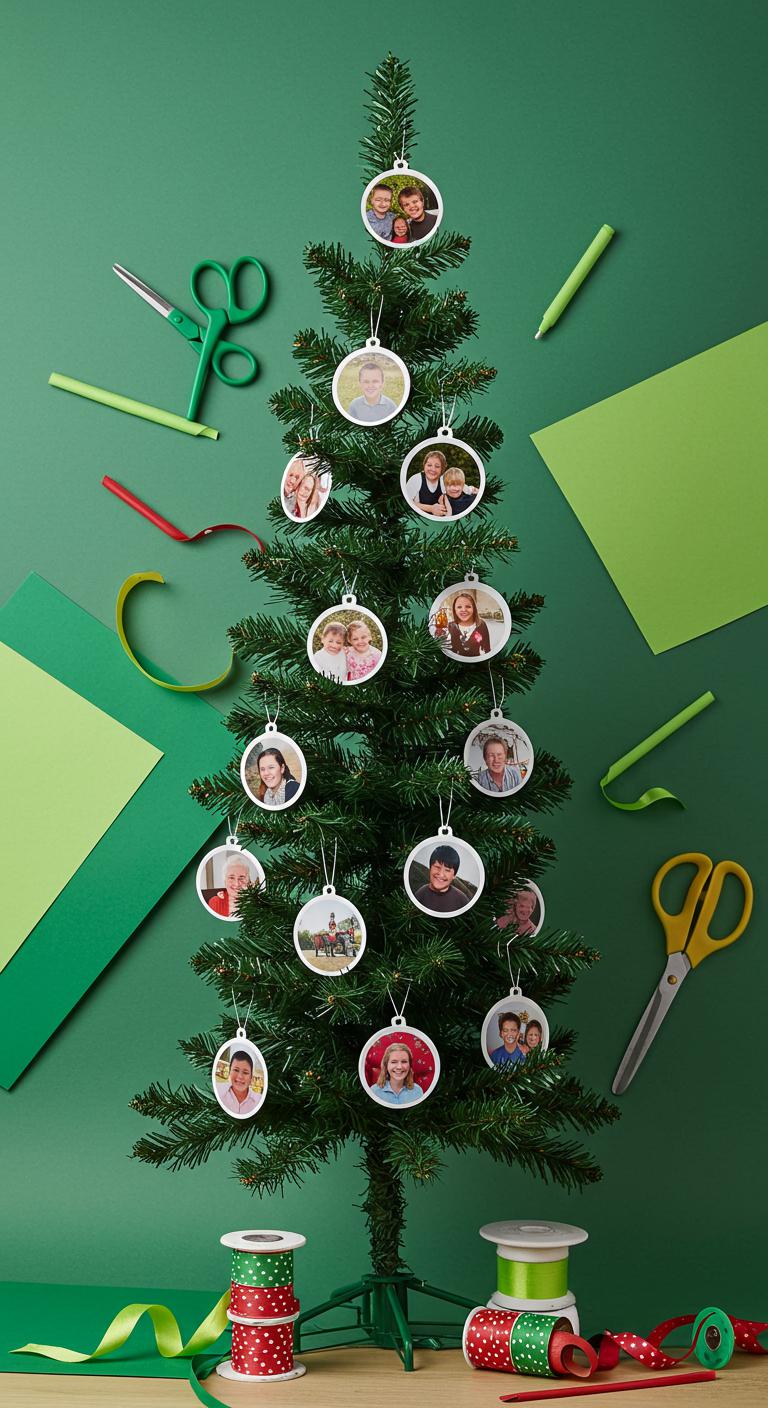
Once you’ve gathered a slim tree and a stack of favorite family photos, you’ll turn it into a Grinchy showpiece by making easy photo ornaments that double as keepsakes. Start by trimming photos to circles, add green cardstock backs, and laminate. Punch holes, tie ribbon, and cluster on branches. These Grinchy ornament crafting steps give you simple, freeing DIY photo ideas that celebrate memories.
Grinchy Burlap and Plaid Tree

If you loved making those circular photo ornaments, you’ll find the same hands-on fun when building a Grinchy Burlap and Plaid Tree—this look mixes rustic texture with bright Grinch green for a cozy, photo-friendly backdrop.
Start by wrapping tiers with burlap textures, layer plaid patterns ribbon, add green baubles, clip in photo pockets, and finish with a jaunty star so your shots feel free and festive.