
How to Add Rustic Hooks to Your Entryway for Fall
Imagine stepping into your home on a crisp autumn evening. The air is filled with the scent of pumpkin spice and fallen leaves crunch underfoot. As you hang your coat, your eyes land on a charming rustic hook rack that’s more than just functional—it’s downright inviting. Adding rustic hooks to your entryway is an easy and stylish way to welcome fall vibes while keeping clutter at bay.
Whether you live in a cozy cabin or a downtown apartment, these hooks bring warmth and character to the busiest part of your home. Ready to roll up your sleeves? Let’s dive into how you can add rustic hooks to your entryway and bring that perfect fall feeling indoors.
Getting Started: Choosing the Perfect Rustic Hooks
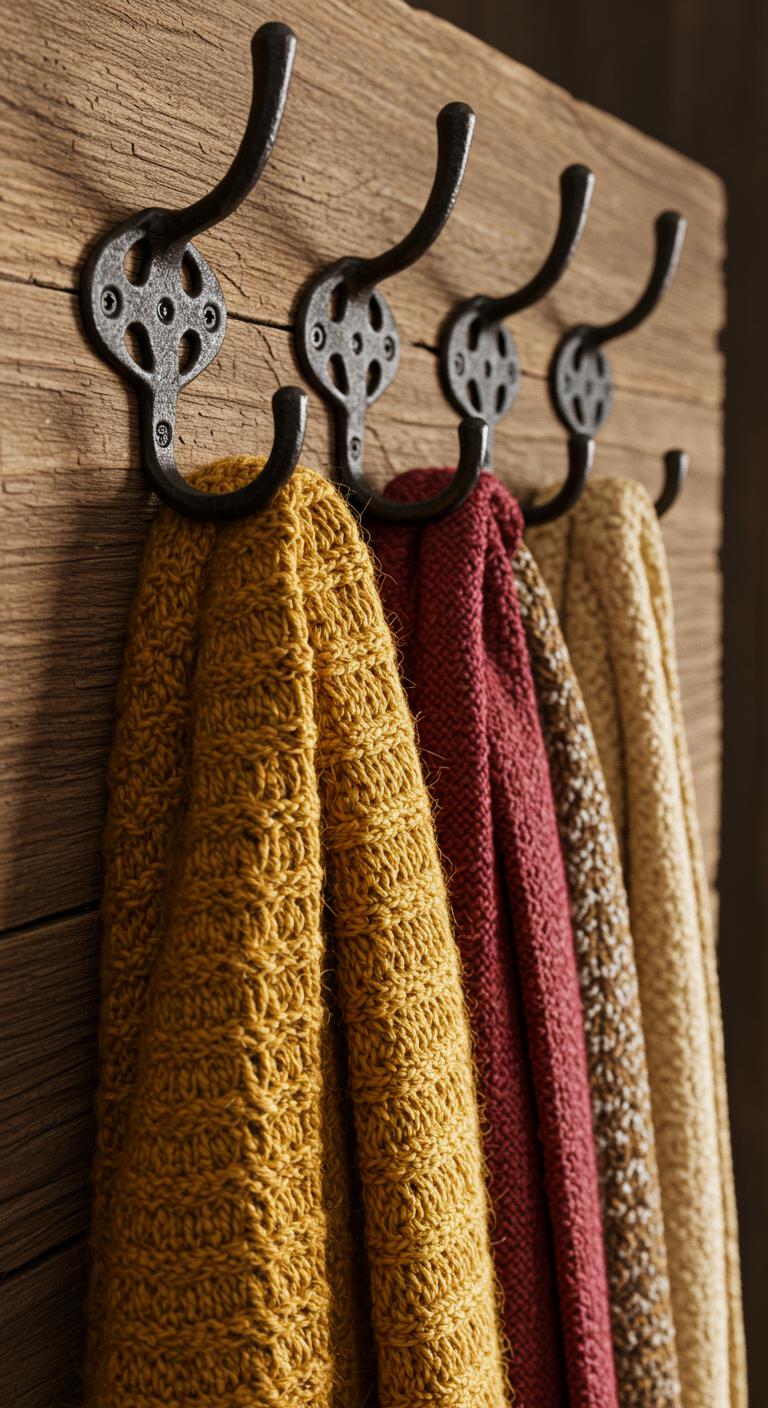
Before hammering nails into your wall, it’s key to pick hooks that complement your space and style. Rustic doesn’t mean one-size-fits-all—it’s all about natural textures, warmth, and a touch of vintage charm.
Here’s what to consider:
- Material: Wood, wrought iron, leather, or a mix. Look for reclaimed or distressed finishes.
- Size: Hooks should be large enough to hold jackets, bags, or hats comfortably.
- Mounting Style: Individual hooks, a plank with several hooks, or a custom DIY setup.
- Color Palette: Earthy tones like deep browns, muted greens, or black iron work perfectly for autumn aesthetics.
Shopping tip: Check out local thrift stores, flea markets, or Etsy for one-of-a-kind finds that tell a story.
Preparation: Measuring, Marking, and Tools You’ll Need
Once you’ve picked your hooks, preparation makes all the difference between a wobbly rack and a statement piece.
Follow these basics:
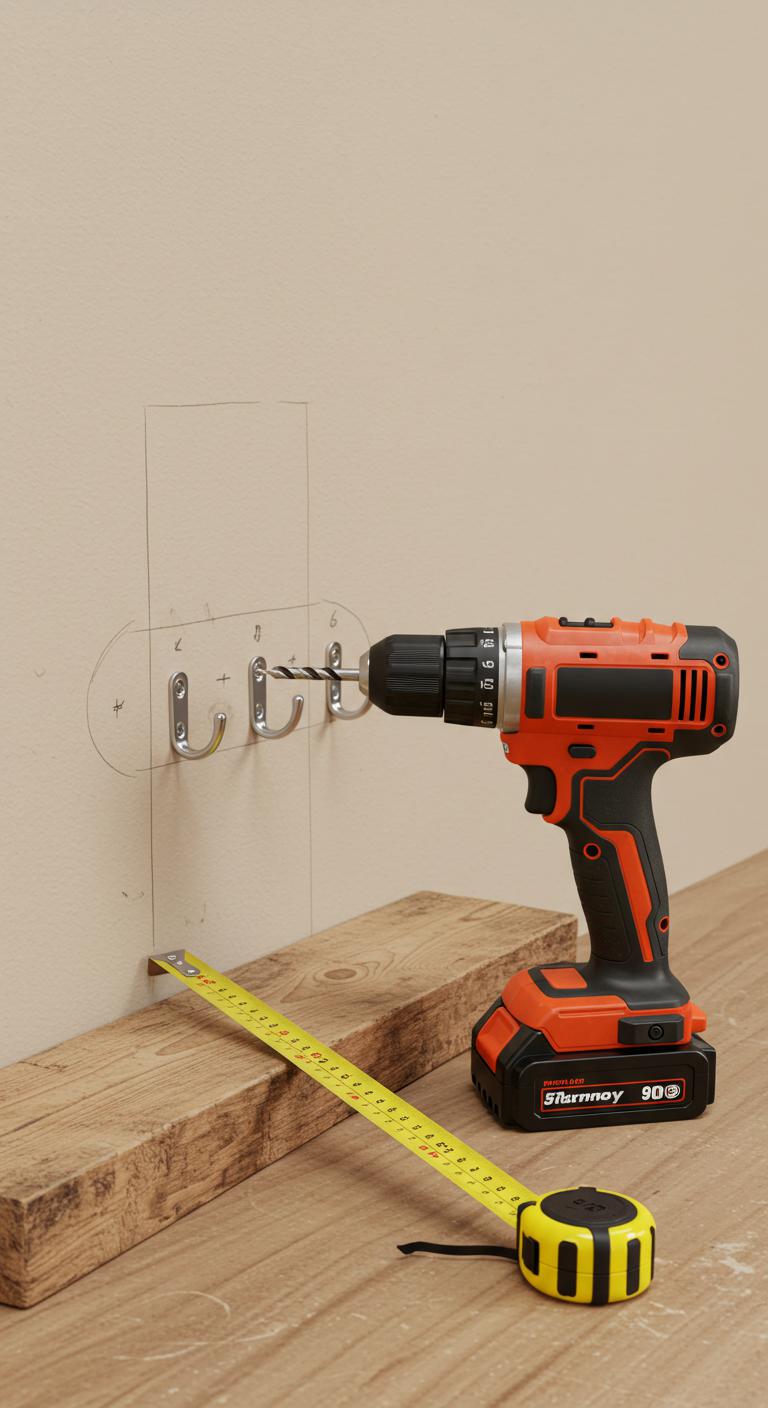
- Measure Your Space: Decide where on your entryway wall the hooks will go. Ideally, they should be eye-level and spaced to fit seasonal gear.
- Mark the Wall: Use a pencil and a level to mark evenly spaced points for your hook screws or mounting brackets.
- Gather Tools:
- Drill or screwdriver
- Tape measure
- Level
- Wall anchors (if mounting into drywall)
- Pencil
Pro tip: If you’re repurposing an old wood plank, sand down rough edges and give it a light coat of varnish or whitewash for enhanced warmth.
Installation Steps: From Wall to Wow in Simple Moves
Here’s an easy step-by-step for installing your rustic hooks:
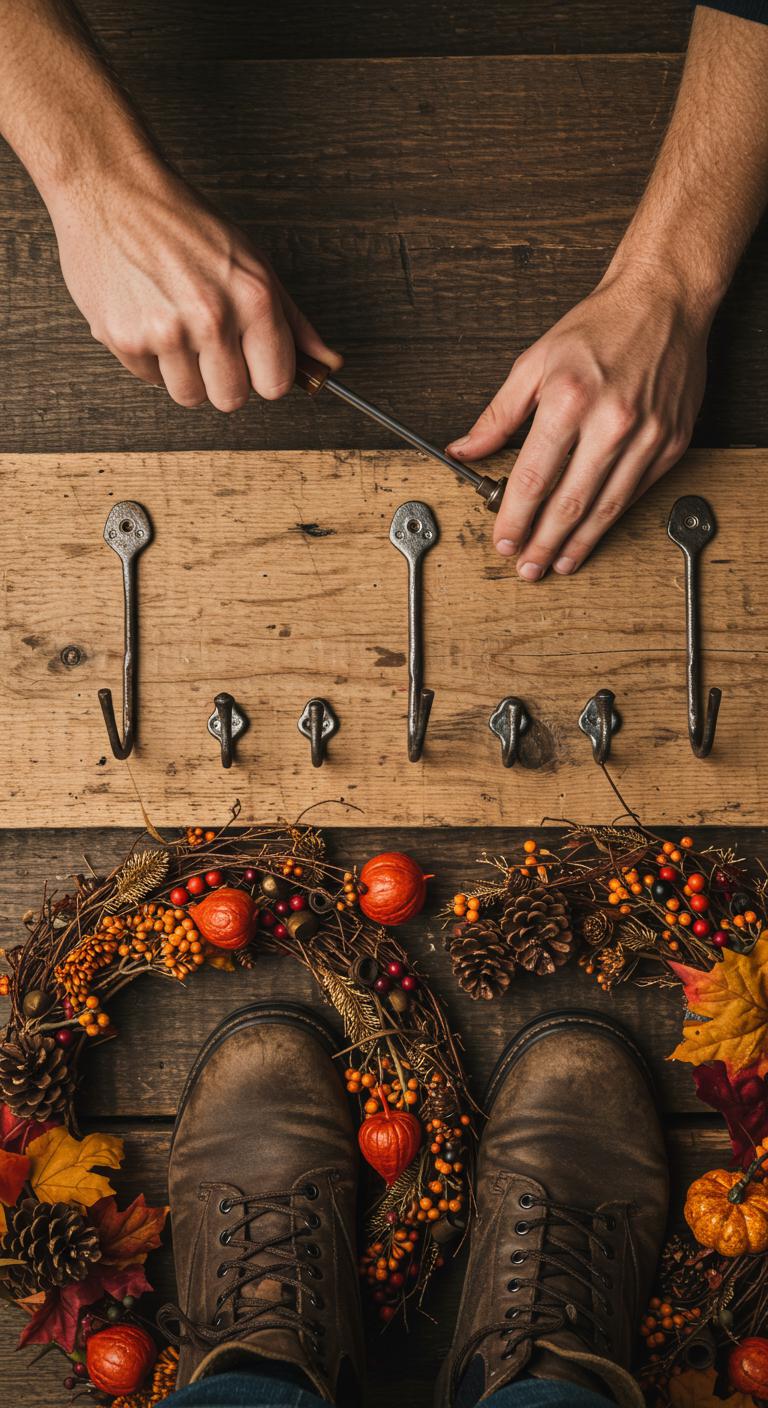
- Mark Drill Holes: With the plank or individual hooks held to the wall, mark drilling points precisely.
- Drill Pilot Holes: For a secure hold, start pilot holes where you’ll attach screws.
- Use Anchors If Needed: If you’re installing on drywall without studs, insert wall anchors to keep hooks sturdy.
- Screw Hooks or Plank Into Place: Attach hooks individually or fasten the full plank.
- Double Check Stability: Gently tug hooks to ensure everything’s tight.
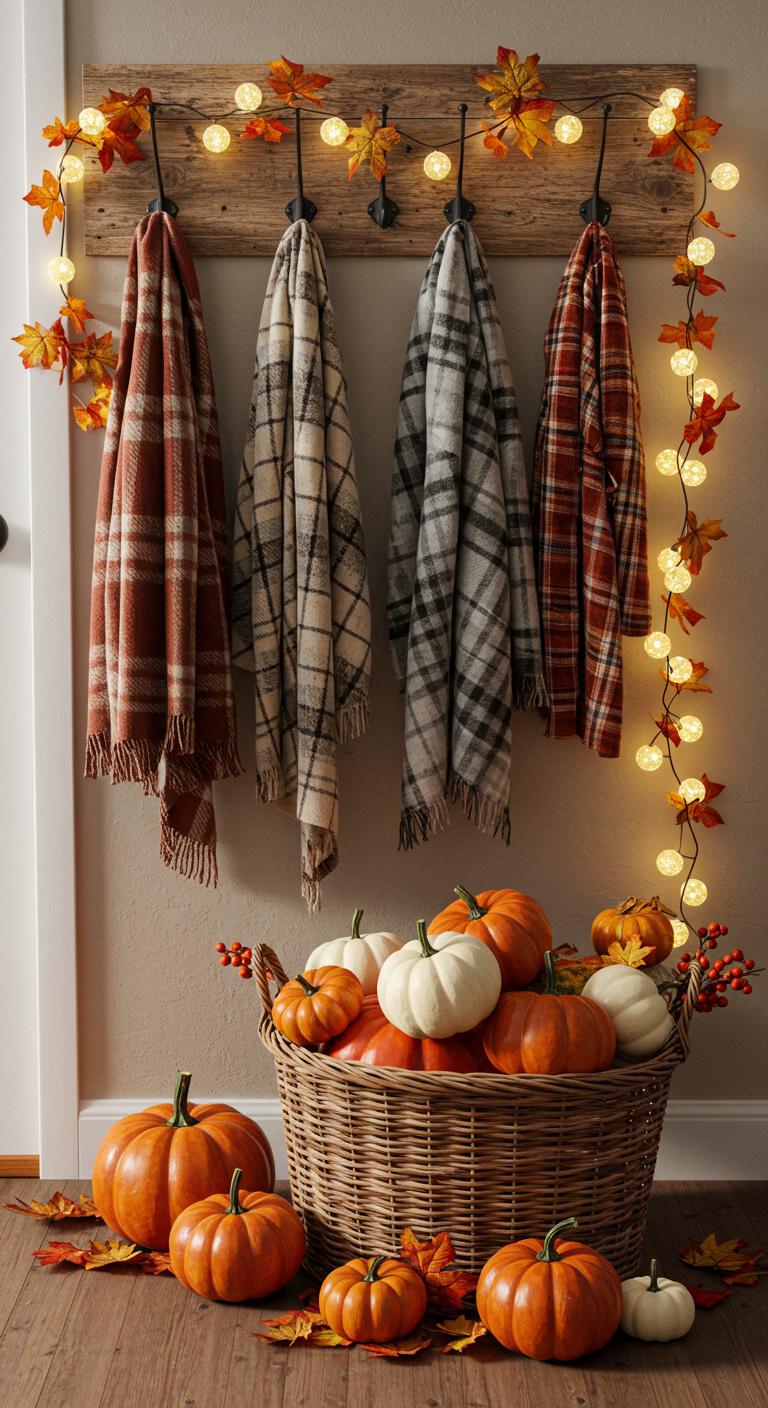
- Add Hooks and Decorate: Hang coats, hats, and fall-inspired accessories like woven baskets or garlands.
Don’t rush—taking the time to install carefully guarantees your hooks will hold up to heavy jackets and constant use.
Best Practices: Styling Your Entryway with Rustic Hooks
Having hooks is just the start; styling makes your entryway Instagram-worthy—and super cozy.
Try these tips:
- Mix Textures: Combine leather straps, cast iron, and wooden hooks for interest.
- Add Seasonal Elements: Swap out hanging scarves or aprons for mini faux pumpkins, pinecones, or dried floral bunches during fall.
- Use Coordinated Storage: Place matching baskets or a wooden bench underneath for shoes and gloves.
- Layer Your Lighting: Use warm string lights, lanterns, or candles for glowing warmth.
- Keep It Practical: Don’t overload hooks; leave room for easy access and neat appearance.
This blend of functionality and décor keeps your mornings smooth and your guests impressed.
Troubleshooting Tips: When Things Don’t Go as Planned
Sometimes DIY doesn’t go perfectly the first time—no worries! Here’s how to fix common issues:
- Hooks Feel Loose: Double-check if anchors are used; try bigger anchors or toggle bolts for extra strength.
- Plank Warps or Pulls Away: Use additional screws or wall brackets to support the weight.
- Uneven Hook Spacing: Use a level and measuring tape to adjust and re-drill as needed.
- Damage to Walls: Patch with wall filler and repaint carefully for a fresh look.
Experienced or new to DIY, a little patience and a steady hand make all the difference.
Advanced Ideas: Personalizing Rustic Hooks for a Signature Look
Is your entryway ready for a unique twist? Try these creative upgrades:
- Custom Painted Hooks: Add subtle gold leaf or distressed paint for a vintage-fall flair.
- Monogrammed Planks: Paint or carve your family’s initial onto wood for personalization.
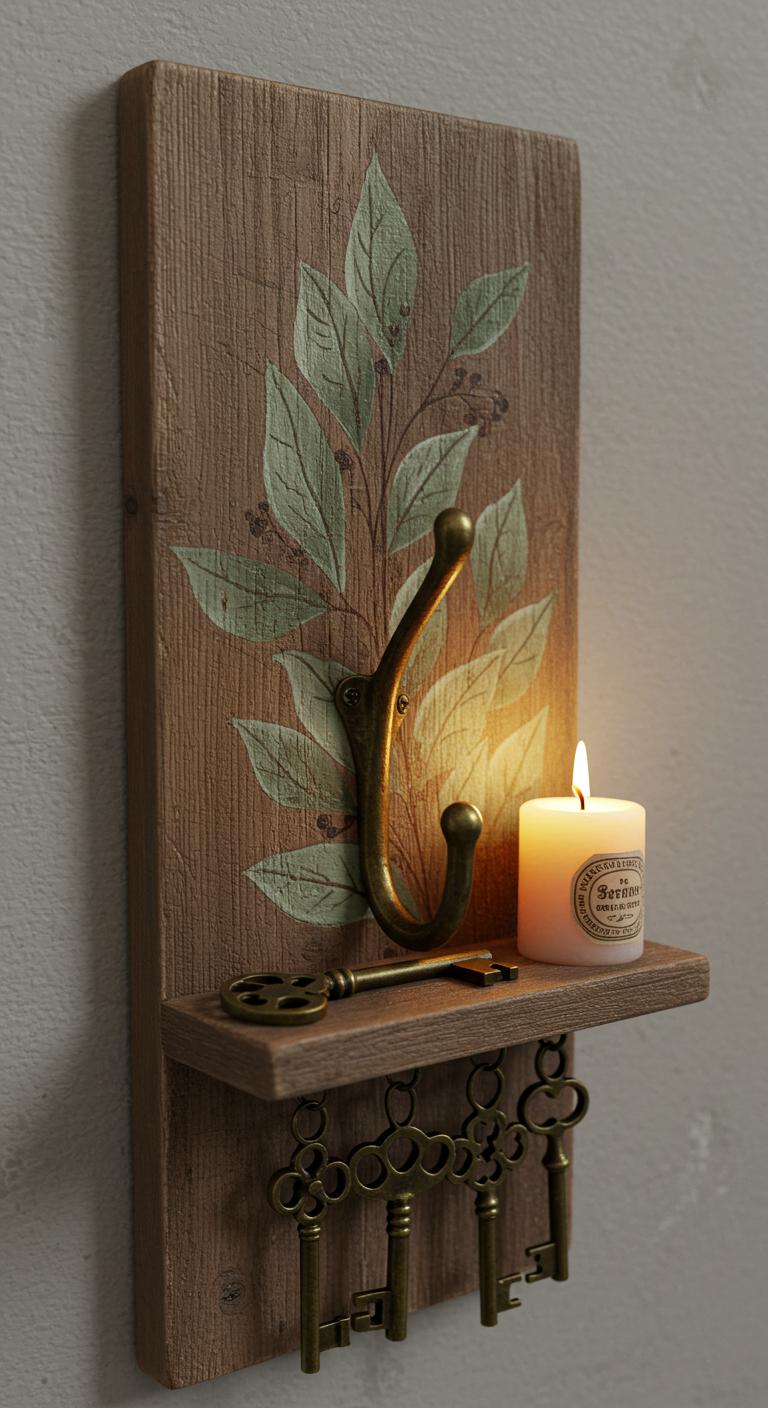
- Integrated Shelves: Combine hooks with a small shelf above for keys and mail.
- Multi-Level Hooks: Mount two rows—one high for adults, one low for kids or pets.
- Natural Embellishments: Attach mini pine branch bundles, burlap ribbons, or cinnamon sticks to hooks seasonally.
These personal touches make custom rustic hooks stand out as both charming and conversation-starting.
Fall is the season for warmth, texture, and welcoming touches in every corner of your home. Adding rustic hooks to your entryway is not only a functional upgrade but a seasonal style statement that can grow with you year-round.
Save this guide for later, and when you’re ready—transform your entryway into the cozy, organized, fall-ready space you’ve been dreaming of! Happy decorating!