Okay, so you and I both know how heartbreaking it is to lose a favorite dahlia over winter – I learned that the hard way the first year I tried to “wing it” with storage. Dahlia tuber storage and overwintering became my obsession after that cold spring when half my clumps never came back to life.
This little guide exists because I wanted something simple, warm, and realistic to follow – not a bunch of garden-speak that makes you feel dumb. I’ve dug, labeled, repotted, and absolutely bungled a few batches, and I’ll tell you which methods saved my sanity (and my dahlias).
Stick with me and you’ll get clear, practical steps, clever tricks for small spaces, and the mistakes to avoid so your tubers wake up happy and ready to bloom next season.
12 Easy Dahlia Tuber Storage and Overwintering Ideas You’ll Actually Use
Gently Dig and Clean
I always wait until foliage has a good frost-kiss before digging – it softens the neck and makes division cleaner. When I first started, I used scissors and mangled a few crowns, which taught me to be patient and use my hands more than tools. If you’re nervous, mark the tuber neck with a stick or removable tag so you don’t nick the growth eye later on, and remember dirt is okay – you’ll trim gently afterwards.
Trim, Don’t Overdo
I trim the stems to about 2-3 inches leaving a little neck – too short and you lose the handle for moving them, too long and they take up more space. Once I accidentally left stems long and they crowded each other in storage, causing a mushy mess, so learn from my rookie mistake. You’ll also want to cut away obviously rotted parts right away, using a clean knife, then dust with cinnamon if you’re into old-school plant remedies – it works for me.
Shake Off Excess Soil
Honestly, I prefer shaking the tubers gently rather than washing them – less shock. Once I had a rainy dig day and tried rinsing everything; drying took forever and I almost lost some to mold. A light brush and a few hours in the sun (not baking) usually does the trick for me, and you should aim for them to feel slightly dry to the touch before packing away.
Divide for Health
If your clump is large, divide into sections each with at least one eye – that’s what I do so each tuber can be a full plant next year. I remember dividing a monster clump and ending up with six healthy starters that summer; it felt like growing a mini-dahlia family. Don’t stress if a piece looks small – sometimes those are the scrappy ones that surprise you.
Label Everything Clearly
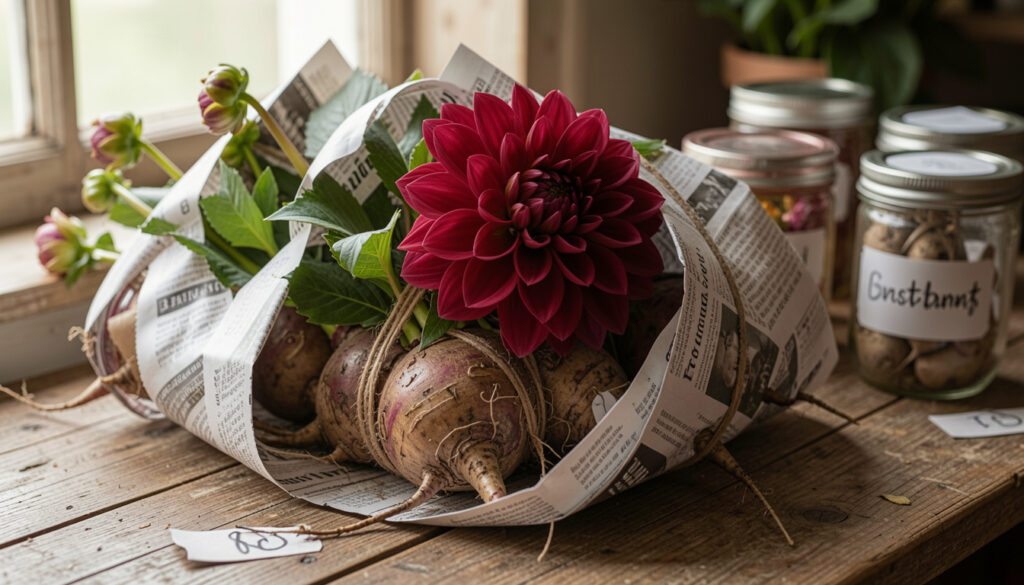
I can’t overstate this – write the variety name and a short note on the paper or tag, because memory lies. One year I labeled by color only and then tried to remember which shade was ‘Pink Whisper’ versus ‘Blush Queen’ and it was chaos. Use pencil on paper tags or masking tape on jars; I even taped a tiny photo once when I was feeling extra organized.
Choose the Right Packing Medium
I like peat moss or dry vermiculite for cushioning because they hold a little moisture without getting soggy, which keeps rot at bay. One winter I tried shredded newspaper only and some tubers got too damp in the bottom of the box – lesson learned. So now I wrap each tuber in a thin layer of moss, tuck it in a box, and feel smugly proud when they all wake up in spring.
Use Breathable Containers
Cardboard boxes, wooden crates, or plastic bins with holes are my go-tos since they protect but still allow air movement. I once used sealed plastic totes and a hidden puddle formed – never again. If you have limited space, stack smaller boxes carefully and don’t compress the tubers; they like a little personal bubble.
Keep Temperatures Consistent
A cool, frost-free spot around 40-50°F is ideal, like an unheated garage or basement that rarely drops below freezing. My tiny apartment lacks such luxury, so I stash boxes in a climate-controlled closet and check them monthly – it’s a small fuss that pays off. If temperatures swing wildly where you are, consider adding a thermometer to monitor things – you’ll thank yourself in March.
Check Monthly for Trouble
Pop the lid once a month and inspect for softness, mold, or desiccation; catching issues early salvaged many a tuber I thought was gone. Once I rescued one that had dried slightly by misting it and adjusting the packing – felt like a plant doctor. Trust your eyes and nose; if something smells funky, remove it fast to protect the neighbors.
Label Moisture Levels
I started scribbling “slightly moist” or “dry” on each box because different varieties like different conditions. That note saved me when I rechecked in February and adjusted a few micro-climates in my storage area. You don’t have to be perfect – a tiny sticky note can become your seasonal bible.
Store Large Tubers Separately
Big dinner-plate dahlias often need their own boxes because they can bruise smaller ones and take more space than you expect. I once tried jamming everything into one bin and woke up to a sad pile of mushy giants – avoid that if you can. If you’re tight on room, rotate which varieties you keep versus re-buying each year, and be honest with which ones you truly love.
Consider Replanting in Pots
If you have a warm-ish basement, potting tubers up in soil and keeping them slightly moist can work really well, especially for precious or rare varieties. I tried this once for a sentimental variety my grandma gave me and it felt comforting to see green in February. Keep light low and temps cool; new shoots can pop early so keep an eye out.
How to Actually Make This Work For You
Okay, here’s the real deal – pick a single method and stick with it for a year so you can learn how your home behaves, because consistency beats perfection every time. If you’re short on space, prioritize your favorites and be honest about which tubers you’ll re-buy versus store, then mark everything clearly so March isn’t a mystery. Finally, schedule a monthly check-in – five minutes with a flashlight and a notebook will save you hours of heartbreak and a bunch of plants.
When should I dig my dahlias?
Dig tubers after the first hard frost when the foliage has blackened slightly – that tells you the plant has gone dormant. Waiting too long risks freezing damage, but pulling too early can leave tubers underdeveloped.
How should I treat rotted or soft tubers?
Cut away soft or rotten bits with a clean knife and discard the bad pieces; healthy-looking sections can sometimes be saved if they have a firm eye. Dust with cinnamon or a fungicide if you want extra insurance and keep those pieces isolated from healthy tubers.
Can I leave tubers in the ground?
In very mild climates you can leave dahlias in the ground with heavy mulching, but in most zones it’s safer to lift them to avoid wet freeze-thaw cycles. If you try in-ground storage, use at least 8-12 inches of straw or mulch and monitor for sogginess.
What if I have limited storage space?
Use vertical space with shallow shelving and small labeled boxes, or consider potting up a few prized tubers to overwinter indoors under low light. You can also prioritize varieties you love most and re-buy cheaper ones next season to save room.