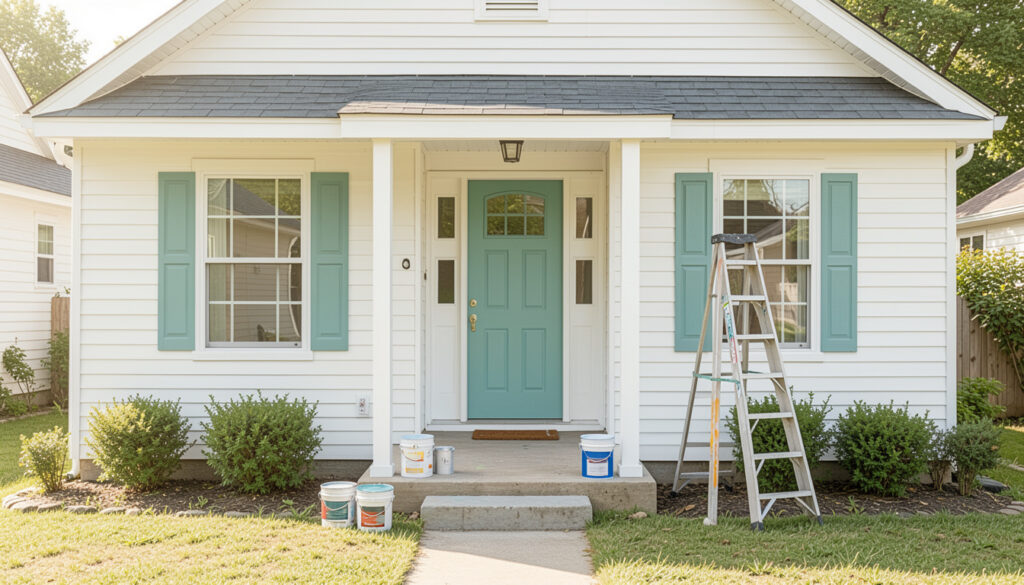
Okay friend, if you are staring at your house and thinking “I could paint that,” this guide about home painting exterior for beginners is for you. Painting your home’s exterior feels huge and a little terrifying, but it’s one of the most rewarding projects you can tackle on a weekend.
I wrote this because I remember my first time scraping peeling paint at dawn, covered in dust and convinced I had bitten off more than I could chew – and then falling in love with the transformation. I learned a bunch of shortcuts and real mistakes the hard way, so I want you to skip the dumb errors and enjoy the process.
Read on and you’ll get 12 easy, picture-backed ideas with honest tips, tool guides, and quick safety notes so you can actually finish the job and be proud of it.
These 12 Easy Home Painting Exterior For Beginners
Prep Like A Boss
Good prep makes the rest feel like a breeze, and that includes scraping, sanding, and cleaning the surfaces until they look forgiving. I always pressure wash first and let everything dry for at least 48 hours when weather allows, because paint sticks to clean surfaces better and lasts longer. If you take the time here, you’ll save weeks of touch-ups down the line.
Choose Your Paint Wisely
There’s a ton of options – latex is forgiving and easy for beginners, while oil blends can be durable on trim. Ask for exterior-grade, fade-resistant formulas at the store and get a sheen that hides imperfections without looking flat; satin is often a kind friend here. I once learned the hard way that cheaper outdoor paint lost its color within two seasons, so treat this as an investment.
Master The Trim Game
Trim transforms the look, so tape it carefully and use a small angled brush for neat corners and windows. Start with the trim before rolling the main walls to avoid accidental splatter, and keep a damp rag handy to wipe mistakes immediately. When I painted my first trim, I found that slow, steady strokes beat speed every time.
Protect Your Plants
Use drop cloths and plastic sheeting over shrubs and planters, and wet any nearby soil so paint dust won’t cake onto leaves. You don’t need to win the battle with Mother Nature – simply move potted plants or loosely cover garden beds to keep the mess minimal. I wrapped my rosebushes in breathable fabric once and it felt like a tiny, polite surgery on the yard.
Right Tools, Less Drama
Invest in a quality roller with the right nap for your siding type, and a few good brushes for edges – cheap tools just make the job feel worse and take longer. A paint sprayer is tempting, but for beginners I recommend rollers and brushes until you feel confident with cleanup and control. When you use proper tools, you’ll notice how much neater the finish looks and how much faster you move.
Prime For Success
Primer bonds to raw or patched wood and covers old stains, creating a level base for your topcoat and preventing weird shine differences. You can skimp on primer at your own risk – it’s often the difference between a paint job that lasts two years and one that stays put for a decade. I used primer on a patch job once and it completely hid an old stain that would have screamed through light paint.
Slow, Even Strokes
Speed creates lap marks and uneven coverage; apply paint in slow, overlapping sections and keep a wet edge to avoid stripes. Work in manageable chunks so you can step back and inspect as you go, and adjust pressure on your roller to maintain a consistent coat. You’ll feel proud when the wall looks smooth and continuous instead of splotchy.
Paint With A Friend
Having someone to hold the ladder, cut in, or pass brushes turns the day from stressful to fun, and you’ll actually finish faster with two people. I remember laughing through an entire afternoon of painting with my neighbor while trading advice and music playlists, and the house looked incredible by evening. If you can, recruit a friend – it changes the vibe and your stamina.
Test Paint Colors Outside
Paint a few 12-inch squares in different spots and watch them at morning and late afternoon light to see how they shift in color. For exteriors, weather and surrounding greenery affect perception dramatically, so don’t rely on small chips under store lights. Once I tested two shades on my siding and a seemingly subtle difference ended up feeling like night and day in sunlight.
Ladder Safety First
Always set your ladder on a stable, level spot and use a ladder stabilizer if you’re working near gutters or uneven ground, and never overreach while on a step. Move the ladder frequently instead of stretching, and keep tools in a belt or on a secure platform to avoid trips. Safety is boring but essential – paint fades, injuries last.
Make Doors Pop
Doors and shutters are perfect spots to add a punch of personality without risking the whole house if you change your mind later. Use semi-gloss for easier cleaning and sharper highlights, and tape hardware for crisp edges that look professionally done. I painted my front door a contrasting color and neighbors actually stopped to compliment the whole house.
Seal And Protect Final Coat
Once your final coat is dry, add a clear sealer on wood trims or any vulnerable areas to guard against moisture and sun exposure. This step is especially helpful in rainy climates and gives your work a subtle sheen that reads like quality. If you skip this, expect more frequent touch-ups – and nobody wants that extra chore.
How to Actually Make This Work For You
Start by planning realistic blocks of time across multiple days and checking the forecast, then assemble your tools, primer, and paint in one trip so you avoid decision fatigue midproject; treat it like cooking where mise en place saves time and energy. Ask for help with ladder-holding and large rolling, and keep your phone camera handy to document finishes and color tests so you can compare later if you doubt your choices – small photos help you spot uneven spots you missed up close.
What paint finish should beginners pick?
Choose satin or low-luster for siding because it hides minor imperfections while still cleaning easily, and reserve semi-gloss for doors and trim for a crisp, durable finish – 2-3 sentences max fits here. Satin is forgiving and beginner-friendly.
Do I need primer on all surfaces?
Primer is essential for bare wood, repaired areas, or when covering a darker color with a lighter one; on intact, similar-colored surfaces you can sometimes skip it, but primer extends longevity and improves coverage. I usually err on the side of priming to avoid surprises.
Can I DIY a whole two-story house?
Technically yes, but consider renting scaffolding or hiring pros for high, hard-to-reach areas to ensure safety and a smoother finish; small houses are totally doable alone while larger projects benefit from help. Your comfort with heights should guide the decision.
How long before I can remove tape and touch up?
Remove painter’s tape within an hour or so of the paint becoming tacky but not fully cured to avoid peeling, and allow at least 24 hours before light touch-ups and a few days for full curing depending on weather. If humidity is high, give it extra time.