20 Homemade Christmas Ornaments for Beginners
You’ll find 20 easy, budget-friendly ornament projects you can make step by step, with simple materials and plenty of photo ideas to guide you. I’ll walk you through salt dough snowflakes, pinecone Santas, felt gingerbread, and more, showing quick tips, tools to keep on hand, and ways to personalize each piece. Try one or craft an entire set for gifts—keep going and you’ll have a tree full of handmade charm.
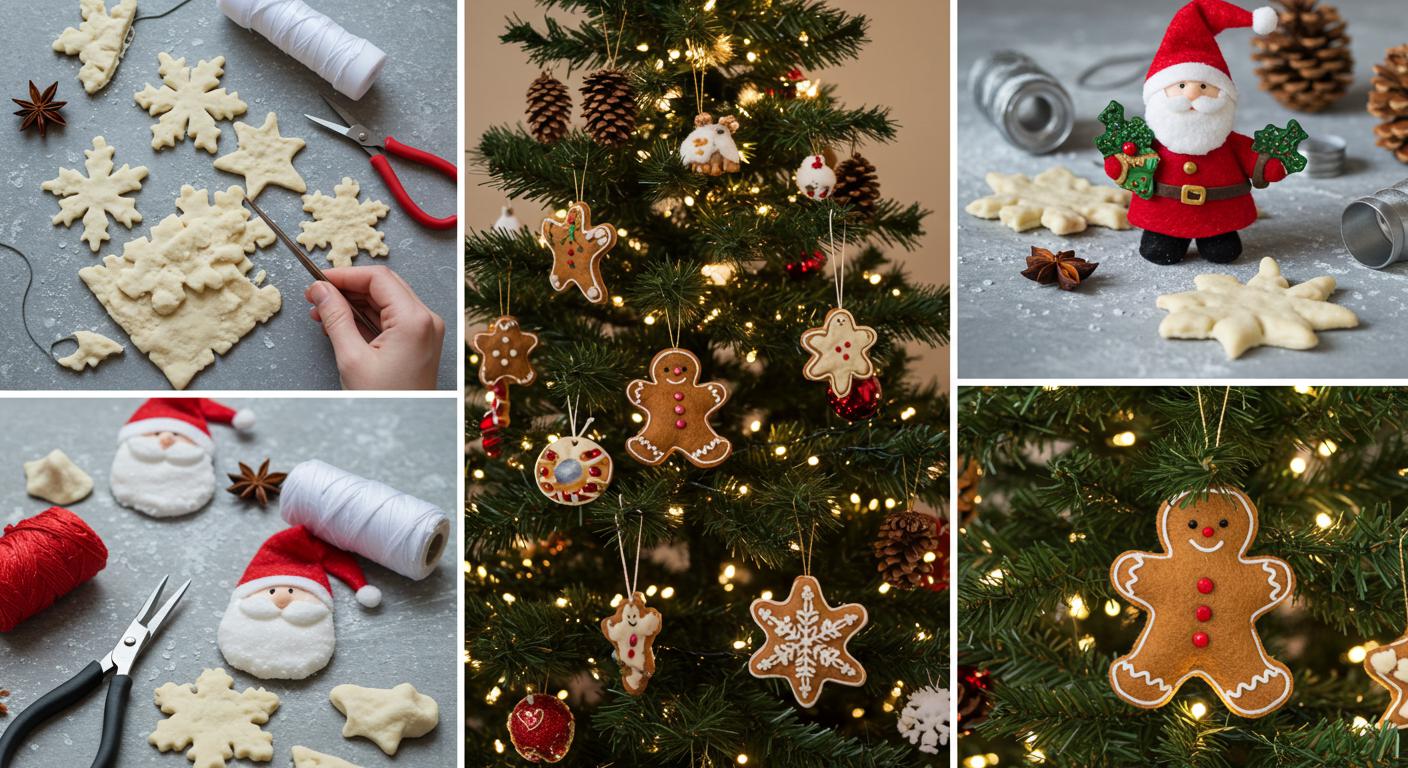
Salt Dough Snowflakes
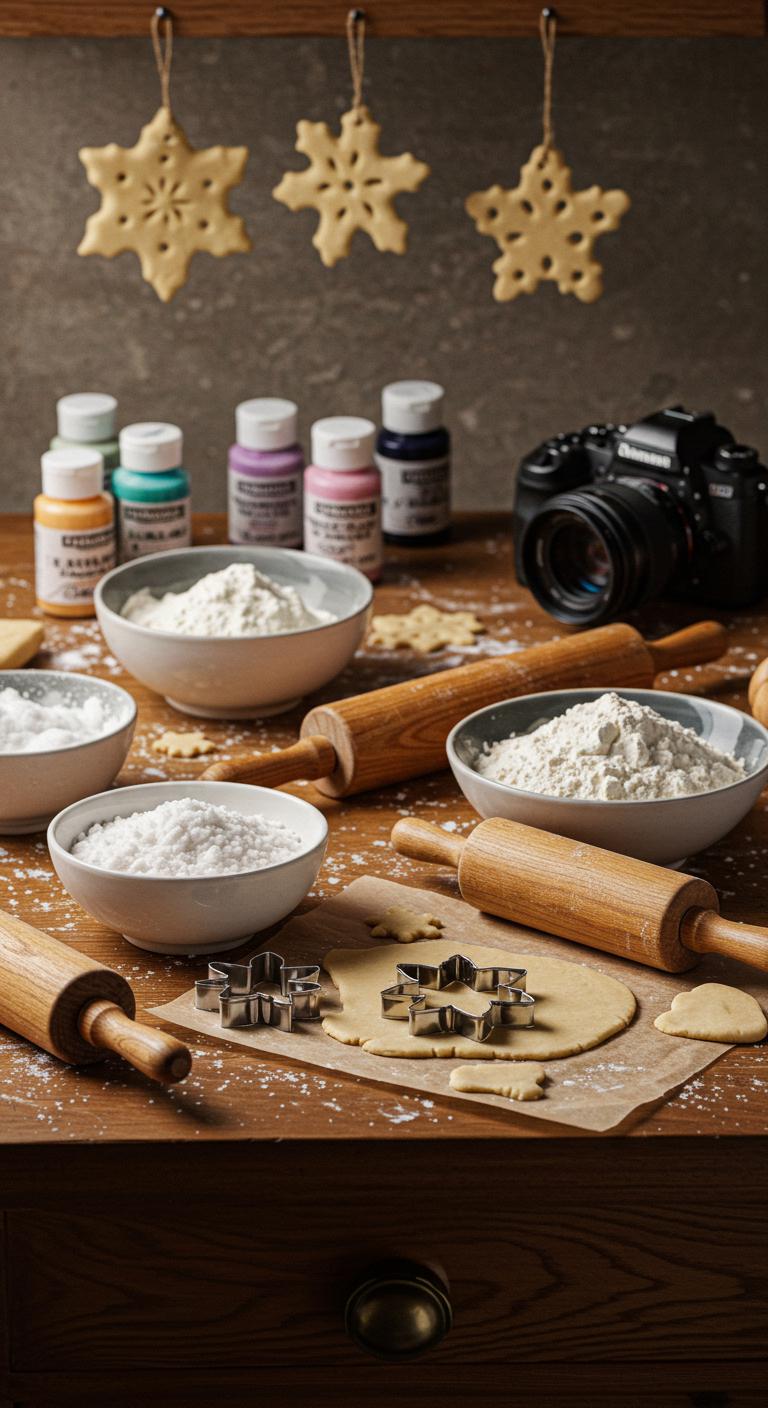
Salt dough snowflakes are an easy, budget-friendly project you can make with simple pantry ingredients and minimal tools. You’ll mix salt dough, roll to 1/4″, press cutters, and poke a hanging hole. Bake, sand, and paint using salt dough techniques. Try festive color options—metallics, pastels, or bold hues. Photograph each step; you’ll relish the freedom to customize.
Pinecone Santa Decorations
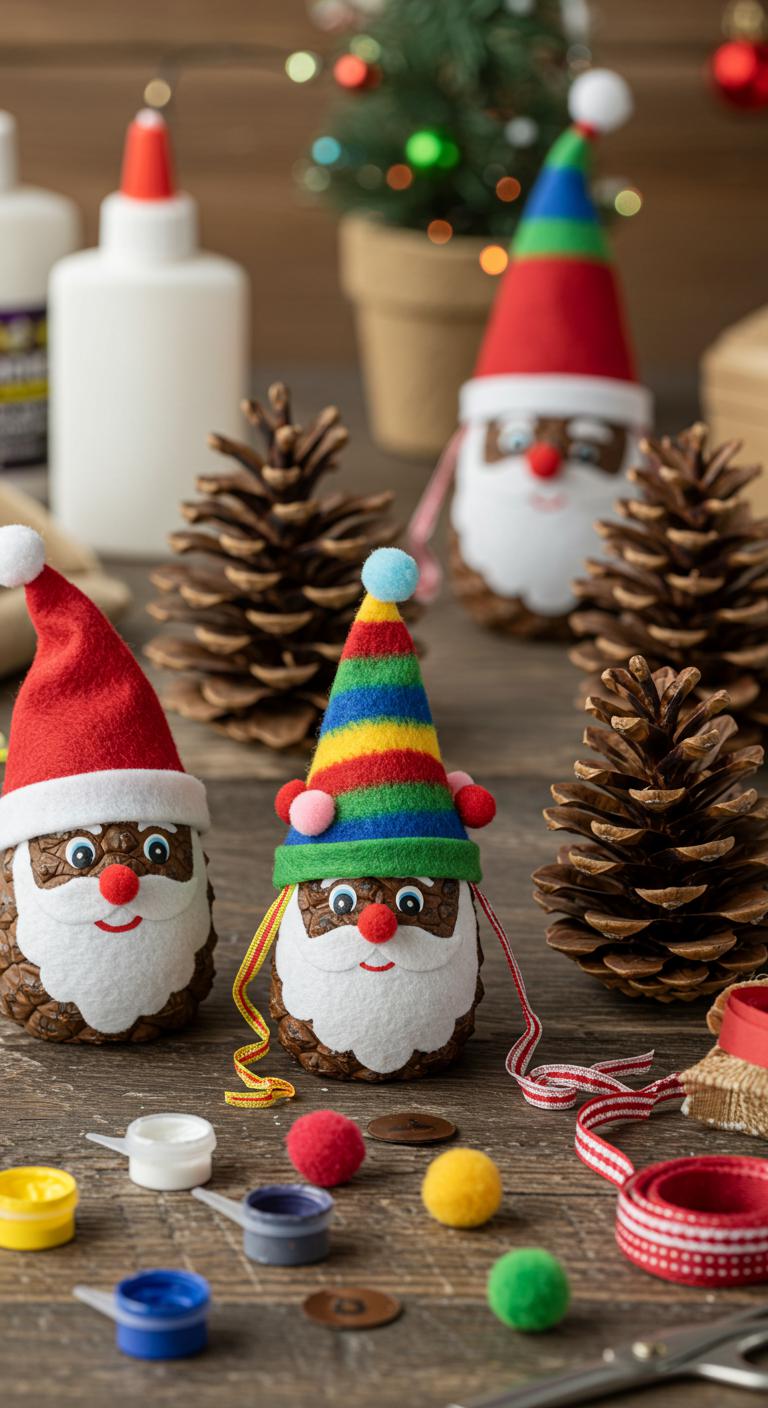
1 easy and charming craft, Pinecone Santa Decorations let you turn found pinecones into little holiday figures you can hang or tuck in a wreath. You’ll prep, glue a felt hat, paint a tiny face, and use pinecone painting for snowy highlights. Add festive embellishments like mini pom-poms and ribbon loops. Snap photos at each step to capture your joyful, free-spirited process.
Felt Gingerbread Men
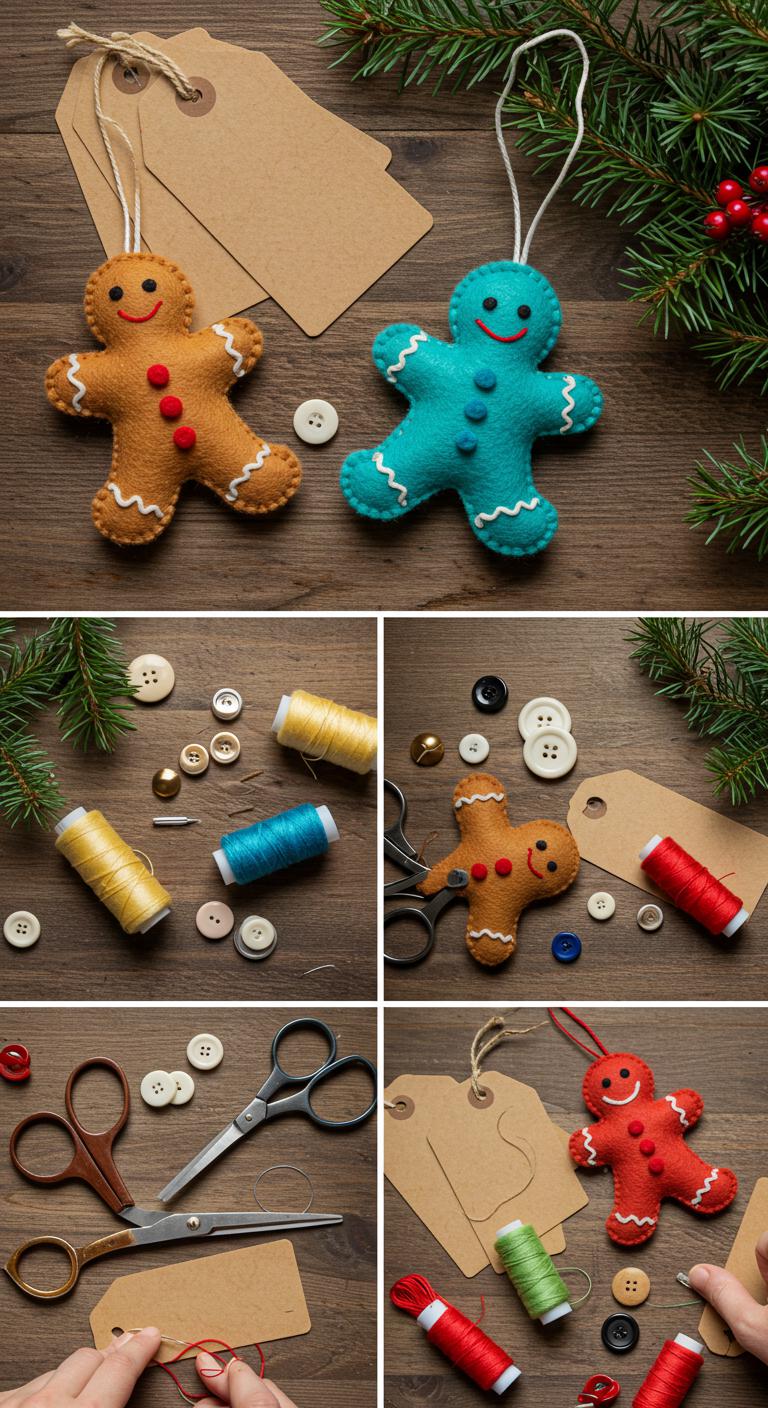
Make two simple felt gingerbread men in under an hour to add warm, handmade charm to your tree or gift tags. You’ll cut templates, stitch paired shapes, stuff lightly, and sew a loop. Follow quick photos for each step, choose free-spirited colors, and add buttons or embroidery. This felt gingerbread crafting creates festive felt decorations that feel joyful and easy to make.
Cinnamon Stick Reindeer
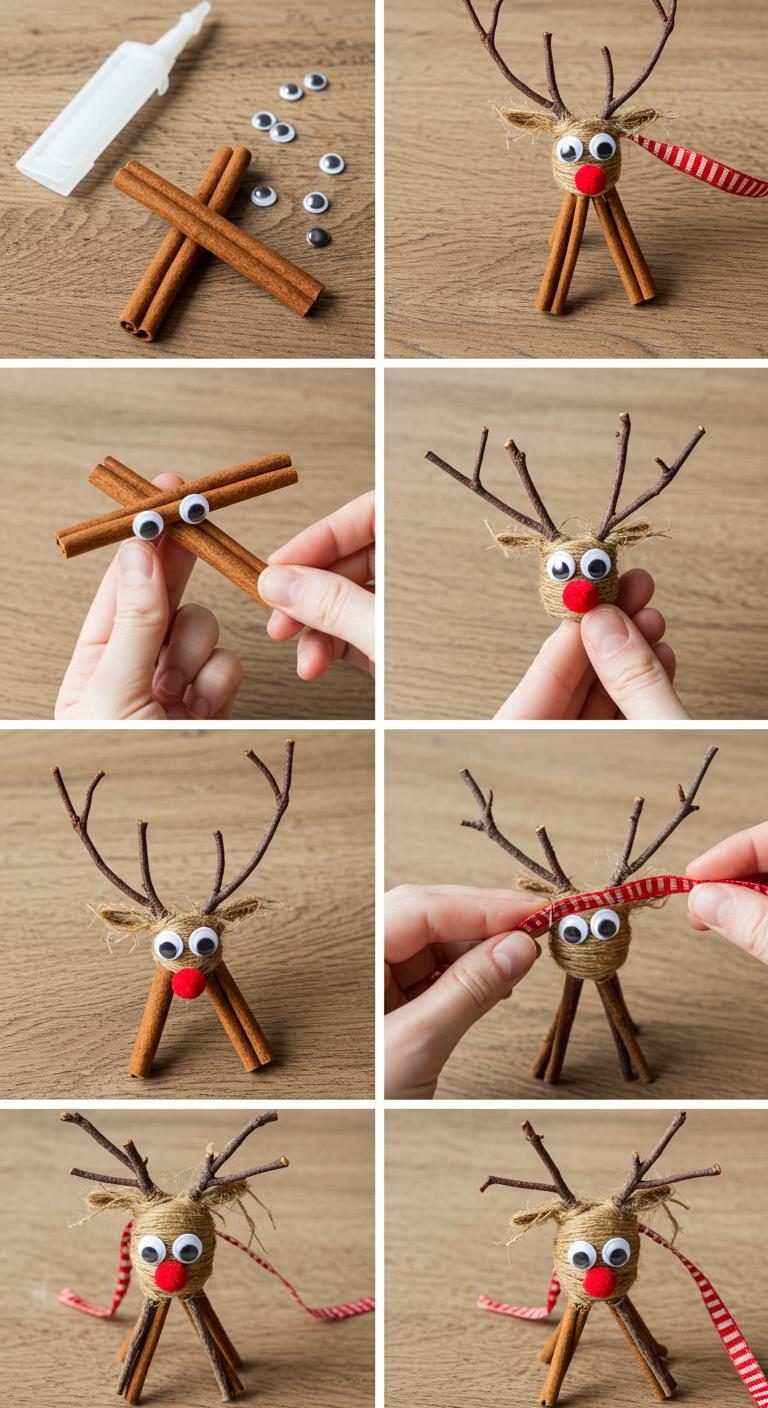
If you enjoyed stitching felt gingerbread men, you’ll love how quick and cozy cinnamon stick reindeer are to put together—no sewing required. Gather cinnamon stick crafts supplies: two sticks, googly eyes, tiny pom, twig antlers, hot glue. Step 1: glue sticks in cross. Step 2: add eyes and nose. Step 3: attach antlers and loop ribbon. Photo suggestions: close-ups of each step.
Mason Jar Lid Ornaments
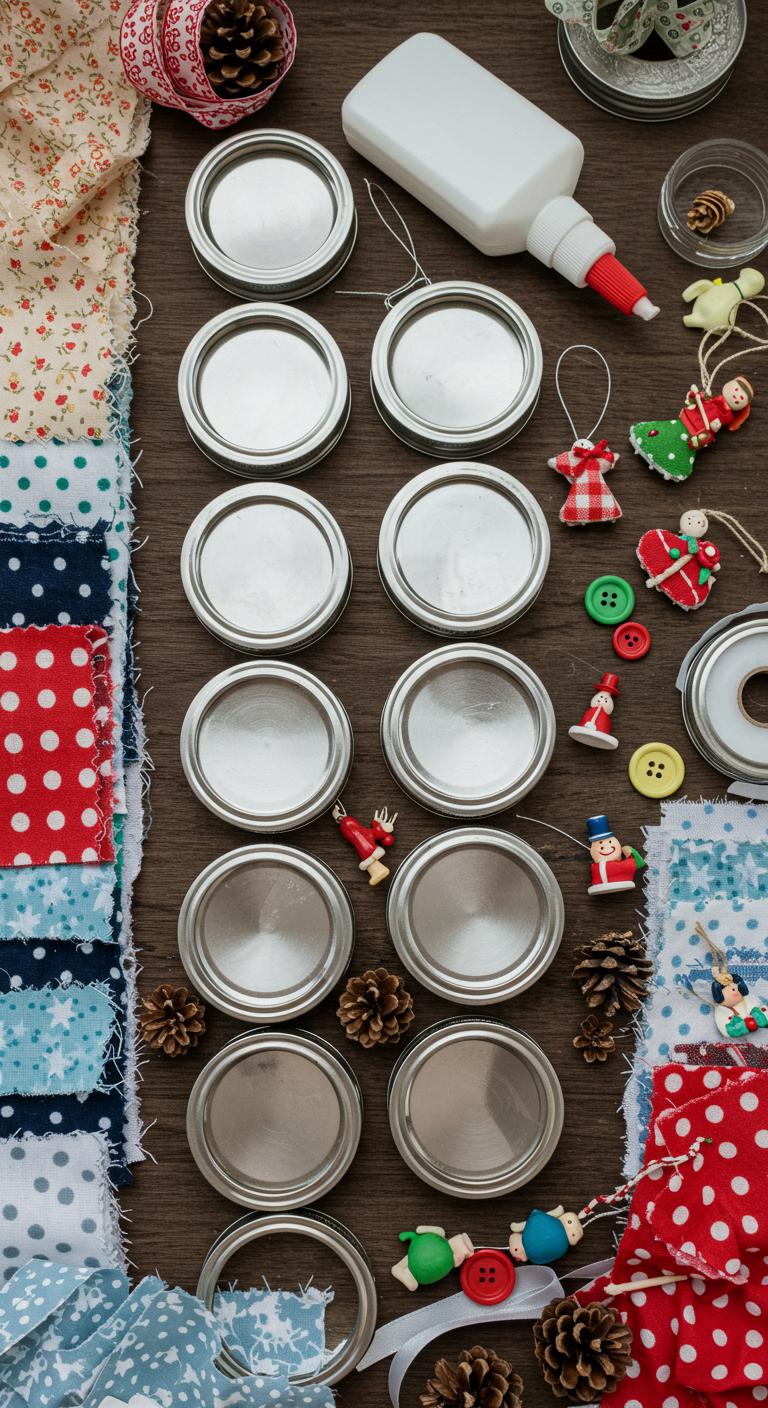
Start by gathering a few clean mason jar lids, some scrap fabric or patterned paper, a small embellishment (miniature pinecones, buttons, or a tiny figurine), glue, and ribbon—then you’ll be ready to assemble a dozen photo-ready ornaments in minutes. You’ll layer fabric, trim edges, add seasonal colors, choose lid designs, apply embellishment options, and use simple crafting tools. Personalization ideas suit festive themes, gift giving, family traditions.
Wine Cork Snowmen
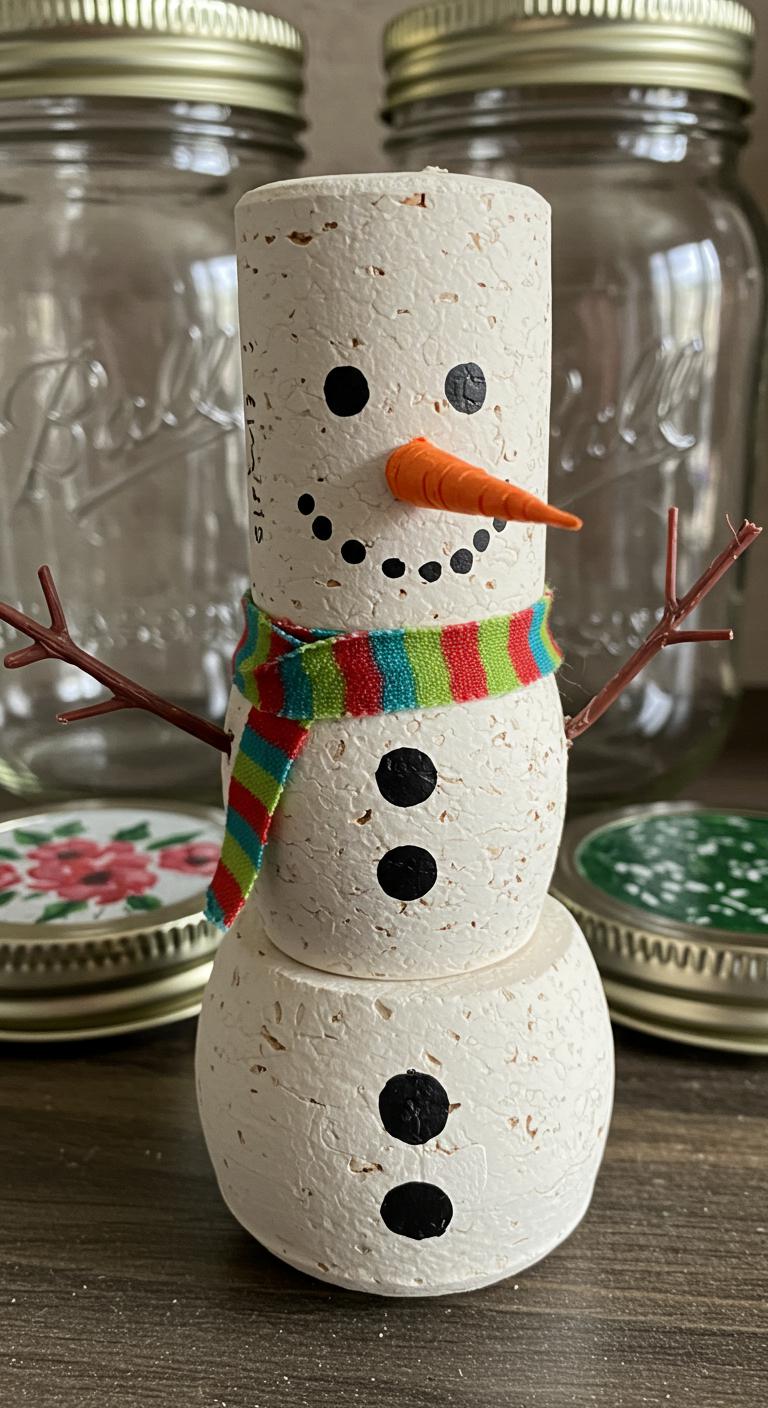
Once you’ve finished decorating those mason jar lids, shift to a smaller, charming project: wine cork snowmen you can whip up in minutes. You’ll glue stacked corks, paint white, add dots for eyes and a carrot nose, then tie a tiny scarf. Photograph each step; save images for easy reference. These wine cork crafts make quick, festive DIY gifts that celebrate playful freedom.
Popsicle Stick Miniature Sleighs
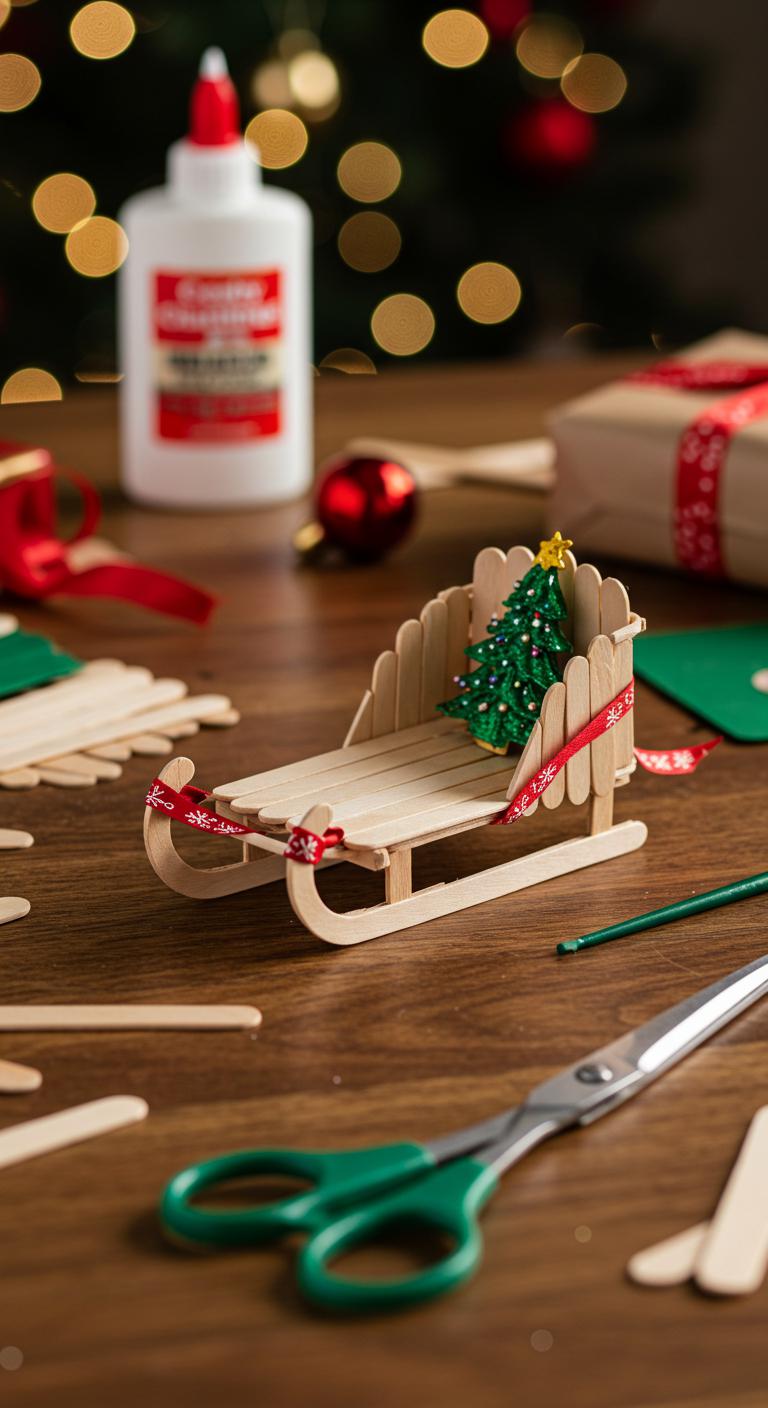
Think of a tiny, nostalgic sleigh you can build in an afternoon: popsicle stick miniature sleighs are simple, photo-friendly projects that use basic materials and glue you probably already have. You’ll cut, glue, and sand sticks, assemble runners, and paint. Follow clear steps, photograph progress, and customize with ribbon or glitter. These popsicle stick crafts make liberated, charming holiday decorations.
Beaded Snowflake Ornaments
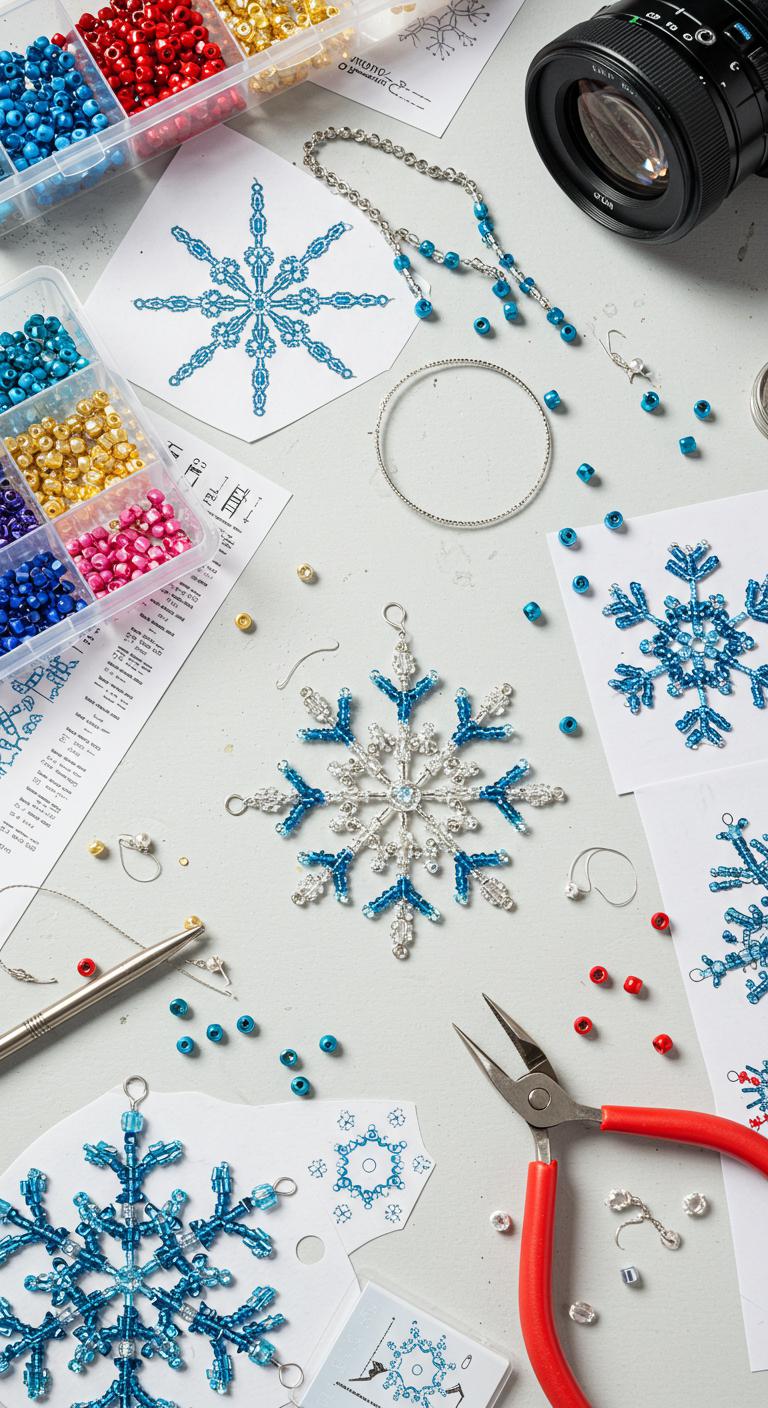
If you like sparkle and simple geometry, beaded snowflake ornaments are a perfect afternoon project you can photograph at every stage.
You’ll pick a snowflake pattern, thread beads using basic beading techniques, and shape arms on flexible wire.
Work step-by-step: center, spokes, embellish. Snap photos to track progress and share your free-spirited designs.
Finish with a loop for hanging.
Scrabble Tile Name Tags
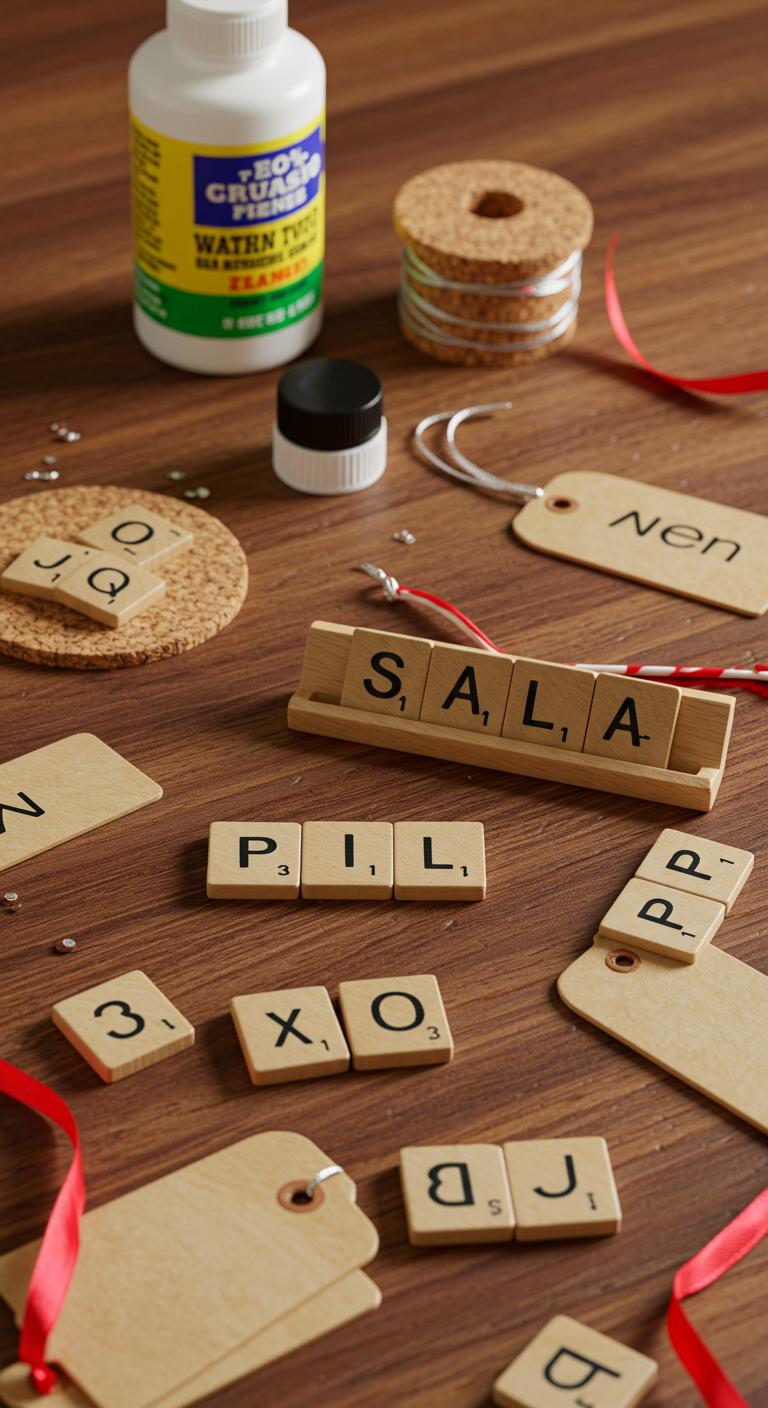
Letters make fun, personalized name tags you can whip up in an afternoon — grab vintage Scrabble tiles (or letter tiles you print), a backing like wood or cork, strong glue, and some ribbon or twine for hanging.
Choose scrabble tile ideas, spell names, glue tiles to backing, seal with varnish, punch a hole, thread ribbon. You’ll create bold, free-spirited personalized holiday tags.
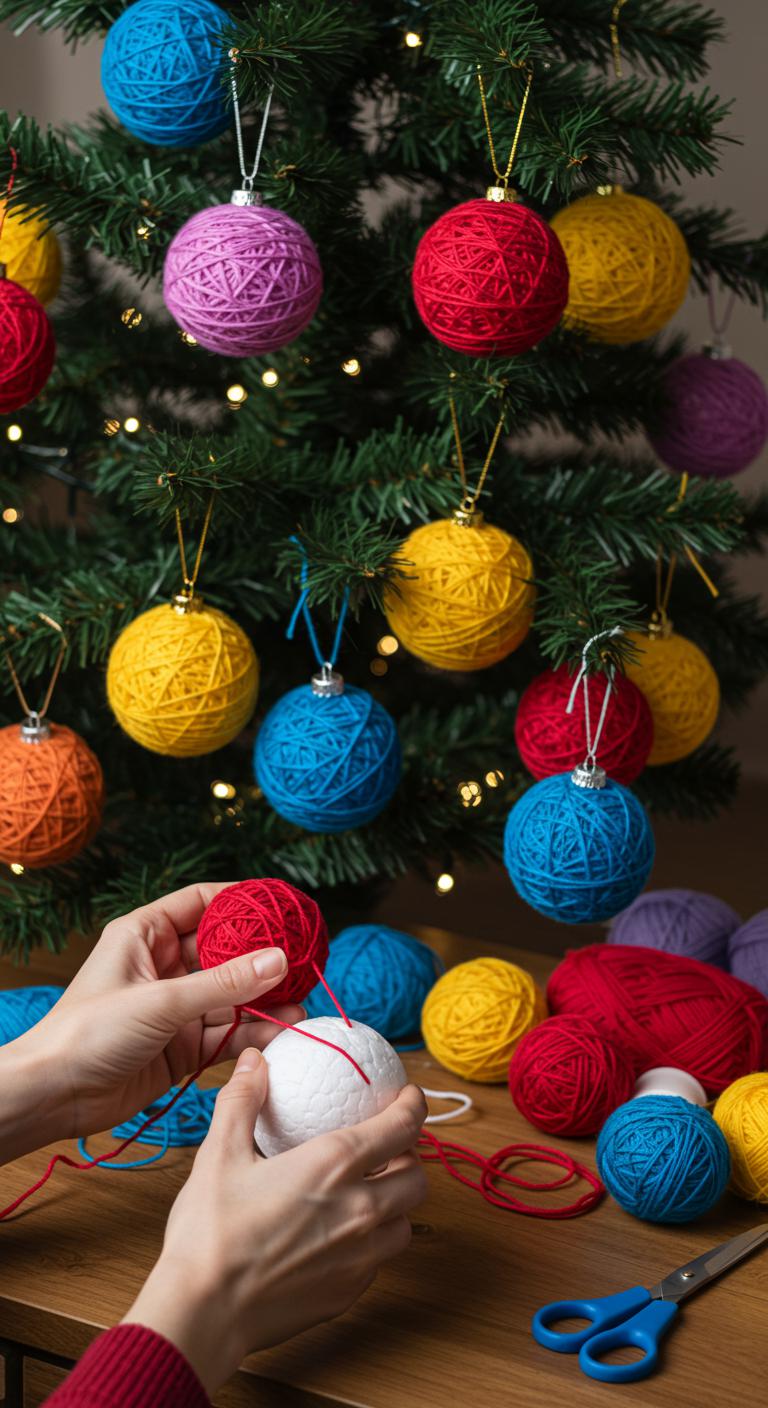
Yarn-Wrapped Baubles
Paragraphs
Button Christmas Trees

Grab a handful of colorful buttons and you’ll be surprised how quickly they turn into charming mini Christmas trees; this project is perfect when you want a photo-ready craft that’s simple and satisfying. Choose a cone base, stack buttons by size with glue, add a star bead, and tie a loop. Enjoy button tree decorations and crafting with buttons—easy, freeform, and photo-rich.
Pom-Pom Snowballs
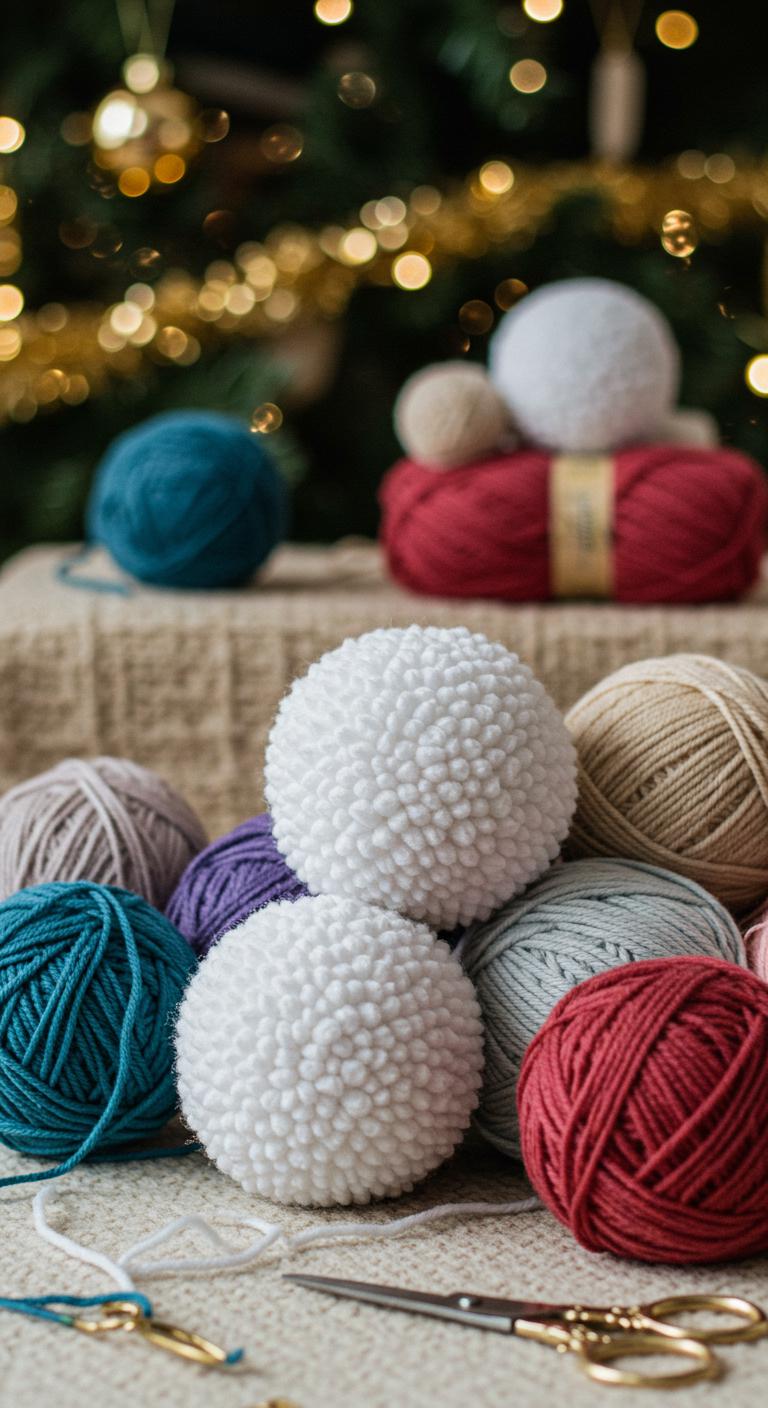
Soft, fluffy pom-pom snowballs are one of the easiest, most photo-ready ornaments you can make—perfect for beginners who want quick results.
You’ll choose yarn, wrap and knot, trim for roundness, then add a loop.
Practice simple pom pom techniques, experiment with festive colorways, and photograph each step.
You’ll finish fast, feel free to improvise, and hang them on your tree.
Fabric Scrap Stars
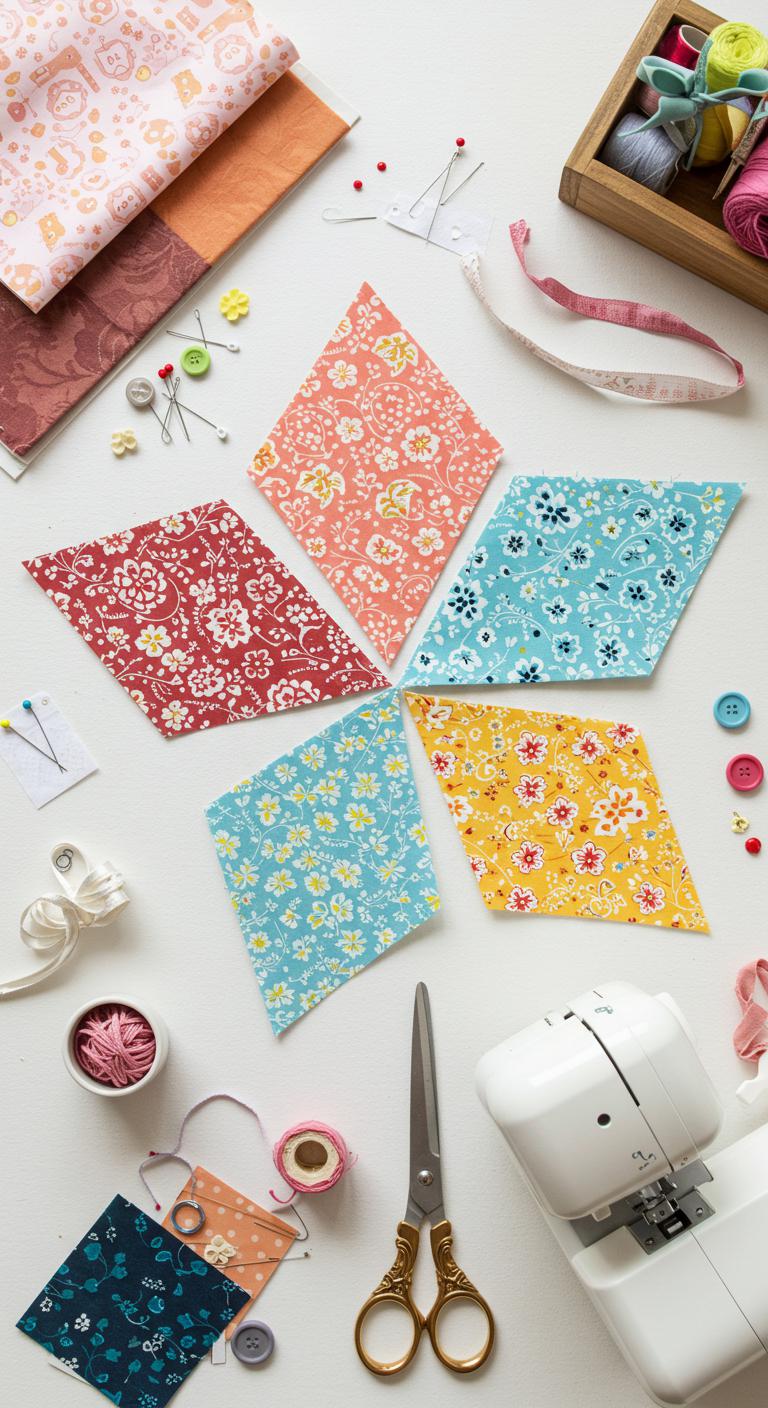
If you loved making pom-pom snowballs, switch to fabric scraps next for a different texture and a patchwork look that photographs beautifully. Cut five diamond petals from varied prints using simple fabric star patterns. Pin, sew or glue petals together, stuff lightly, then finish edges. Add fabric star embellishments—buttons, beads, or ribbon loops. Photograph each step and let your style roam free.
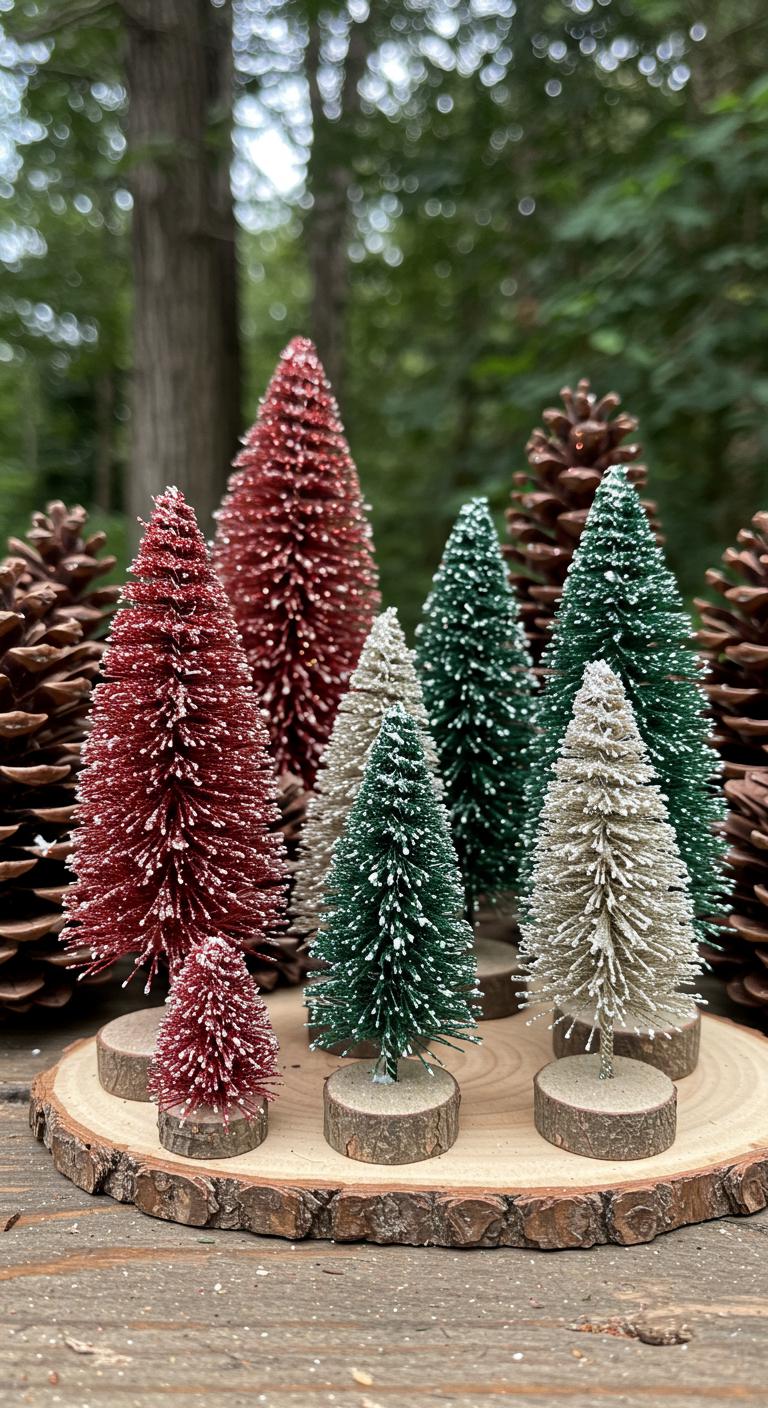
Bottlebrush Tree Ornaments
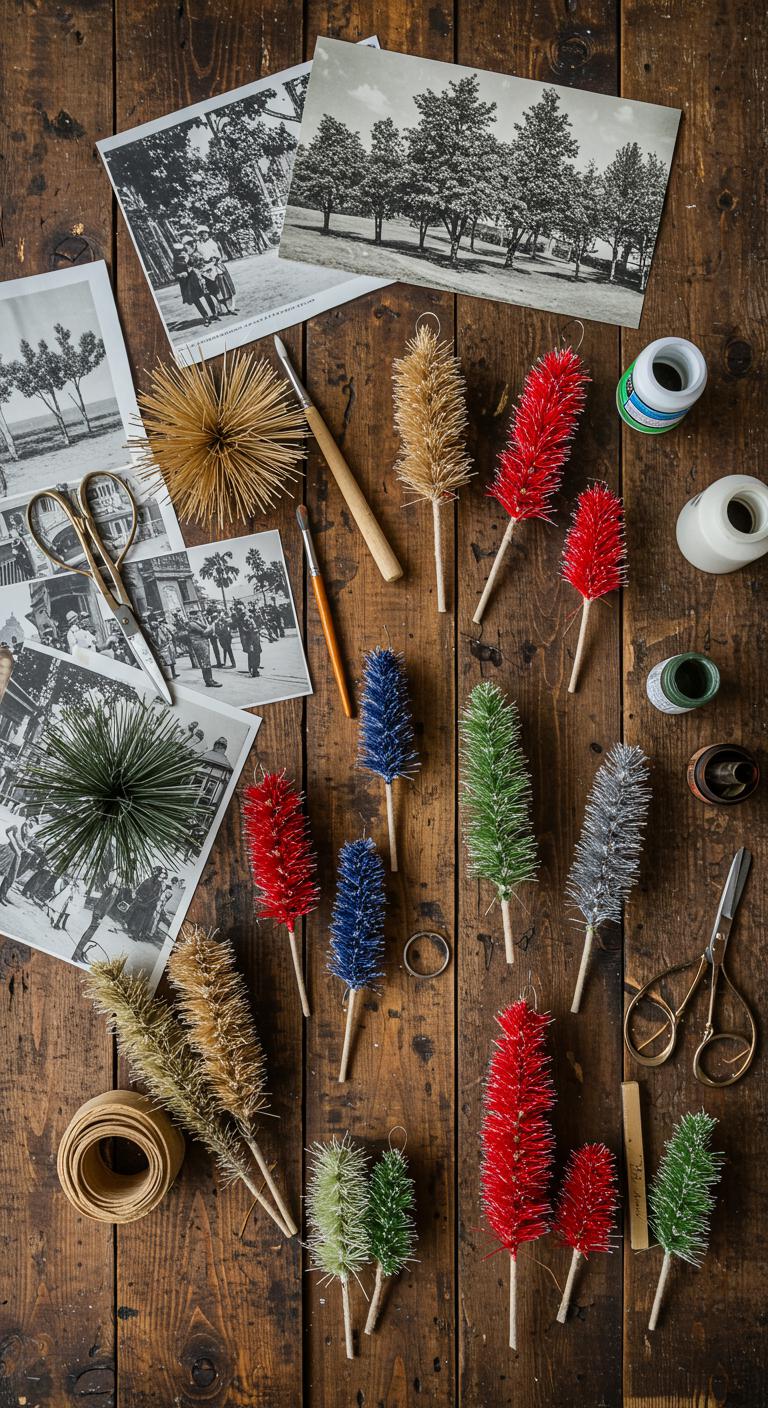
A bottlebrush tree is a tiny, textured ornament that’s quick to make and looks great in photos—perfect for adding vintage charm to your tree or gift tags.
You’ll learn simple steps: trim a wooden dowel, wrap and glue bristles, paint and flock. Capture each stage with photos, note bottlebrush tree history, and riff on vintage bottlebrush designs so you can customize freely.
Clay Handprint Keepsakes
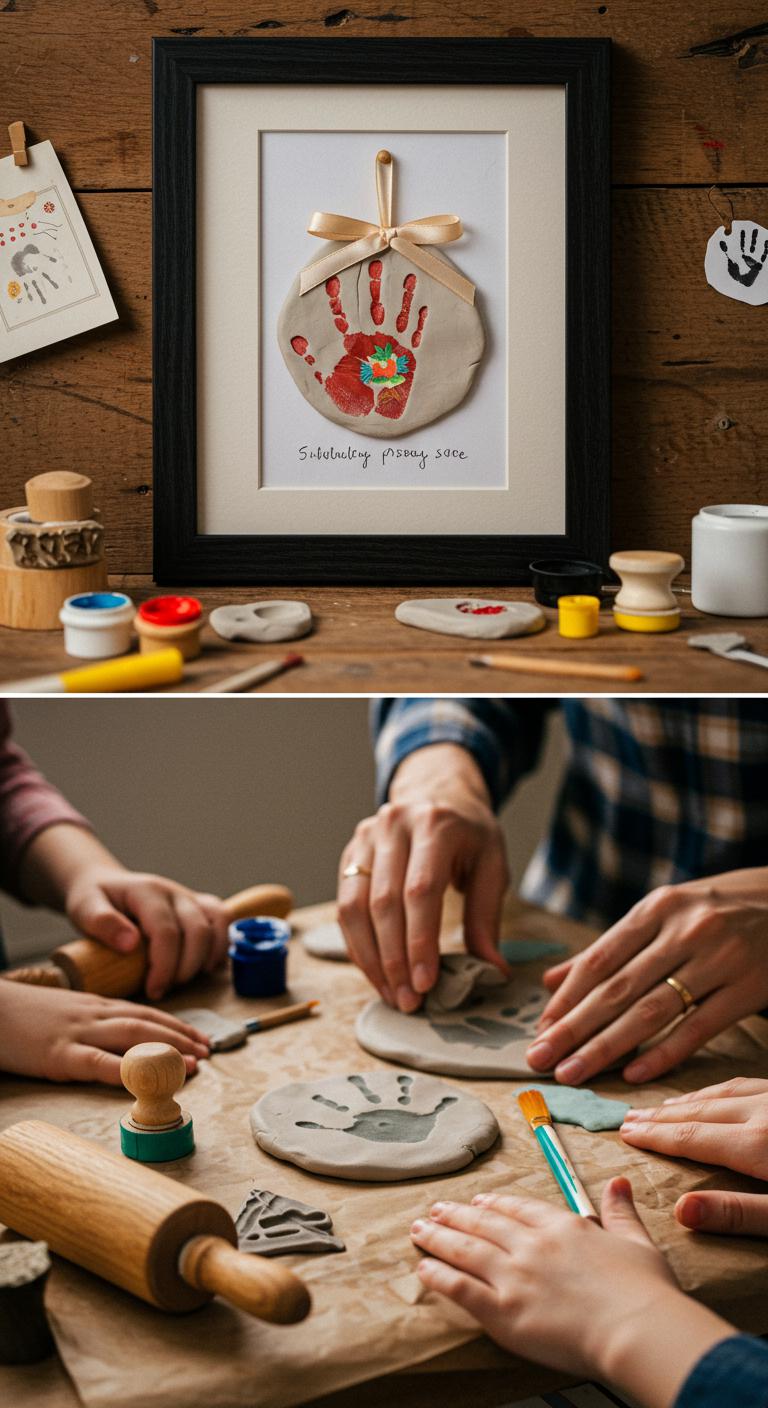
Clay handprint keepsakes freeze a tiny moment in time so you can hold a memory for years—perfect for baby’s first Christmas, a toddler’s art project, or a thoughtful gift for grandparents.
You’ll roll, press, trim, and stamp with simple handprint techniques. Photograph each step, let pieces cure during clay drying, sand edges, paint, and add a ribbon for free-spirited, frameable ornaments.
Coffee Filter Angels
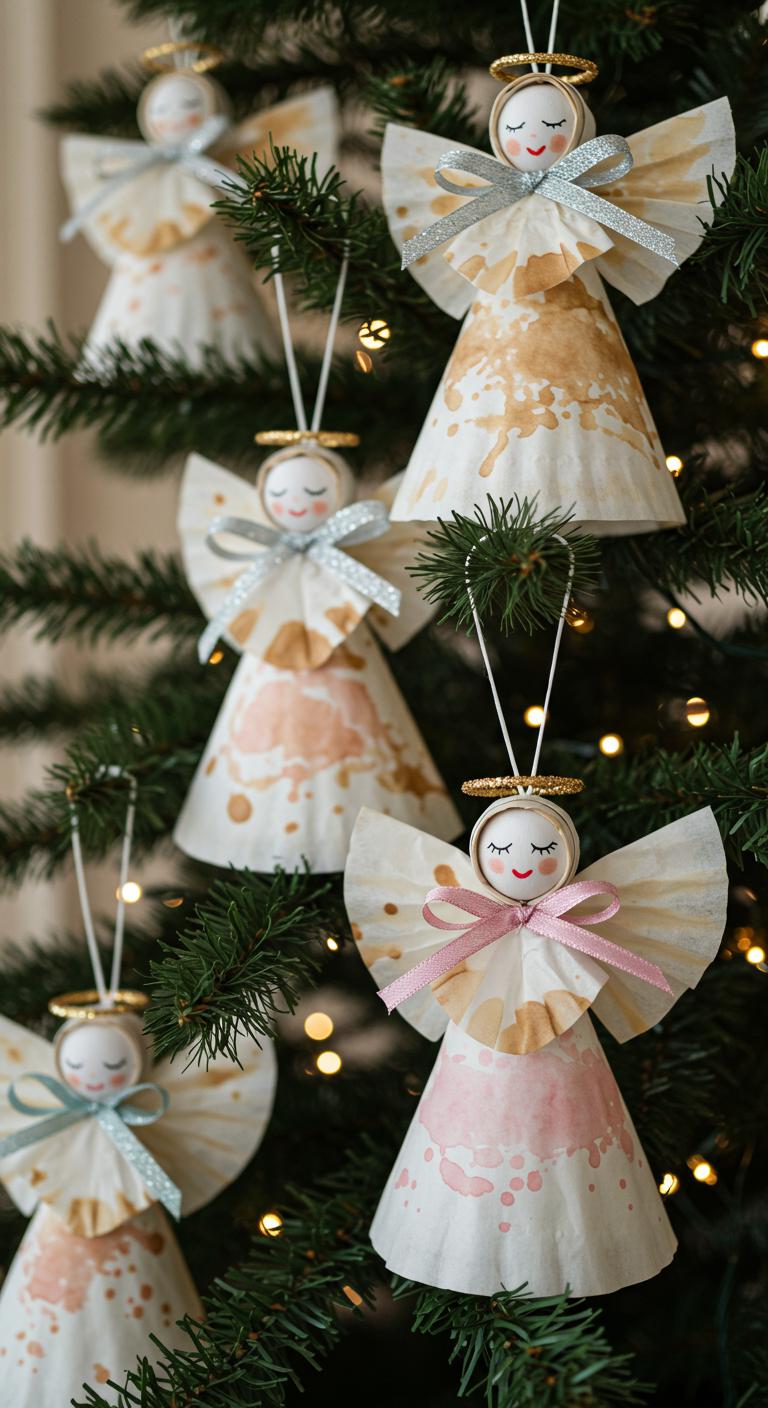
You can move from pressed handprints to lightweight, paper-y ornaments by making coffee filter angels that come together quickly and look lovely on a tree or garland. You’ll layer filters, pinch a head, and secure with twine. Follow simple angel decoration techniques: add a drawn face, ribbon halo, and a spray of watercolor. These coffee filter crafts free your style and photograph beautifully.
Glittered Pinecone Trees
Make small, glittered pinecone trees by first choosing a few similarly sized pinecones, brushing on a thin layer of glue, and rolling them in glitter so they sparkle from tip to base. Next, trim stems, hot-glue a wooden dowel into a base, and add layered glitter techniques. Photograph different pinecone varieties, arrange like a mini forest, and display freely.
Paper Quilling Ornaments
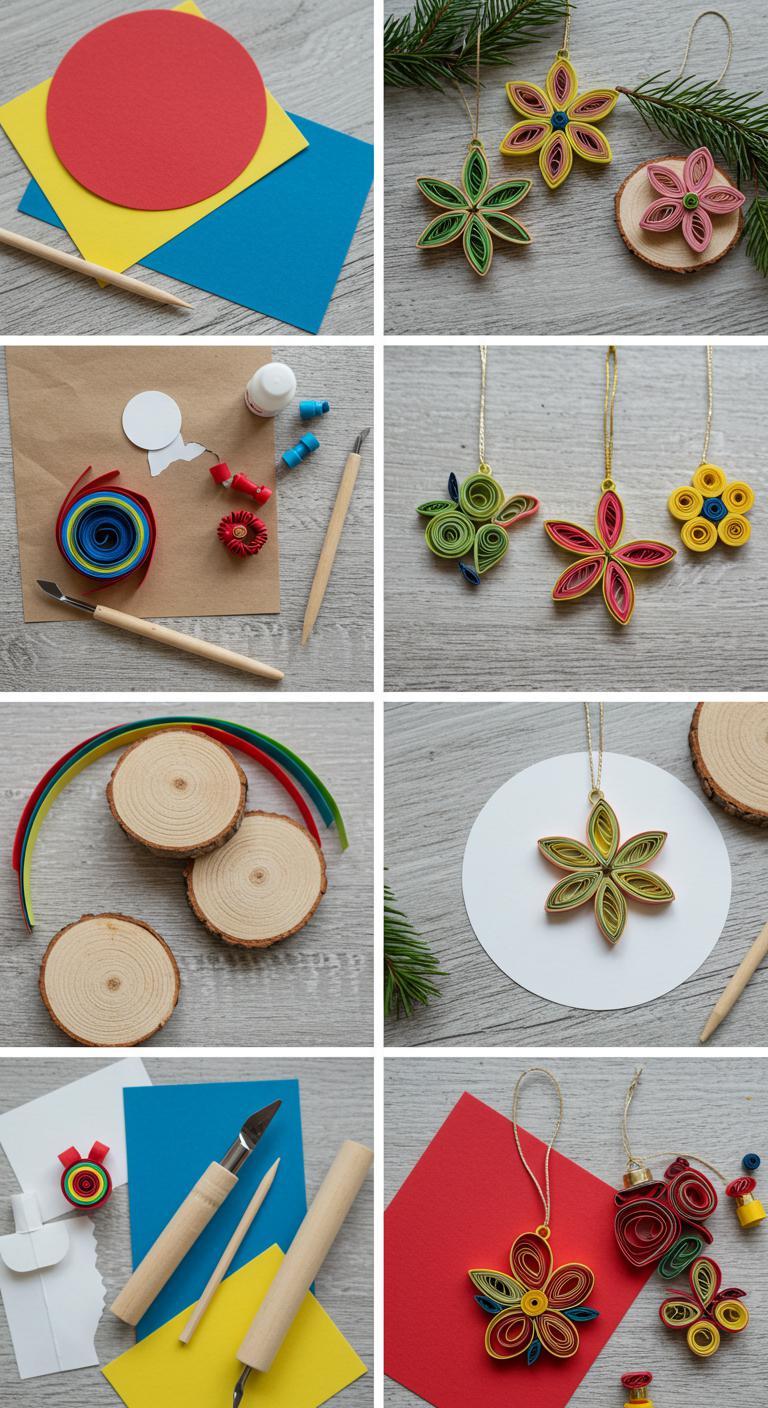
Anyone can get started with paper quilling ornaments using just a few simple tools: quilling strips, a slotted tool or toothpick, glue, and a backing shape like cardstock or wooden discs.
You’ll learn basic quilling techniques step-by-step: roll coils, shape petals, glue onto backing, and assemble festive patterns.
Photograph each stage, experiment freely, and hang your unique, lightweight creations to celebrate your creativity.
Upcycled CD Snowflakes
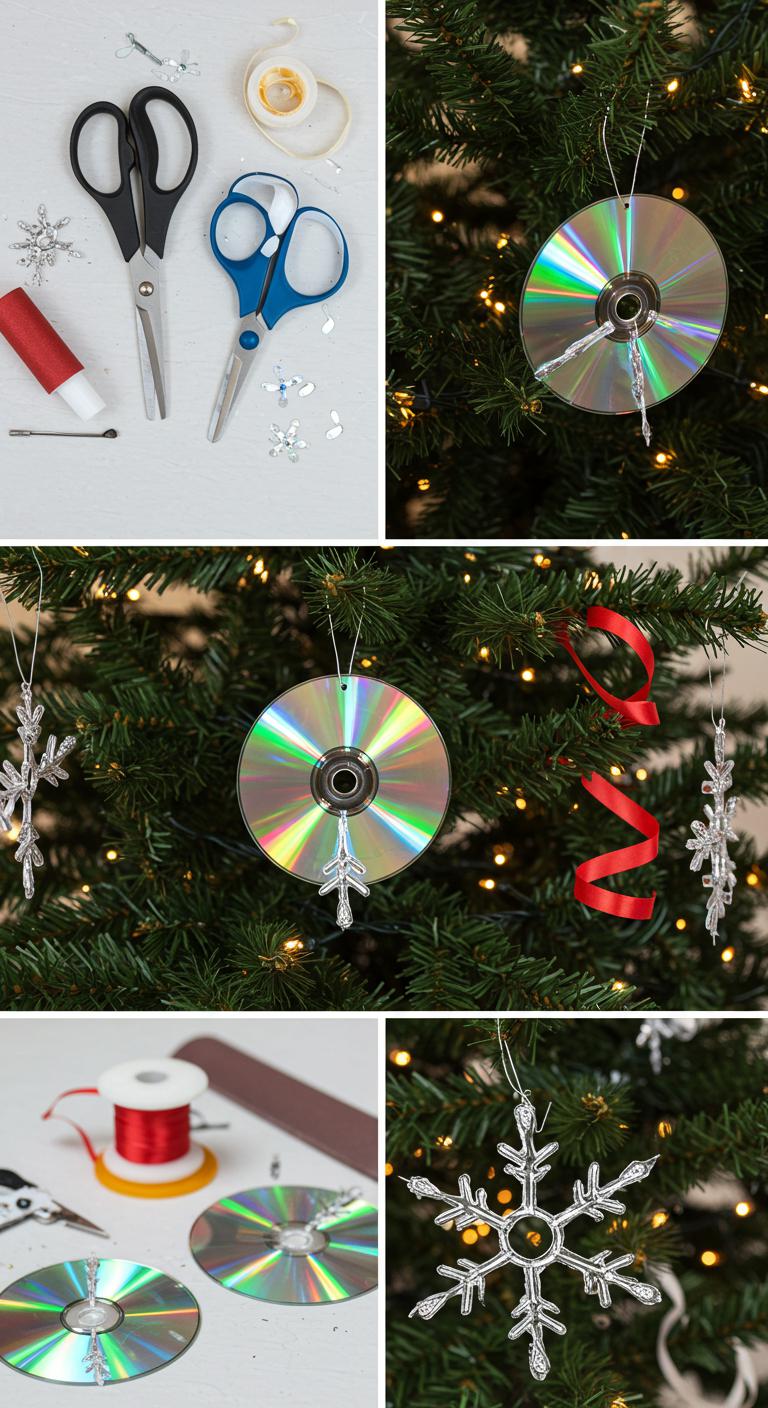
When a scratched CD meets a few simple tools, it turns into a shimmering snowflake you’ll be proud to hang on the tree.
You’ll cut patterns, sand edges, and glue mirrored layers step-by-step, snapping photos as you go.
These upcycled CD crafts are fast, freeing, and perfect holiday recycling ideas.
Hang with ribbon or wire and watch light dance on each piece.
Wooden Bead Garland Ornaments
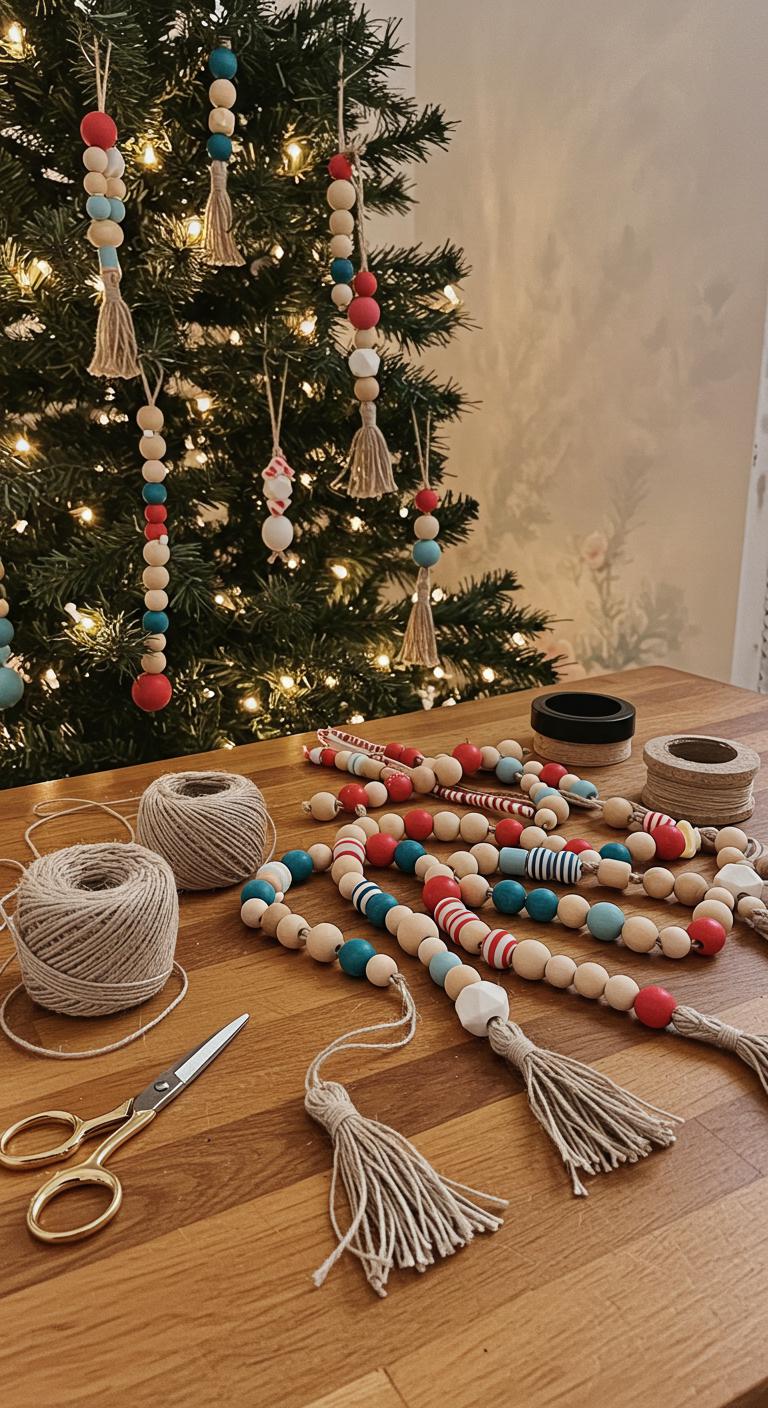
If you loved turning old CDs into shimmering snowflakes, you’ll enjoy the tactile, cozy charm of wooden bead garland ornaments next.
You’ll pick wooden bead colors, cut twine, and follow simple stringing techniques. Thread beads in patterns, knot ends, and add tassels or hooks.
Photograph each step for a photo-rich guide, then hang freely—your tree reflects your bold, handmade style.